01 Overview概述
Two experiments at once两个实验同步进行
The phone case mold was done, so naturally the next step was to use it more. This session had two goals running in parallel: get better at color mixing and reduce the bubble problem from round 1; and start fresh with a new object — a small ESP32 component container — to practice dimensional accuracy and try a proper vent and sprue system.
手机壳模具已经完成,顺理成章的下一步就是多加利用。这一阶段有两个并行目标:提升色彩混合技术, 解决第一轮遗留的气泡问题;同时以一个新的物体为起点——一个小型ESP32零件收纳盒——练习尺寸精度, 并尝试正式的通气孔与浇口设计。
Also the first time using polyurethane resin. It turned out to be a completely different experience from epoxy.
这也是第一次使用聚氨酯树脂。它和环氧树脂的体验截然不同。
Materials Used使用材料
02 Process制作过程
Step by step制作步骤
Part A第 A 部分
Phone Case Casting — Iterations手机壳浇铸——迭代
The phone case mold from Week 1 was done. This part focuses entirely on resin technique — experimenting with color mixing, diagnosing a stubborn bubble problem, and finally solving it by changing how I close the mold.
第一周的手机壳模具已经完成。这部分完全专注于树脂技术——尝试色彩混合,诊断顽固的气泡问题,最终通过改变合模方式解决了它。
Round 2 — Double color attempt第二轮——双色尝试
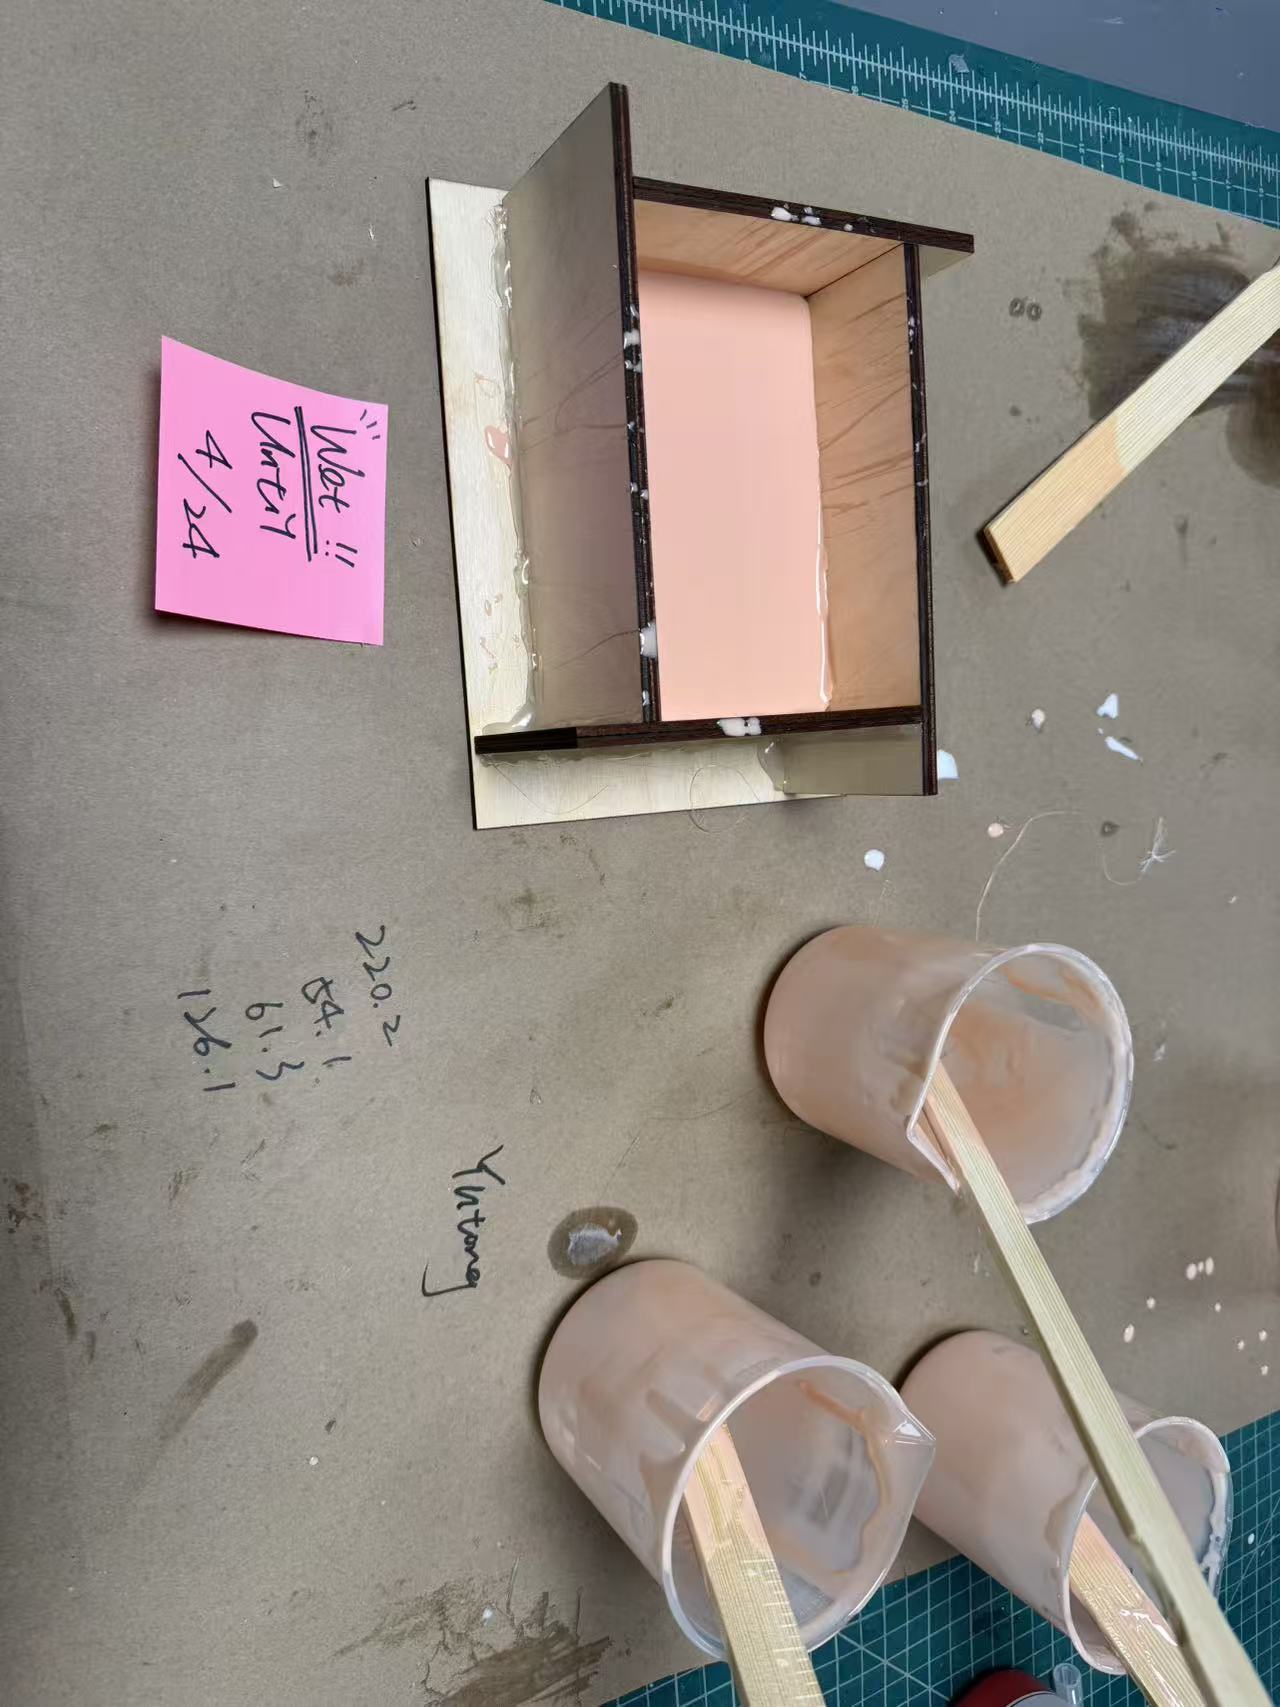
Before the pour. Round 1 left the bottom too thick. Kevin's advice for Round 2: squeeze the mold halves together hard enough to let excess resin overflow — that's how you get consistent wall thickness. I also wanted to try a two-color swirl this time: white and gold glitter on one side, pink and red (with a touch of white glitter for the transition) on the other.
倒入前。 第一轮底部太厚。Kevin对第二轮的建议:用足够大的力将两半模具合在一起,让多余的树脂从边缘溢出——这样才能获得均匀的壁厚。这次我还想尝试双色渐变:一侧白色加金色亮粉,另一侧粉色加红色(加少量白色亮粉过渡)。
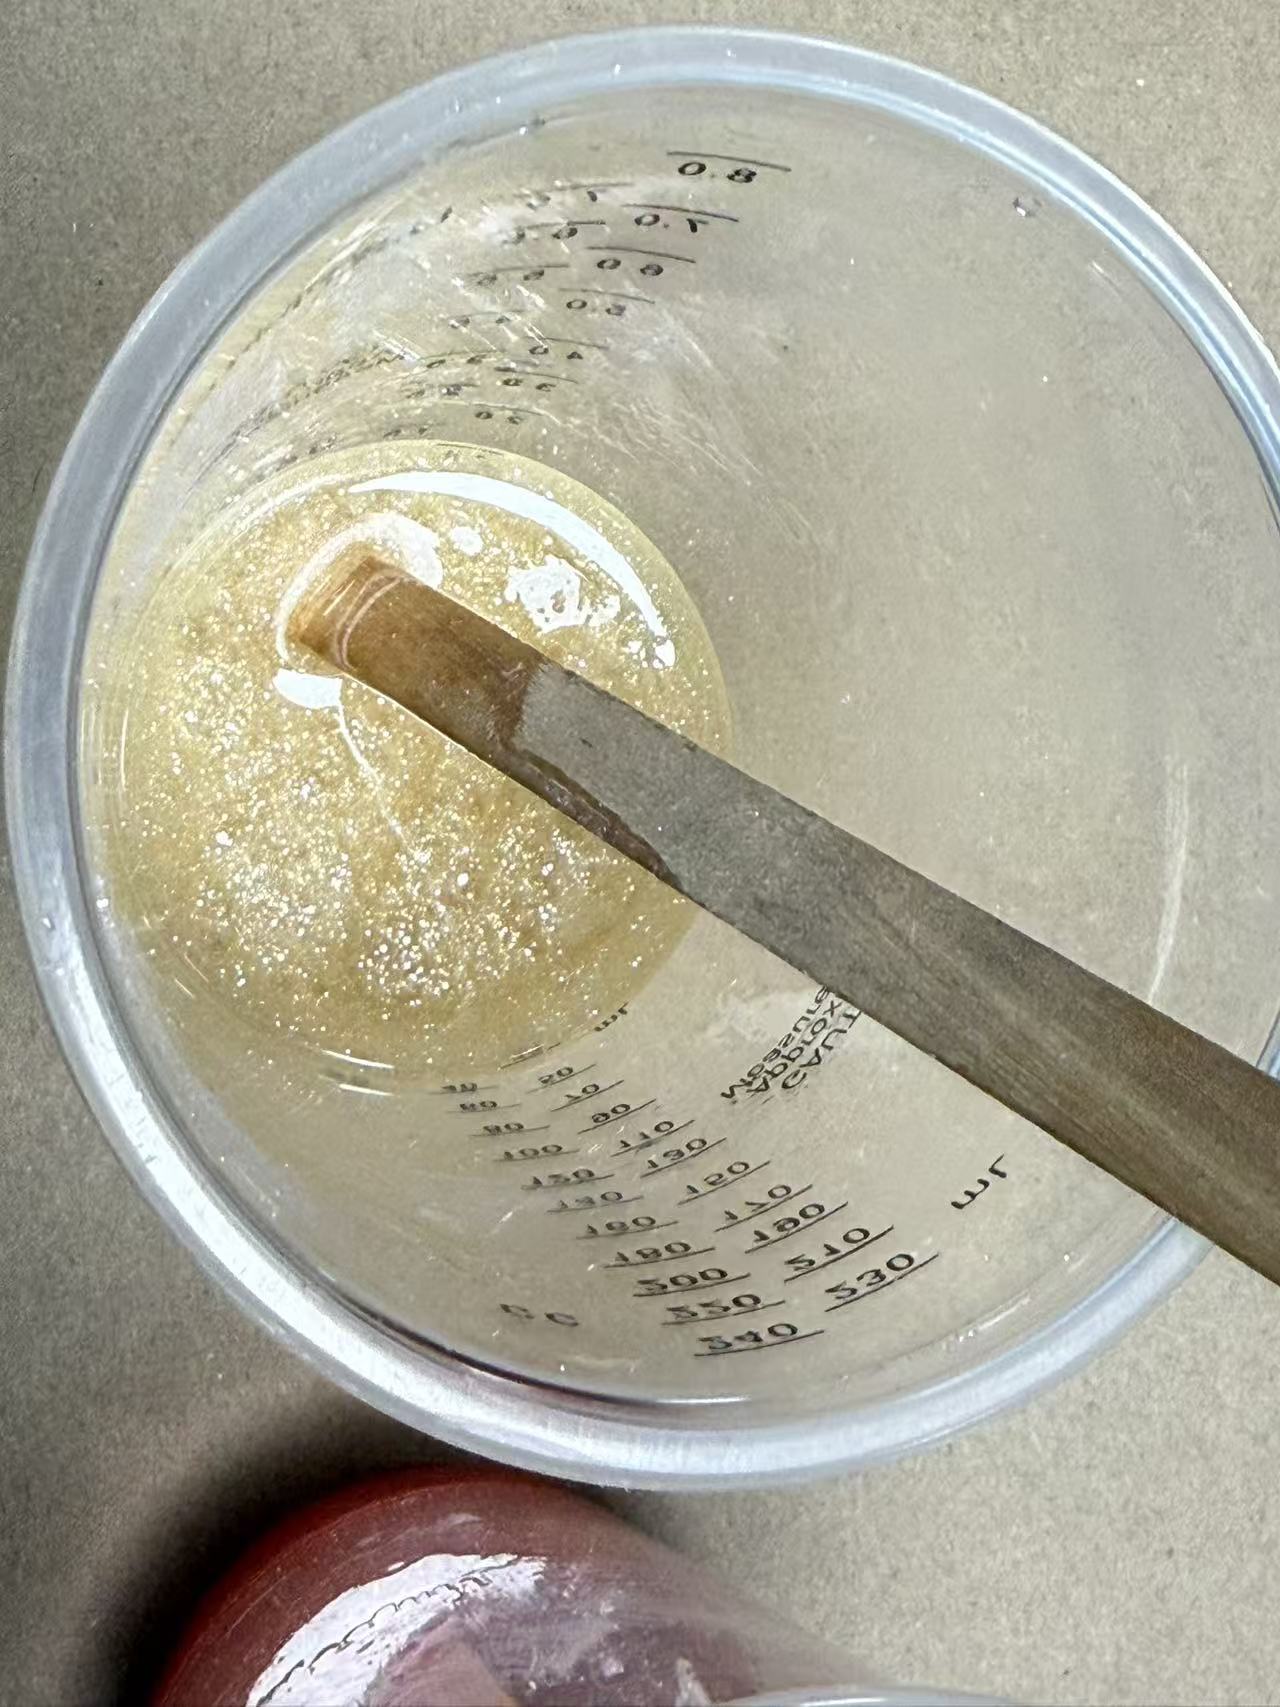
The pour. 2 oz total (1 oz per color) to avoid the previous overflow. After pouring, I pressed the halves together firmly, let excess resin spill out, and placed a clay weight on top to hold steady pressure during the cure.
倒入。 共2盎司(每色1盎司),避免上次的溢出问题。倒入后,我用力将两半合拢,让多余树脂溢出,然后在顶部放一块黏土作为配重,在固化期间保持持续压力。
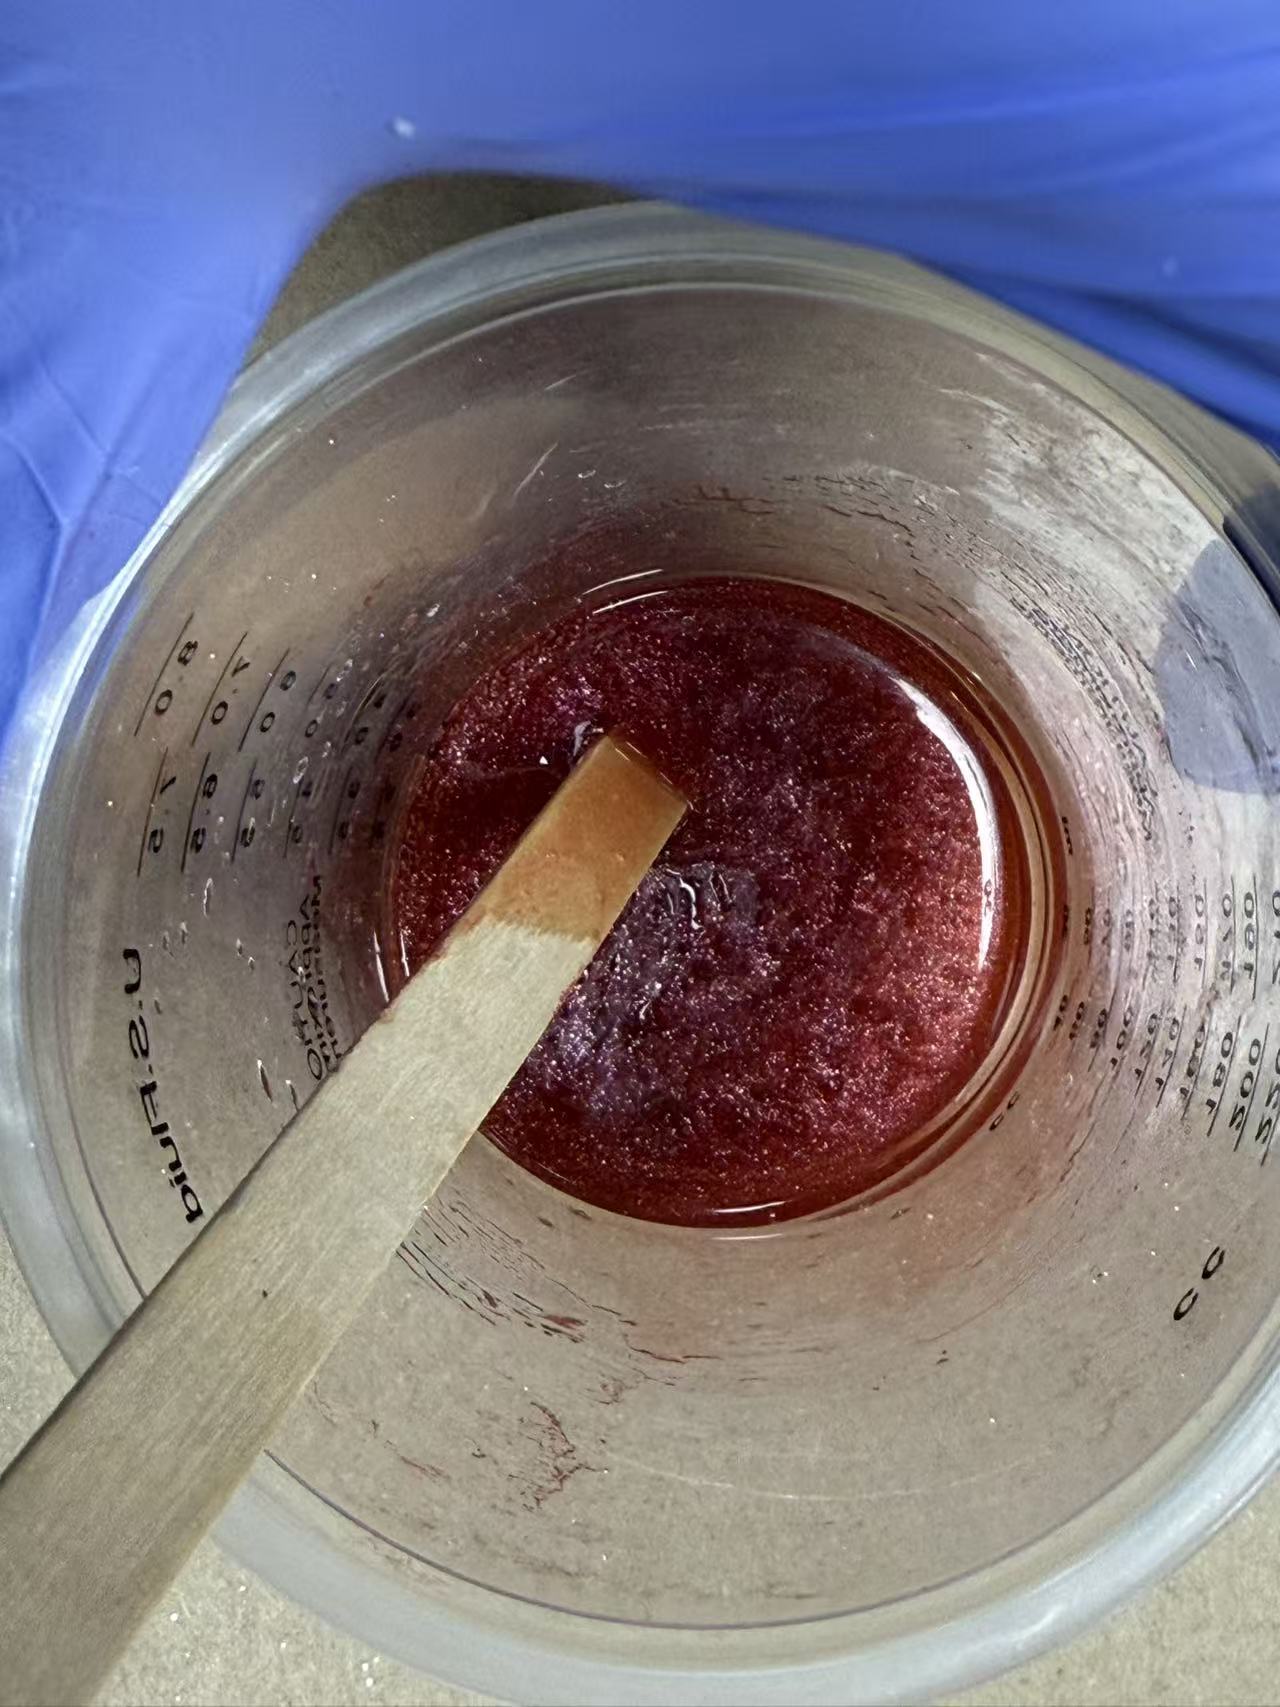
The result. Thickness: much better. Color blend: beautiful. Bubbles: still a lot. After seeing the result, Kevin pointed out I had been pressing the mold closed straight down — which traps air in the middle instead of pushing it out. The top mold half also being a bit thin might not have helped. The bubble problem wasn't solved yet.
结果。 壁厚:好多了。色彩混合:很漂亮。气泡:还是很多。看到结果后,Kevin指出我一直在垂直向下合模——这会把空气困在中间,而不是把它推出去。顶半模稍薄这一点可能也没有帮助。气泡问题尚未解决。
Silver lining: it looks a lot like yuzu soda. But I kept going.
好在:它看起来很像柚子苏打水。但我继续做了下去。
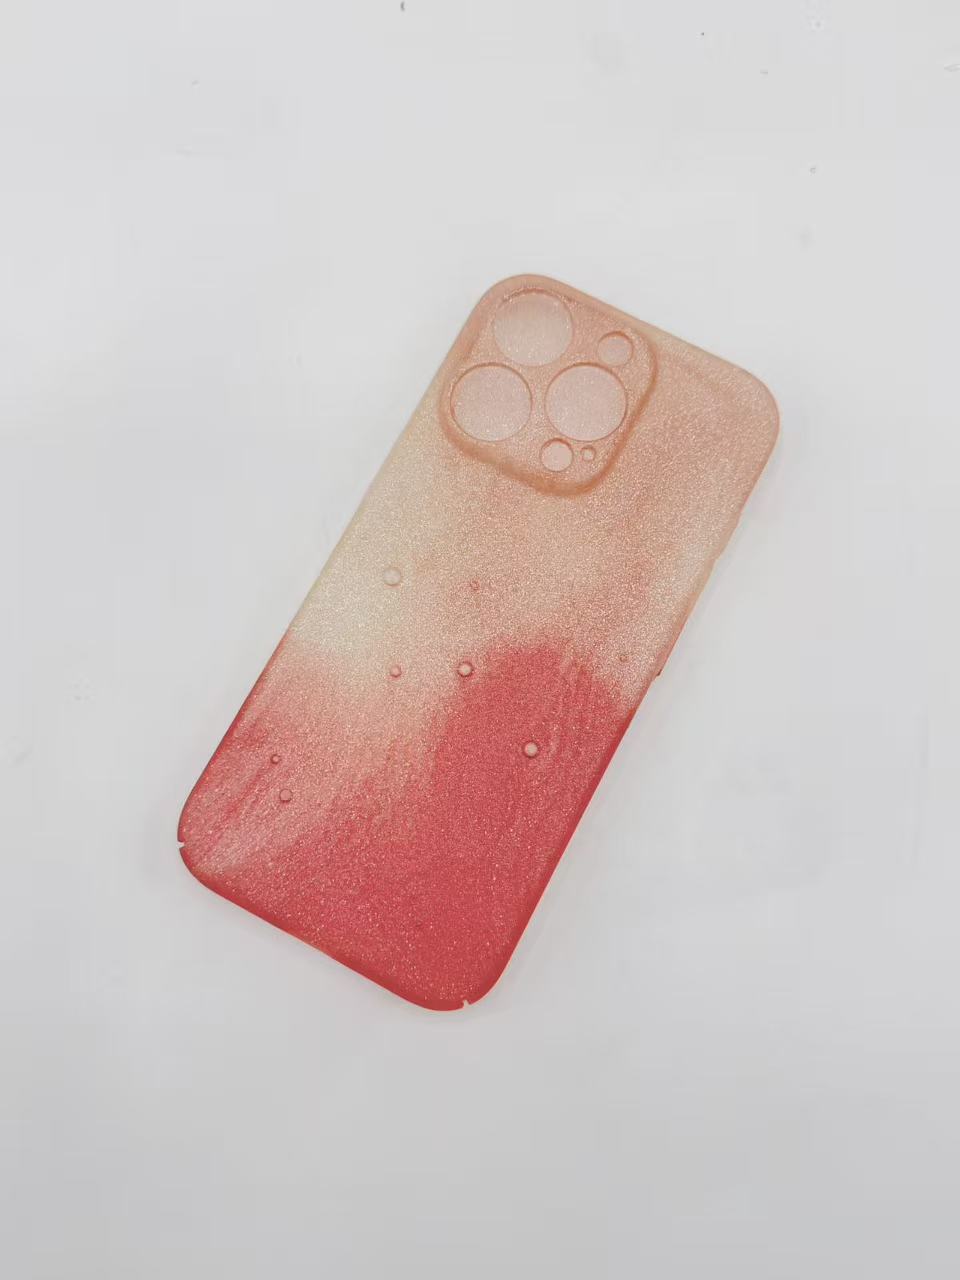
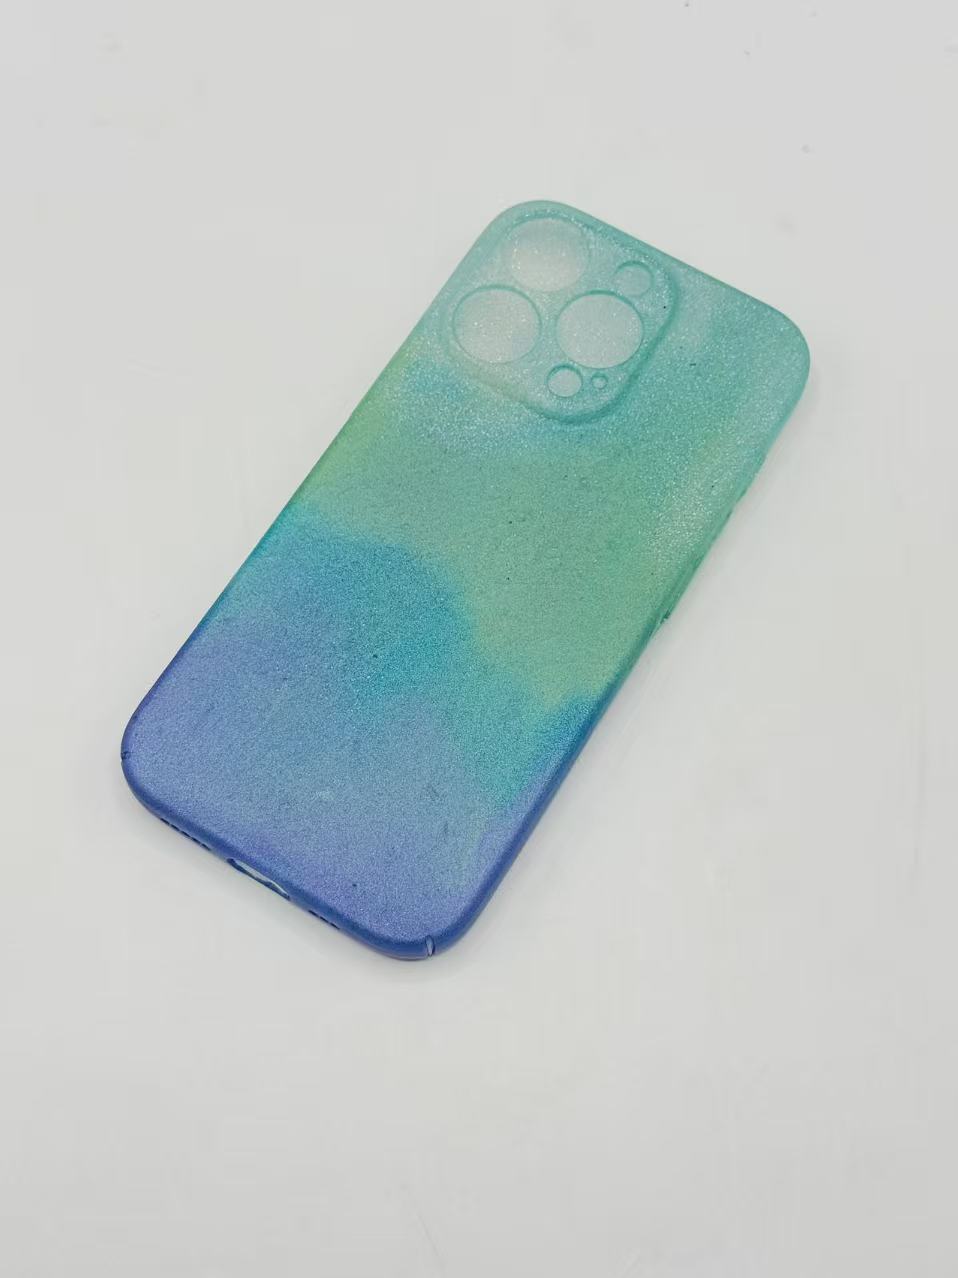
Round 3 — Four color aurora第三轮——四色极光
The fix. This time I closed the mold starting from one edge, rolling it gradually shut — pushing air out ahead of the resin instead of trapping it in the middle. Almost no bubbles.
改进。 这次从一侧边缘开始,逐渐向前滚合——把空气推到树脂前方排出,而不是困在中间。几乎没有气泡。
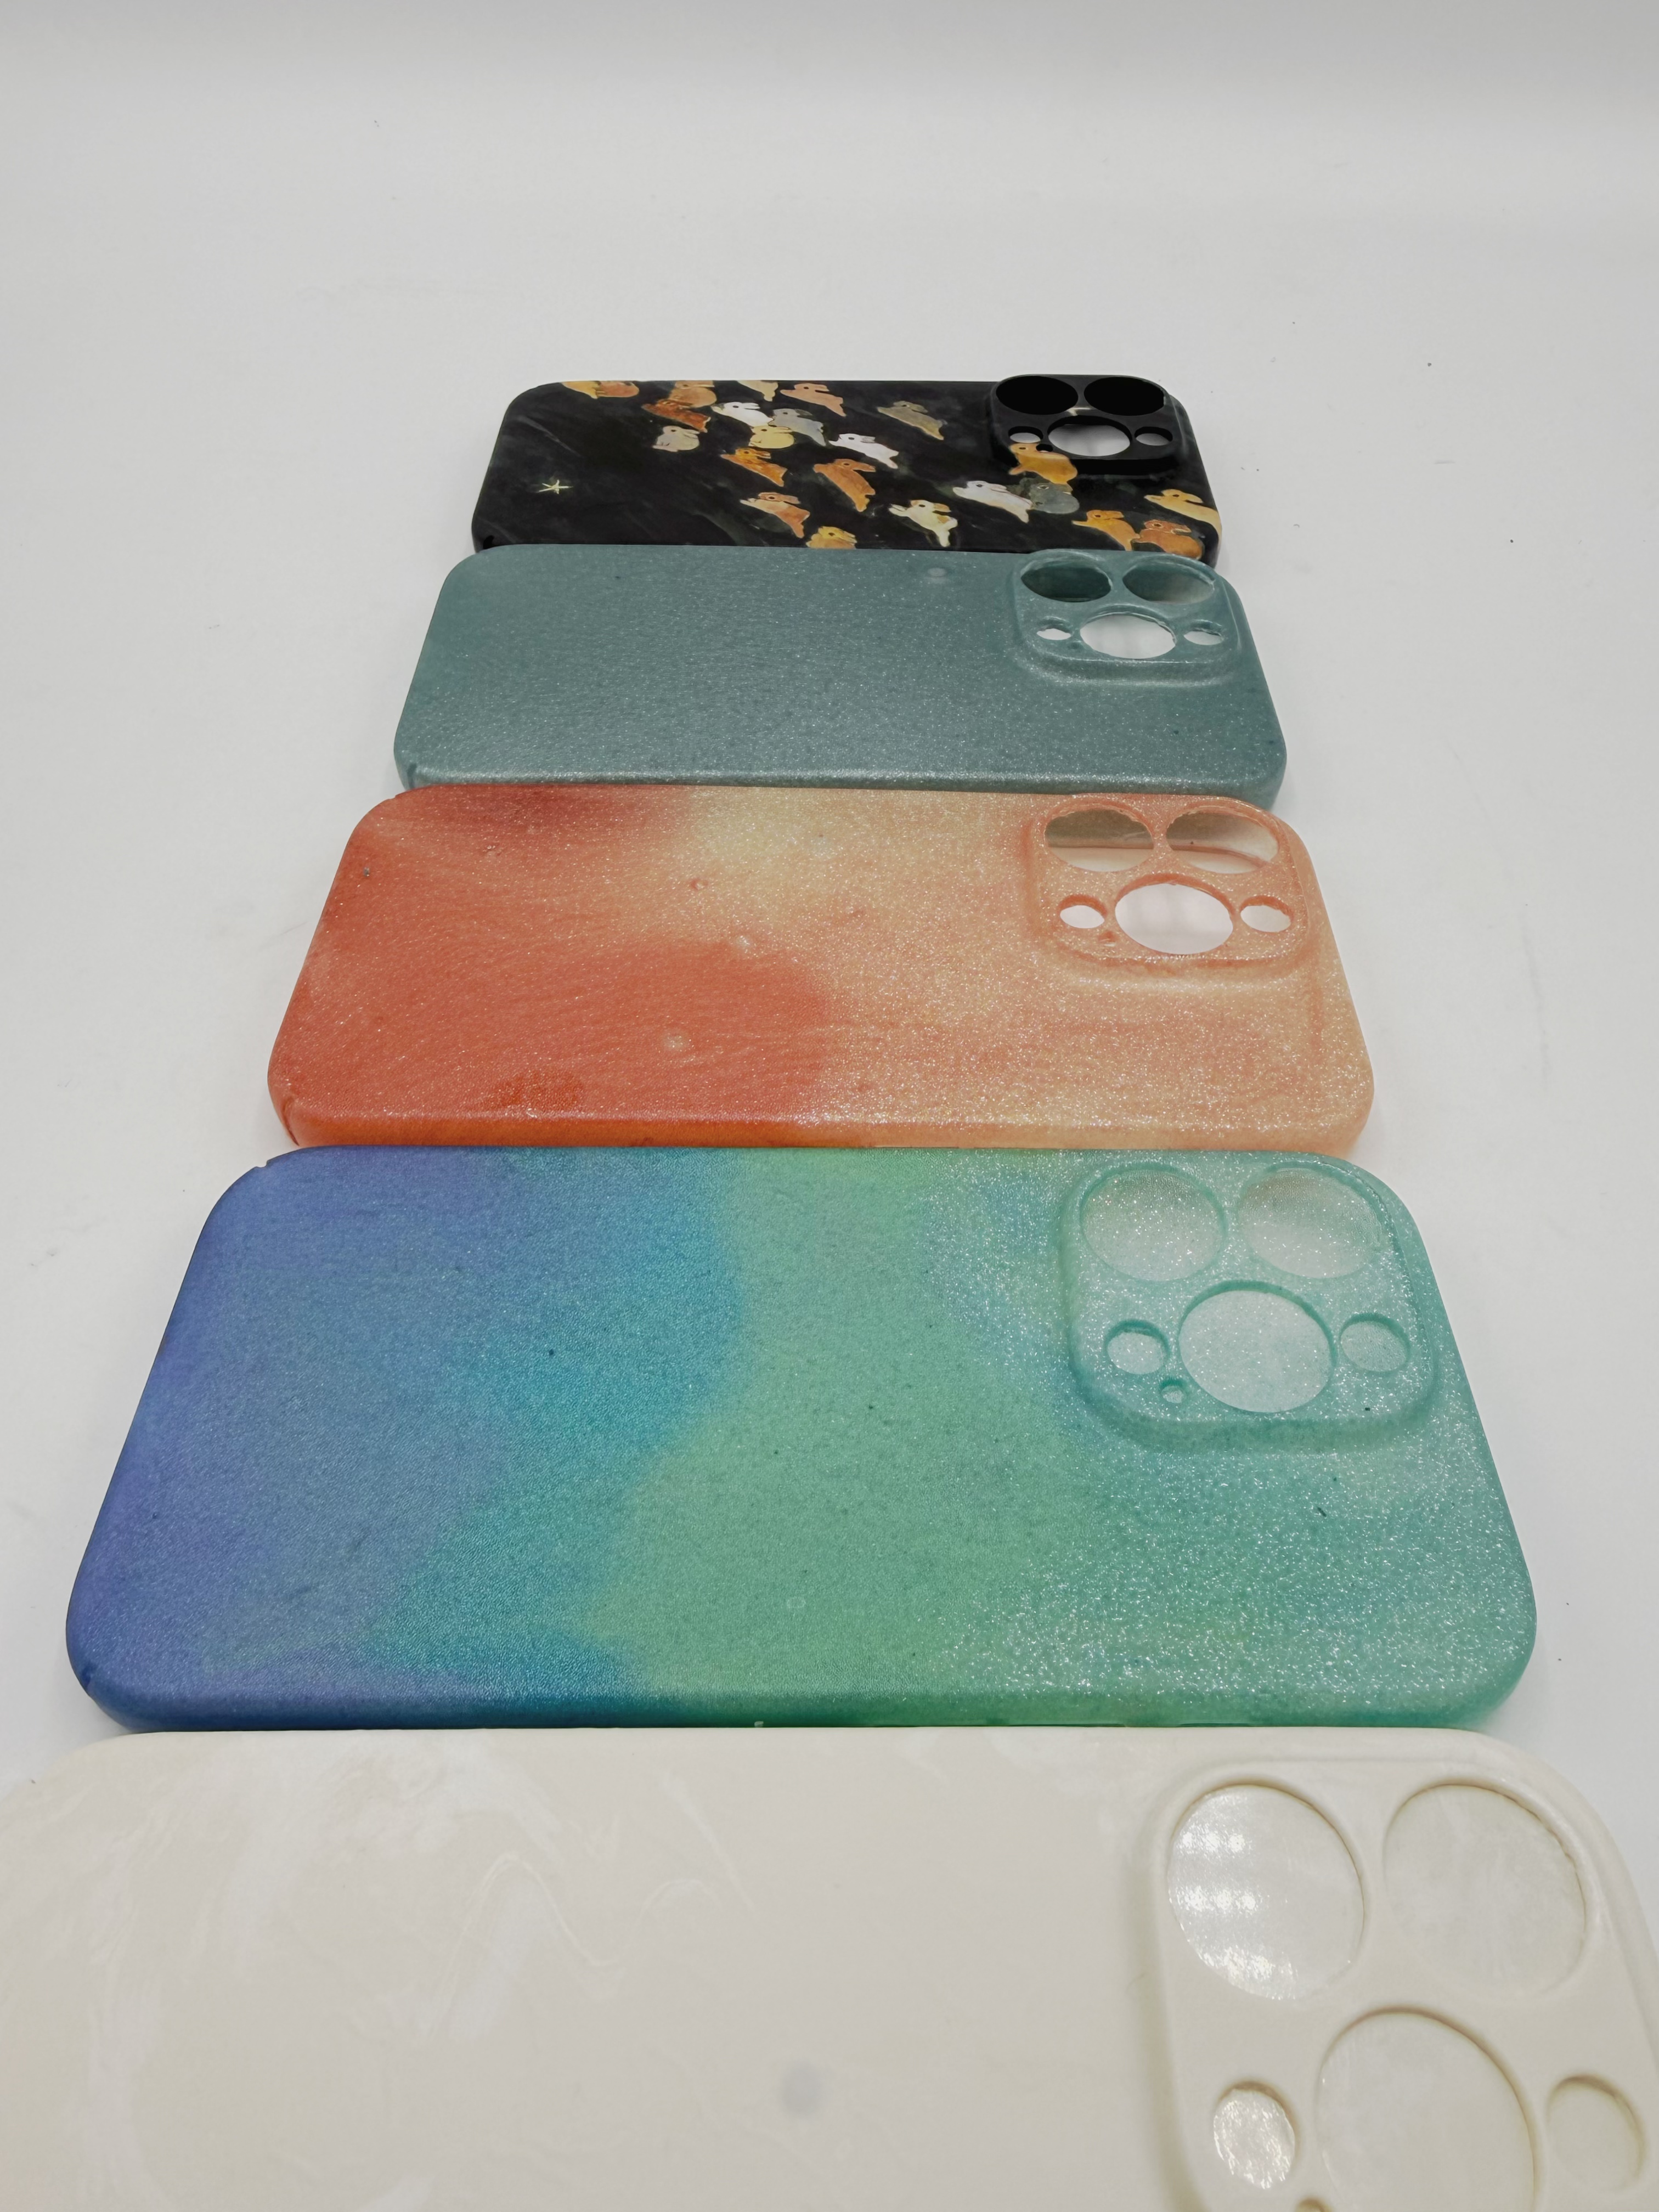
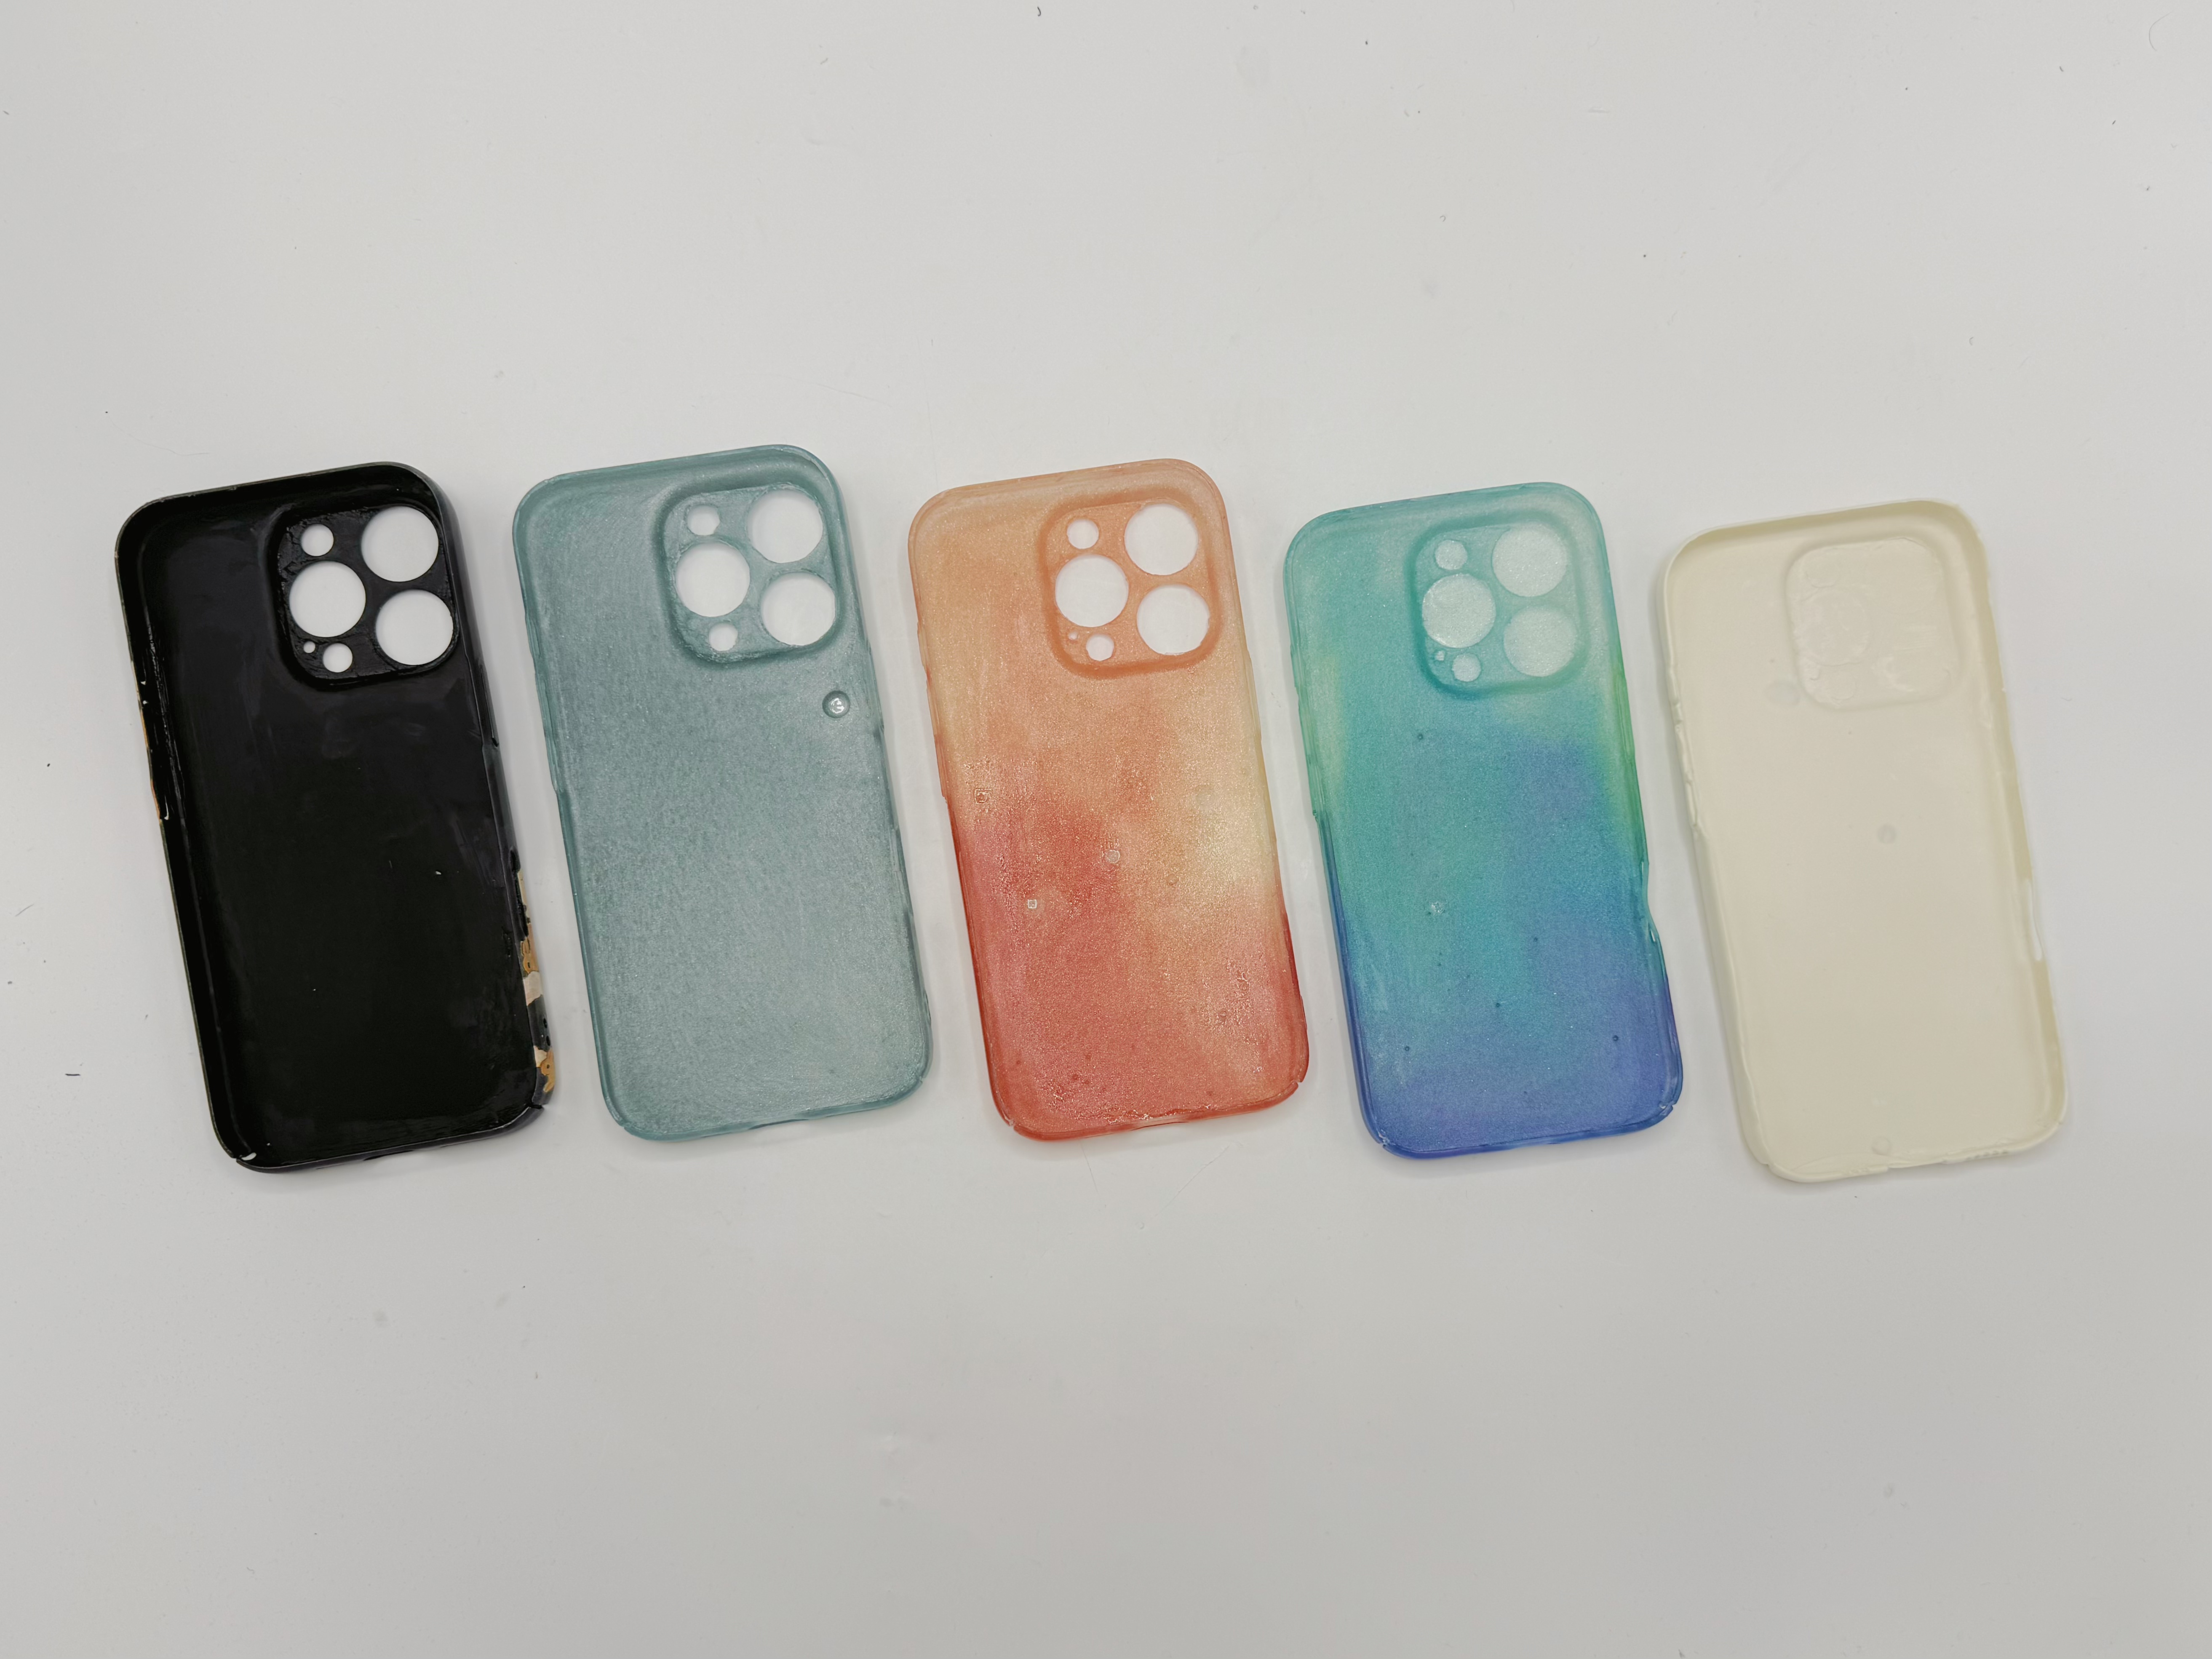
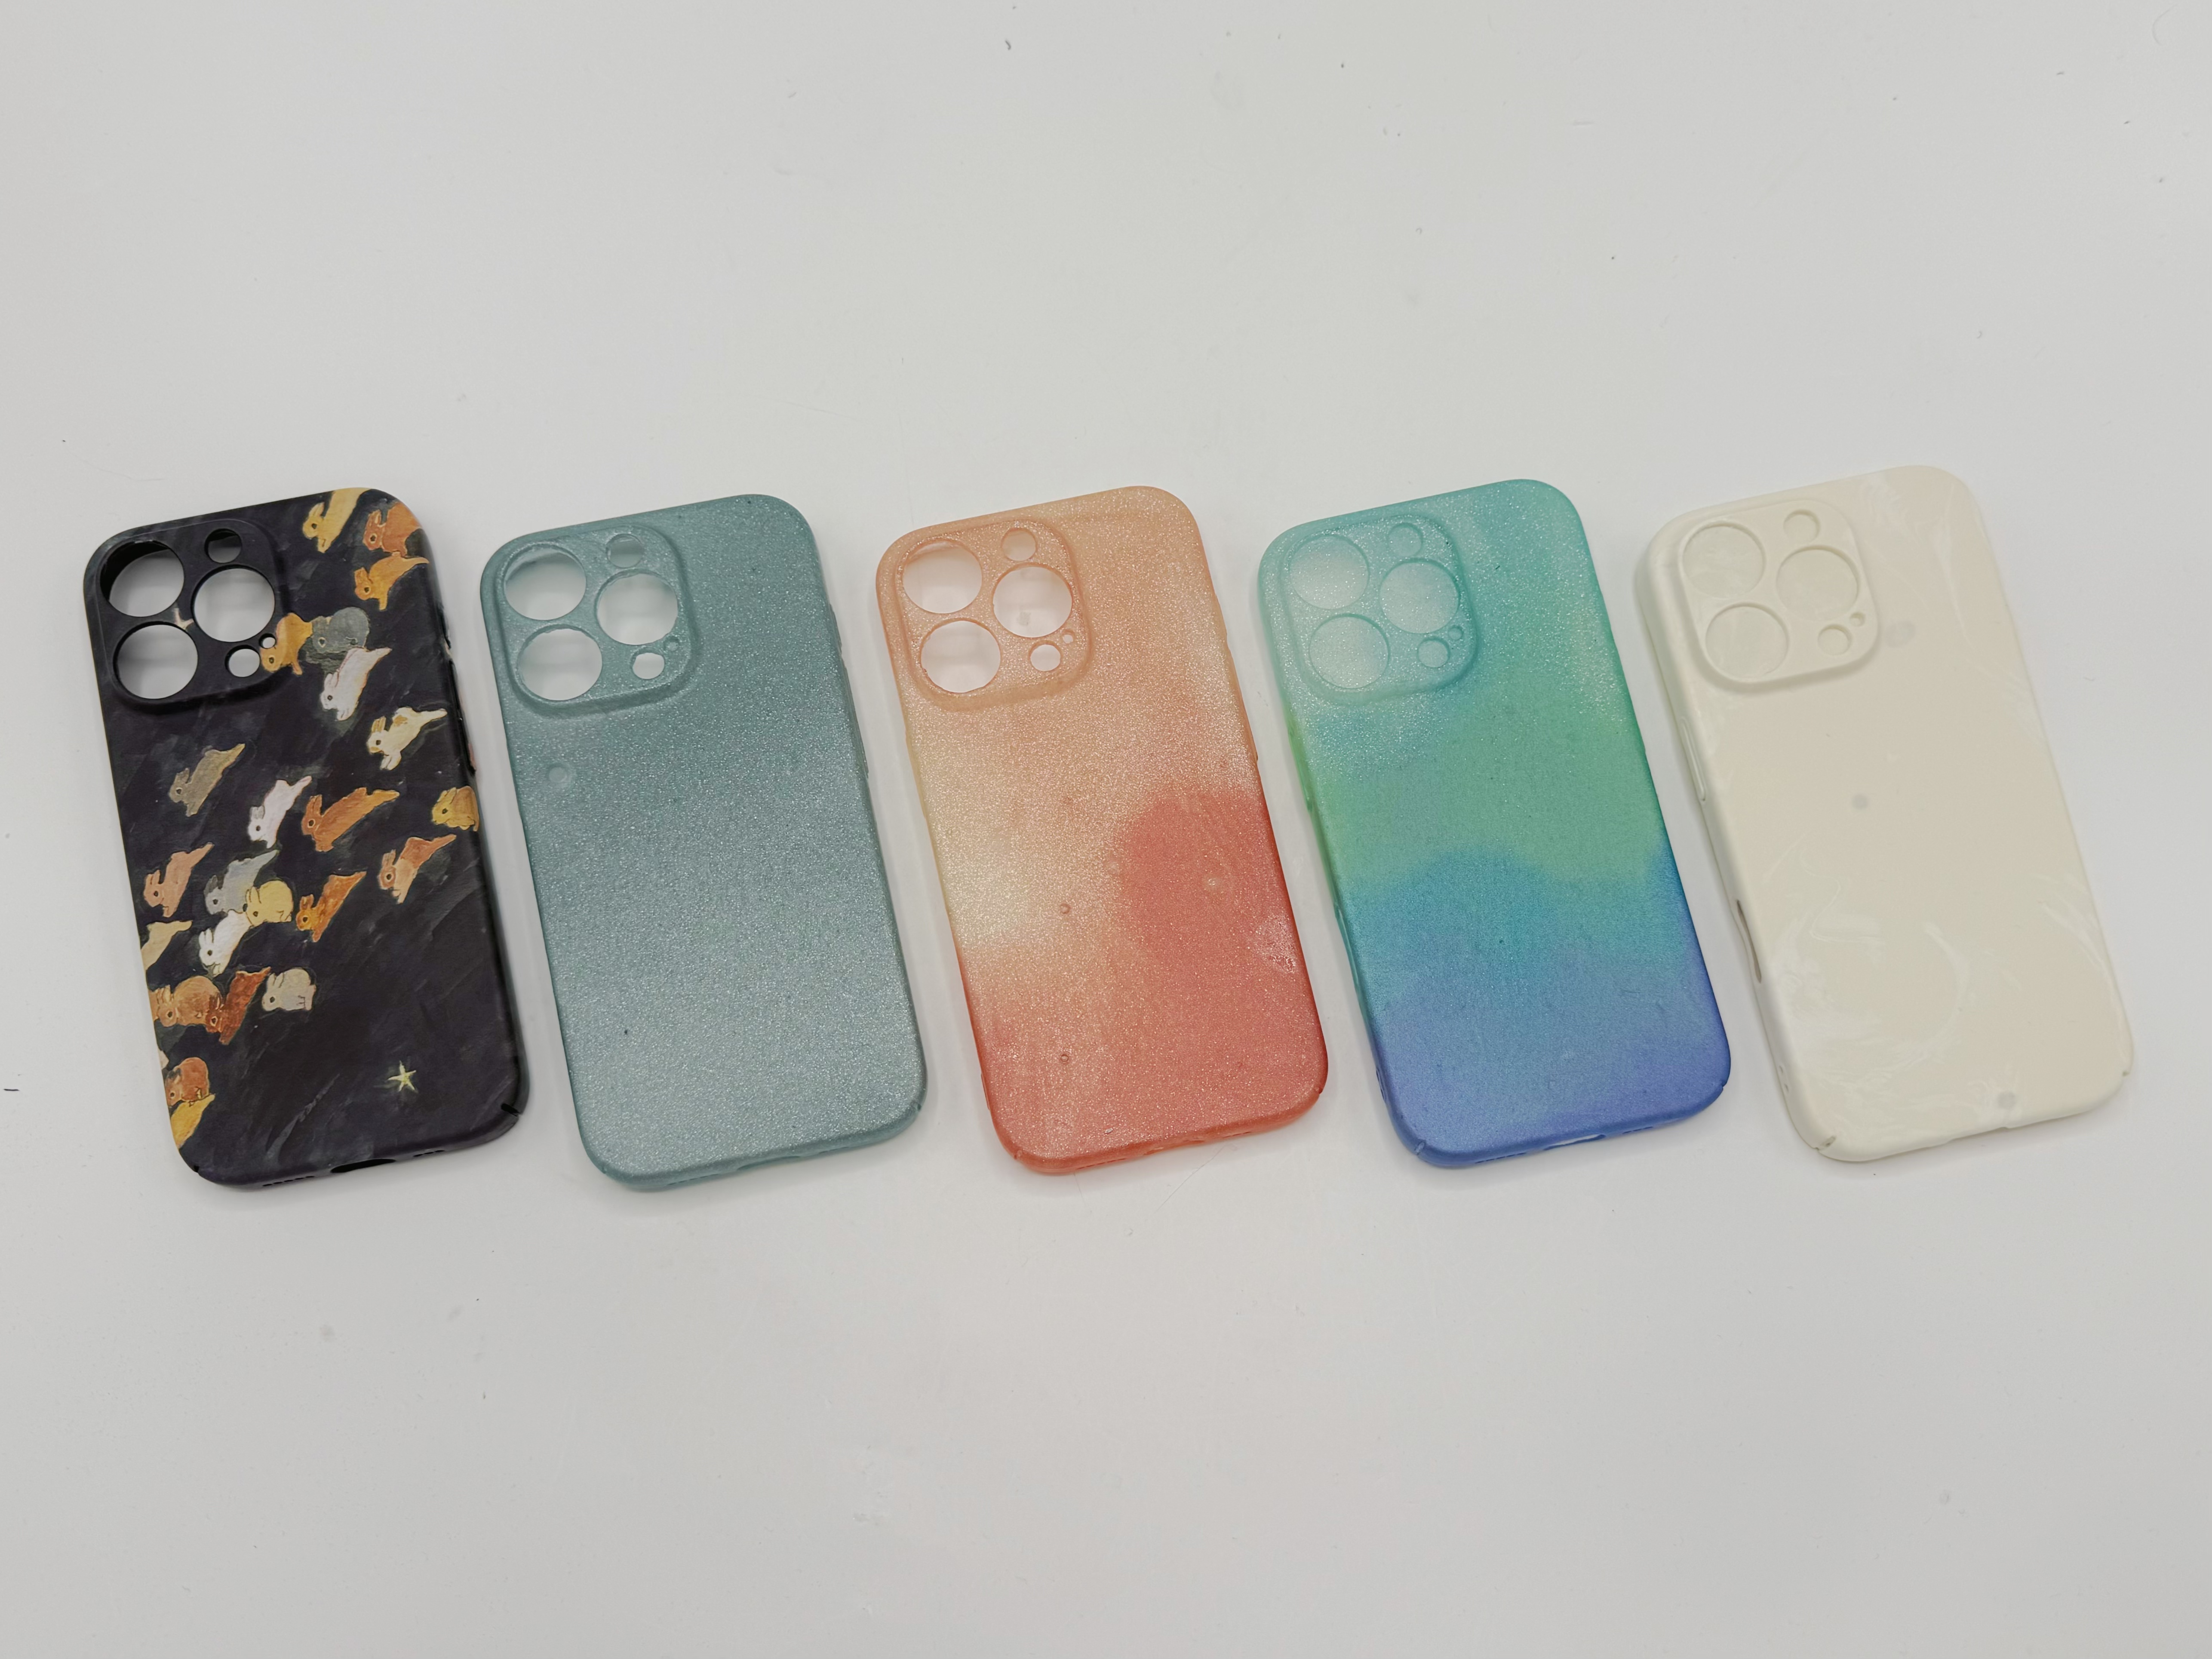
The result. A clean aurora gradient — white, green, blue, purple. One miss: I forgot to mix white glitter into the non-white colors, so those sections have less pearlescent shimmer and the transitions look slightly abrupt. Still a big improvement overall.
结果。 干净的极光渐变——白、绿、蓝、紫。一个小失误:我忘了在非白色中混入白色亮粉,导致那些部分的珠光感较弱,颜色过渡显得略微突兀。但总体上是一大进步。
Part B第 B 部分
ESP32 Container MoldESP32 容器模具
While the phone case iterations were ongoing, Kevin suggested picking a new object to mold — something smaller that could fit inside the vacuum chamber with resin inside. I chose an ESP32 component container: small enough for the chamber, and with threaded geometry that would be a good test for dimensional accuracy. This also introduced two new things: a proper vent and sprue system, and polyurethane resin.
在手机壳迭代进行的同时,Kevin建议找一个新的物体来翻模——最好是能连同树脂一起放入真空箱的小件。我选了一个ESP32零件收纳盒:尺寸够小,而且带有螺纹结构,是测试尺寸精度的好对象。这部分还引入了两个新内容:正式的通气孔与浇口系统,以及聚氨酯树脂。
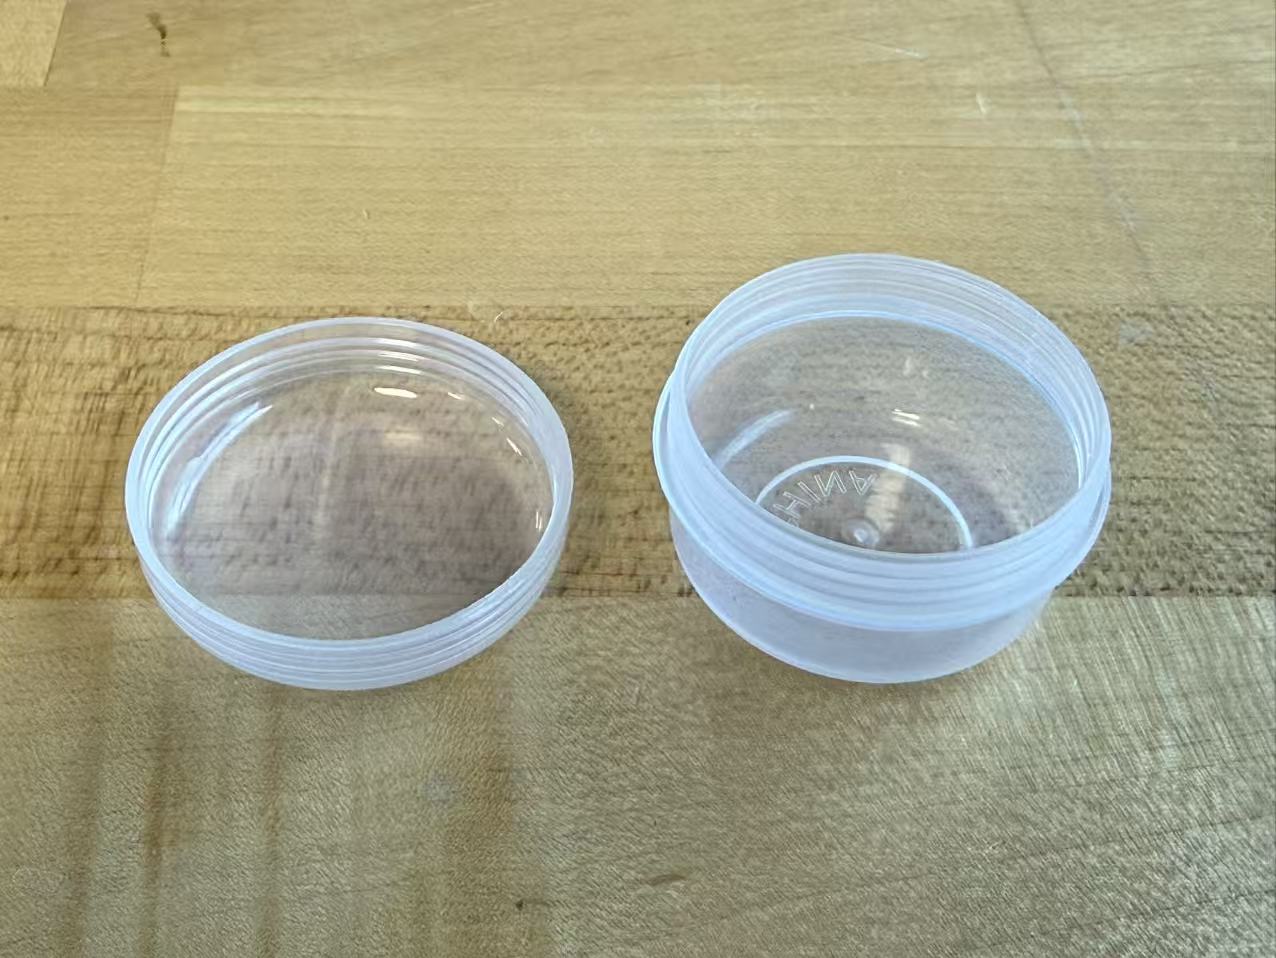
The object: a small ESP32 component container with a threaded lid. Small, rigid, and detailed enough to test how precisely silicone captures geometry.
对象:一个带螺纹盖的小型ESP32零件收纳盒。体积小、刚性好,细节足够丰富,可以测试硅胶对几何形状的精确捕捉能力。
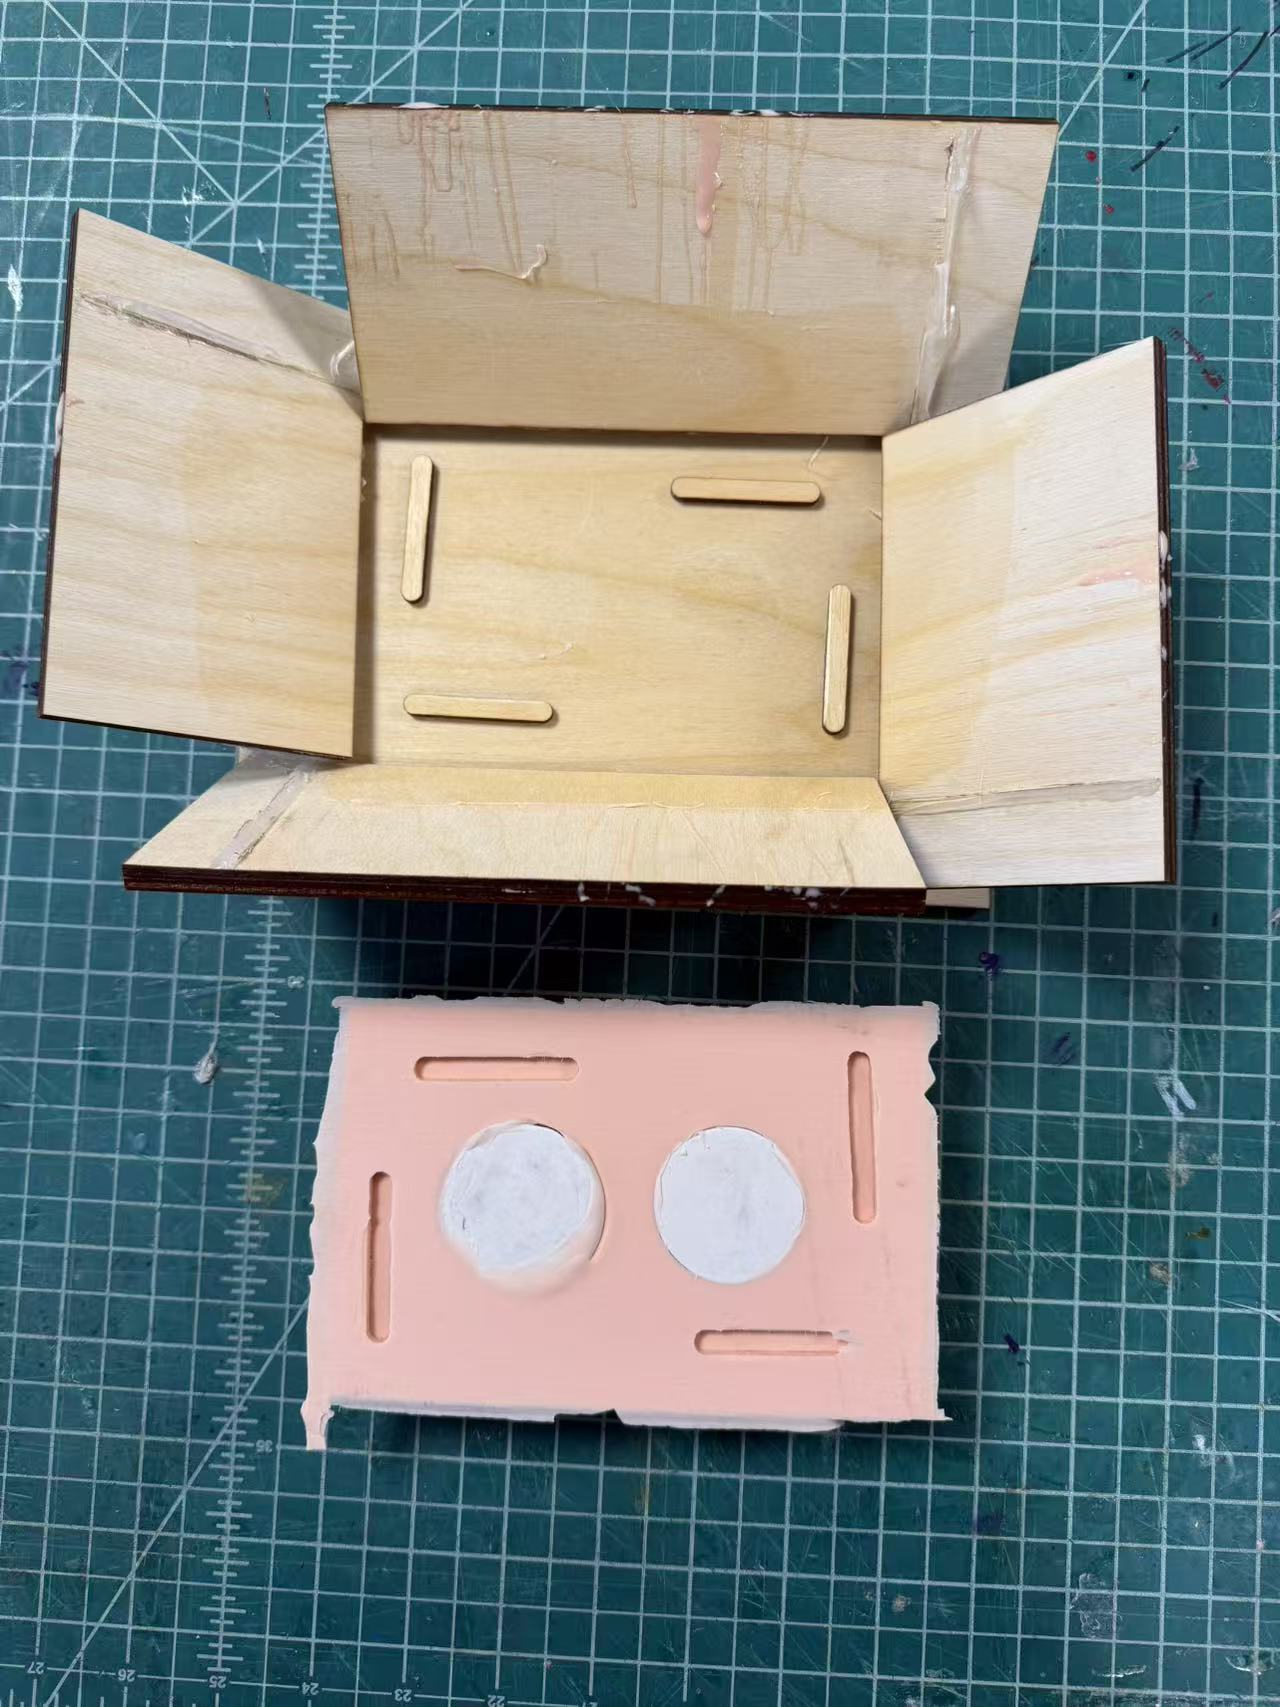
Bottom mold half底部模具
Same process as before. Mold box, clay fill, registration strips, mix and degas silicone, pour, wait overnight. No new techniques — just a different shape.
流程与之前相同。 模具盒、黏土填充、定位条、混合脱气硅胶、浇注、等待一夜。没有新技术——只是换了个不同的形状。
Calculation error. The box footprint was smaller than the phone case box, so I assumed I'd need less silicone. Wrong — the container is much taller, and the height increase more than offset the smaller footprint, giving a larger total volume than I expected. I ran out mid-pour.
计算失误。 盒子底面积比手机壳模具盒小,所以我以为硅胶用量会更少。错了——容器高得多,高度增加带来的体积增量远超底面积减小的节省,总体积比预期大得多。我在浇注中途用光了。

Fortunately silicone is forgiving — a second pour on top fuses seamlessly. Crisis averted.
好在硅胶比较宽容——在上面再倒一层会无缝融合。危机解除。
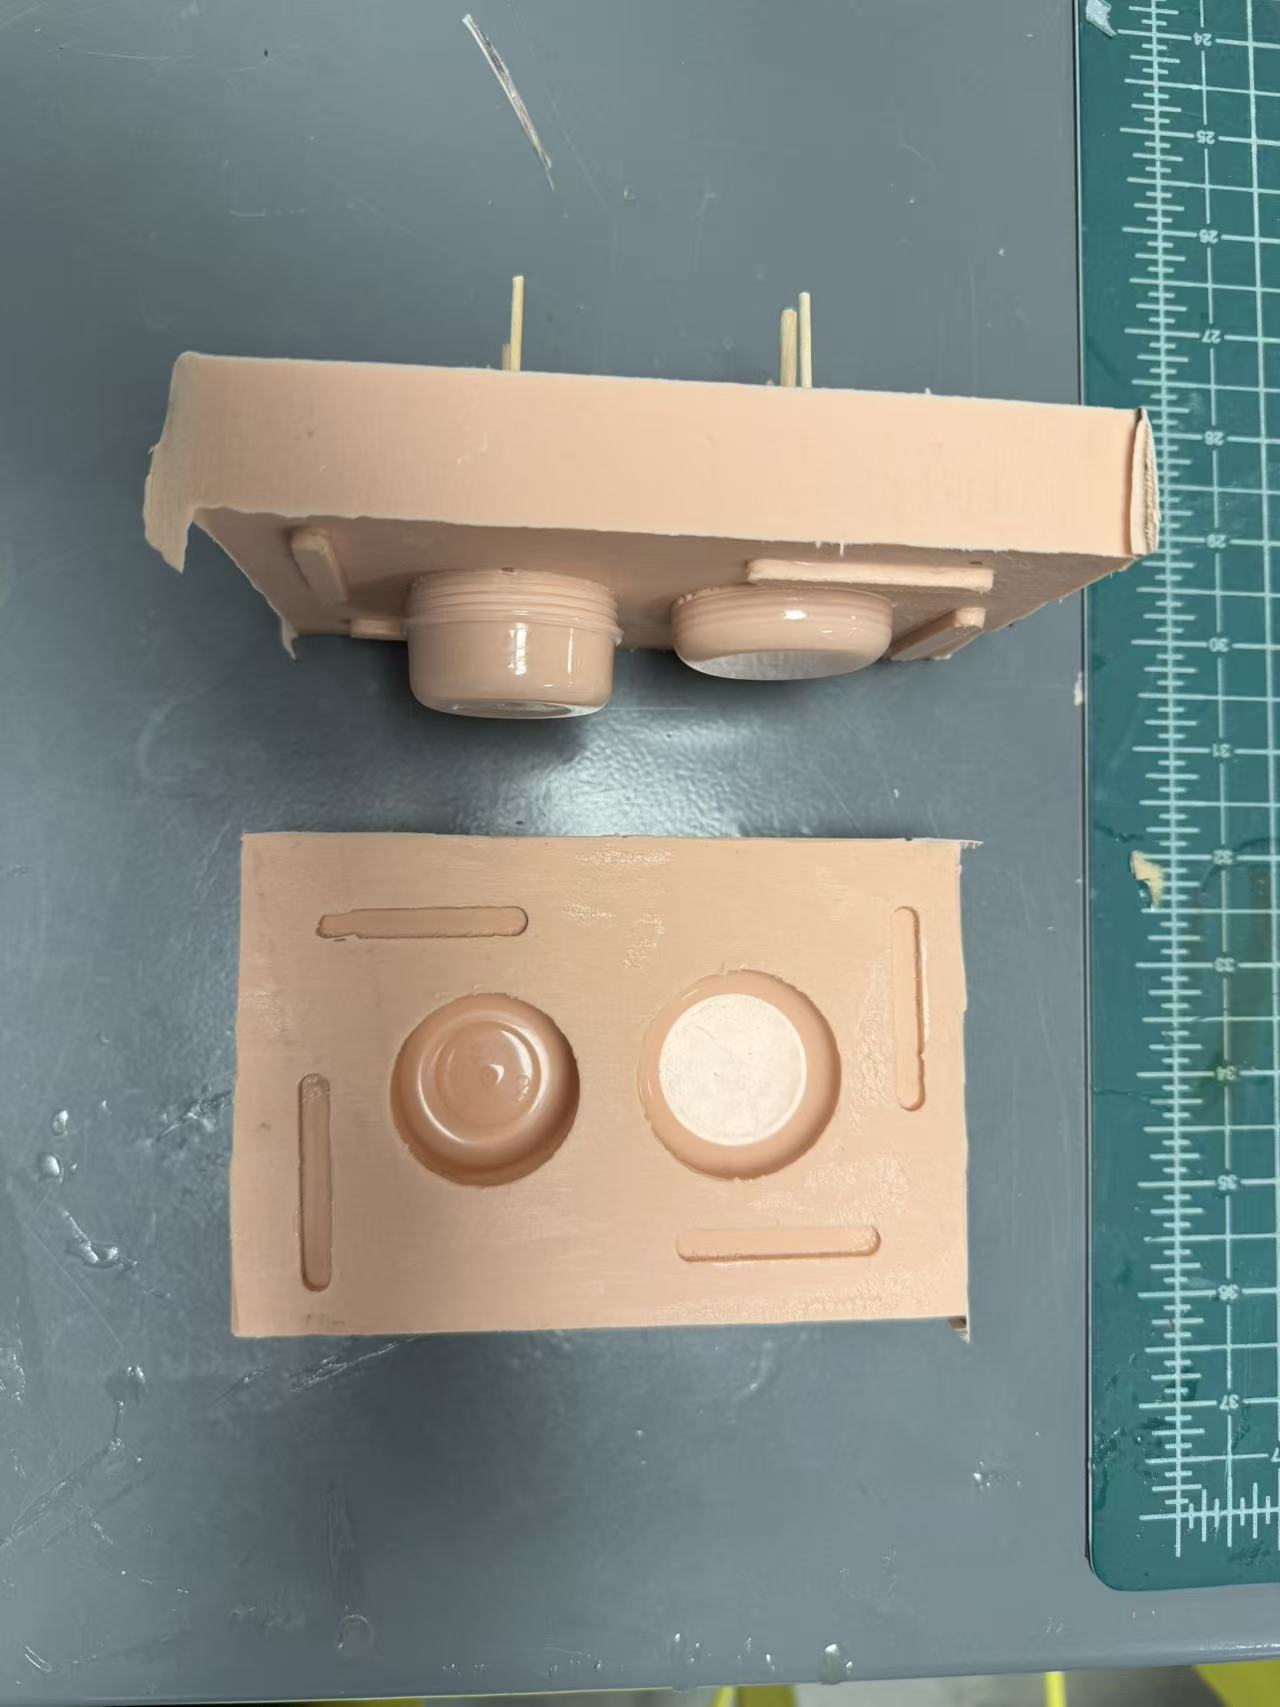
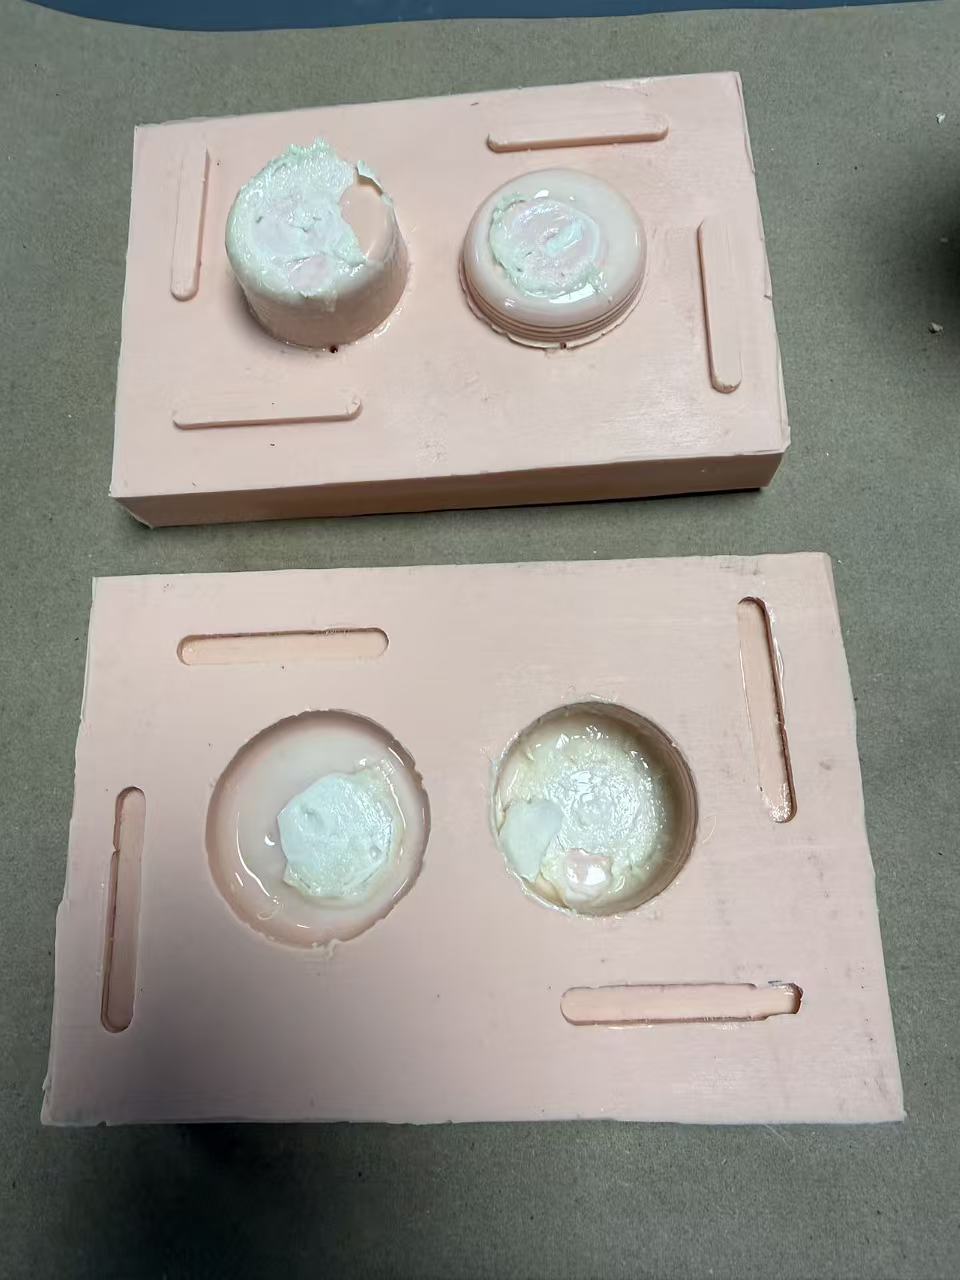
Top mold half — vent and sprue design顶部模具——通气孔与浇口设计
Why vents are needed. The phone case mold has no vents — the workaround is to overfill and squeeze the excess out. It gets the job done, but it is a workaround, not good mold design, and it only works because the mold is open. The container mold is closed: there is no way to squeeze, and without a vent, trapped air would block the resin fill entirely. The solution: a sprue at the lowest point to inject resin in, vents at the highest points so air can escape as the resin rises.
为什么需要通气孔。 手机壳模具没有通气孔——应急方法是过量填充后挤压排出多余树脂。这能解决问题,但只是一种变通方案,不是好的模具设计,而且只适用于开放式模具。容器模具是封闭的:无法靠挤压排气,没有通气孔,困住的空气会完全阻碍树脂充填。解决方案:在最低点设置浇口注入树脂,在最高点设置通气孔,让空气随树脂上升时逸出。
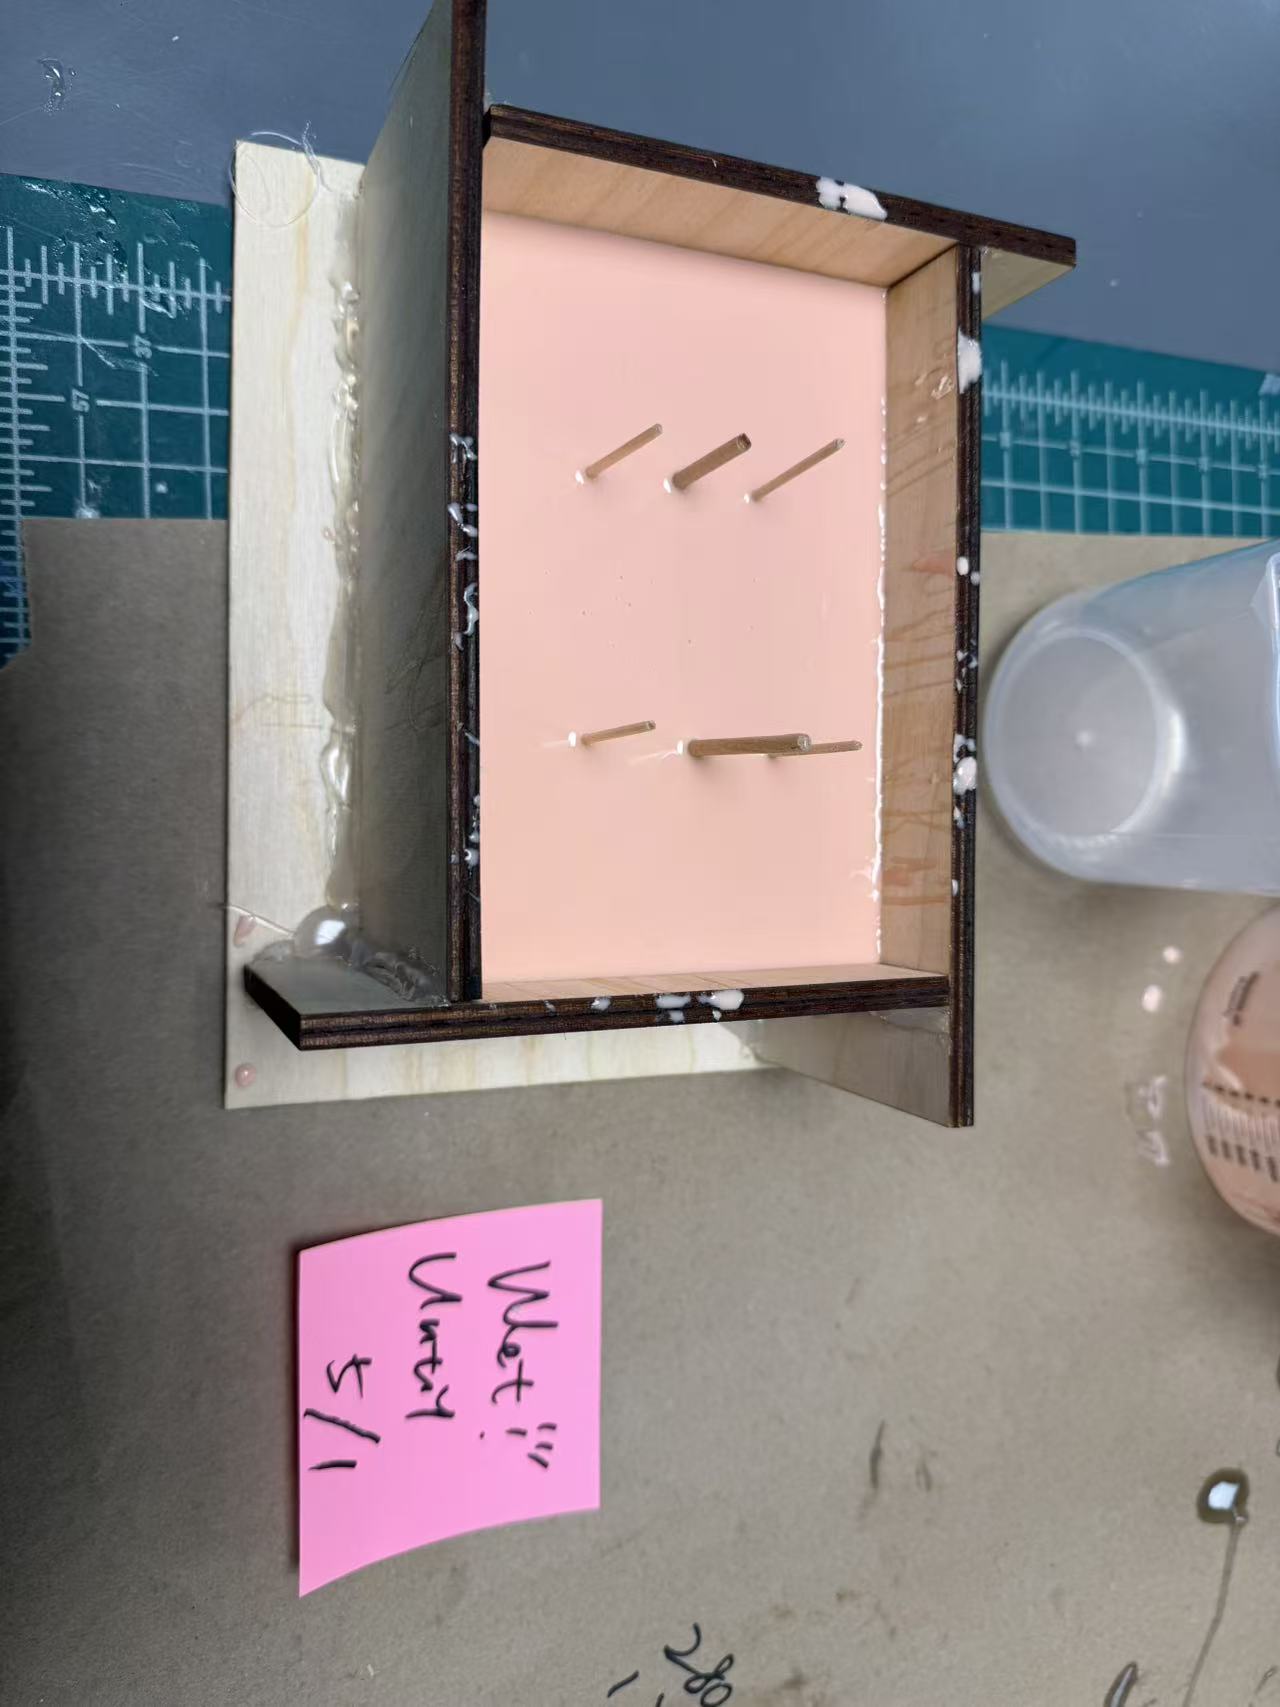
Attaching the vent cores. I needed to attach a toothpick (vent core) and a slightly thicker stick (sprue core) to the container before the second silicone pour. After curing and removal, these leave the channels behind. The challenge: the container walls are extremely thin, so the contact area for adhesion is tiny.
安装通气芯。 在第二次倒硅胶之前,我需要把一根牙签(通气芯)和一根稍粗的细棍(浇口芯)粘到容器上。固化后取出,留下通道。挑战在于:容器壁极薄,粘接面积很小。
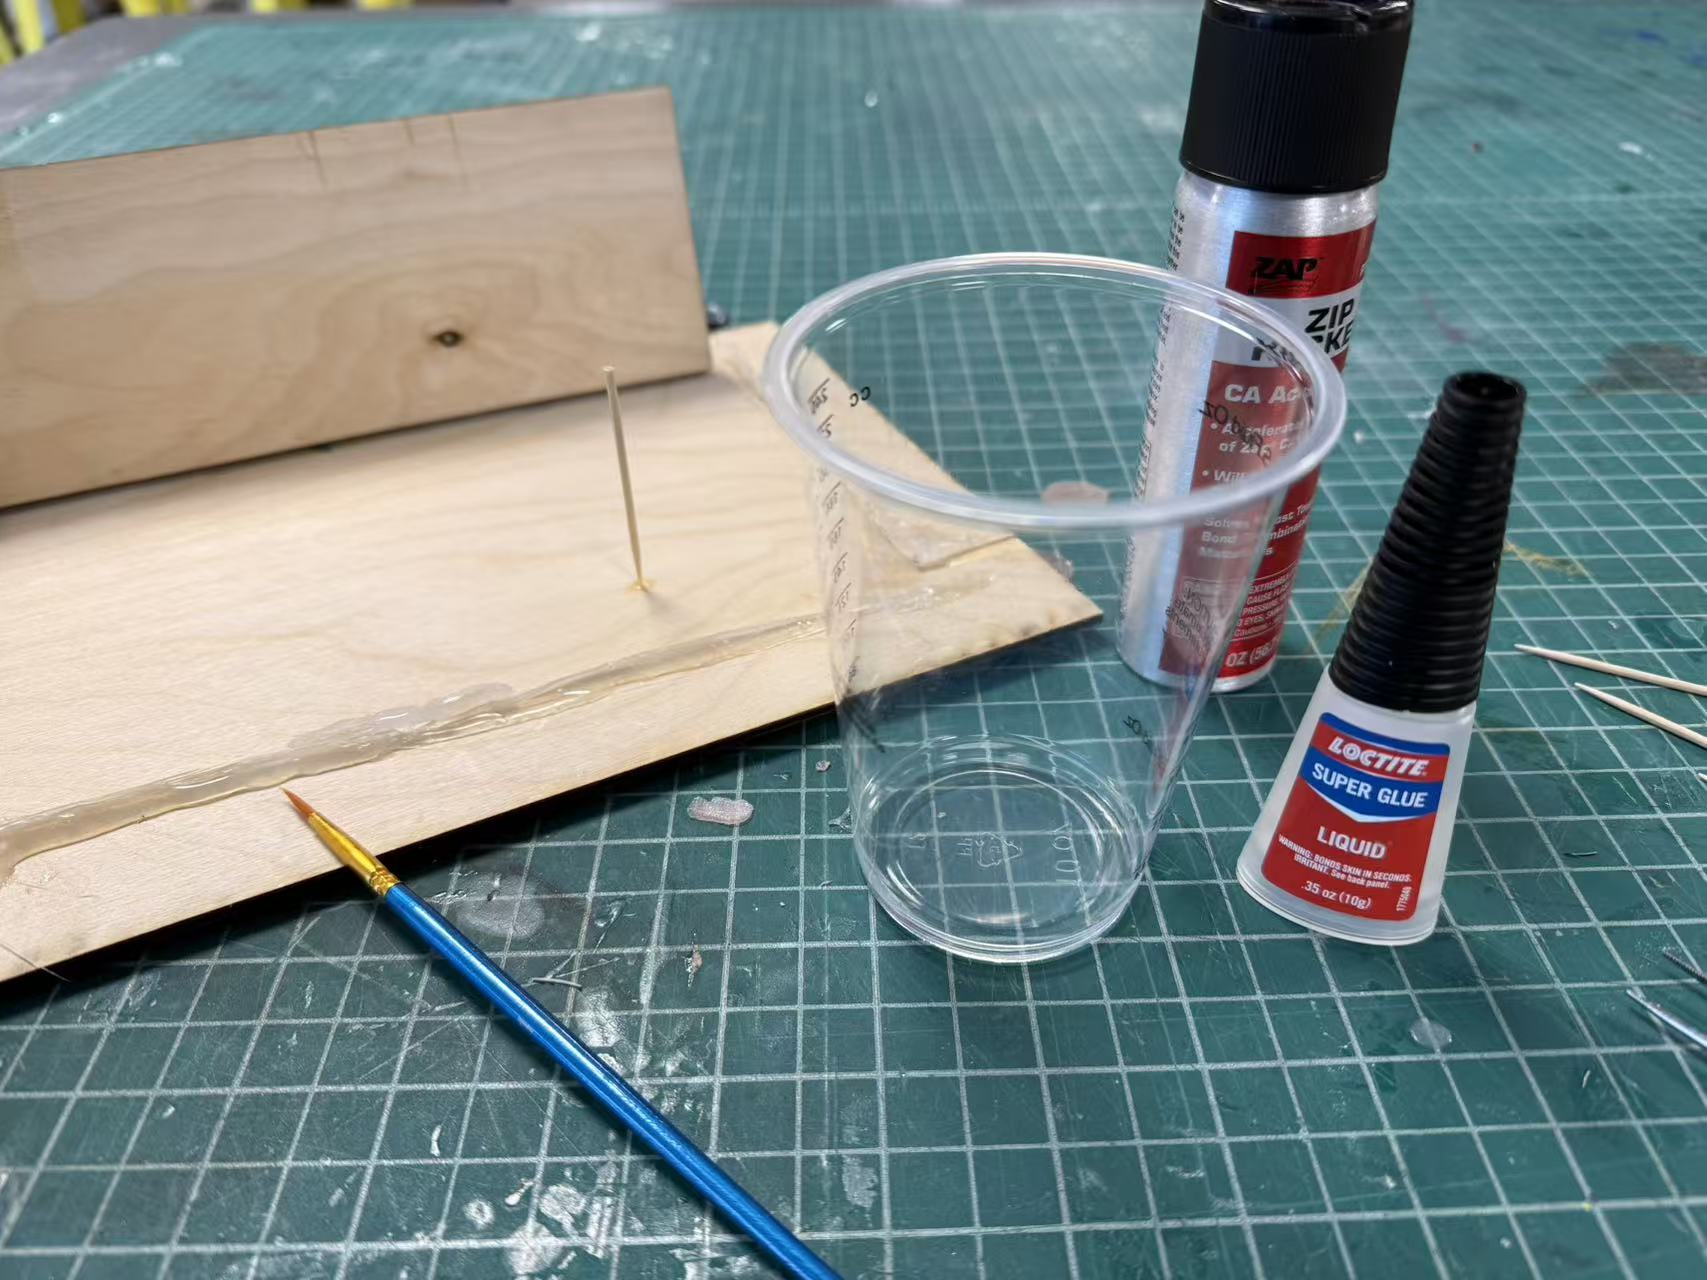
Superglue + activator. Kevin's technique for bonding small items to smooth plastic: superglue cures slowly on its own; activator spray makes it bond in seconds. His key rule: don't spray the activator directly onto the joint — dab it on with a small brush. More control, less mess. I practiced on scrap first.
瞬间胶+活化剂。 Kevin粘接小件到光滑塑料上的技巧:瞬间胶自然固化很慢;活化剂喷雾能让它数秒内粘牢。他的关键原则:不要直接向接合处喷活化剂——用小刷子蘸取点涂。控制更精准,也不会弄脏周围。我先在废料上练习了一番。
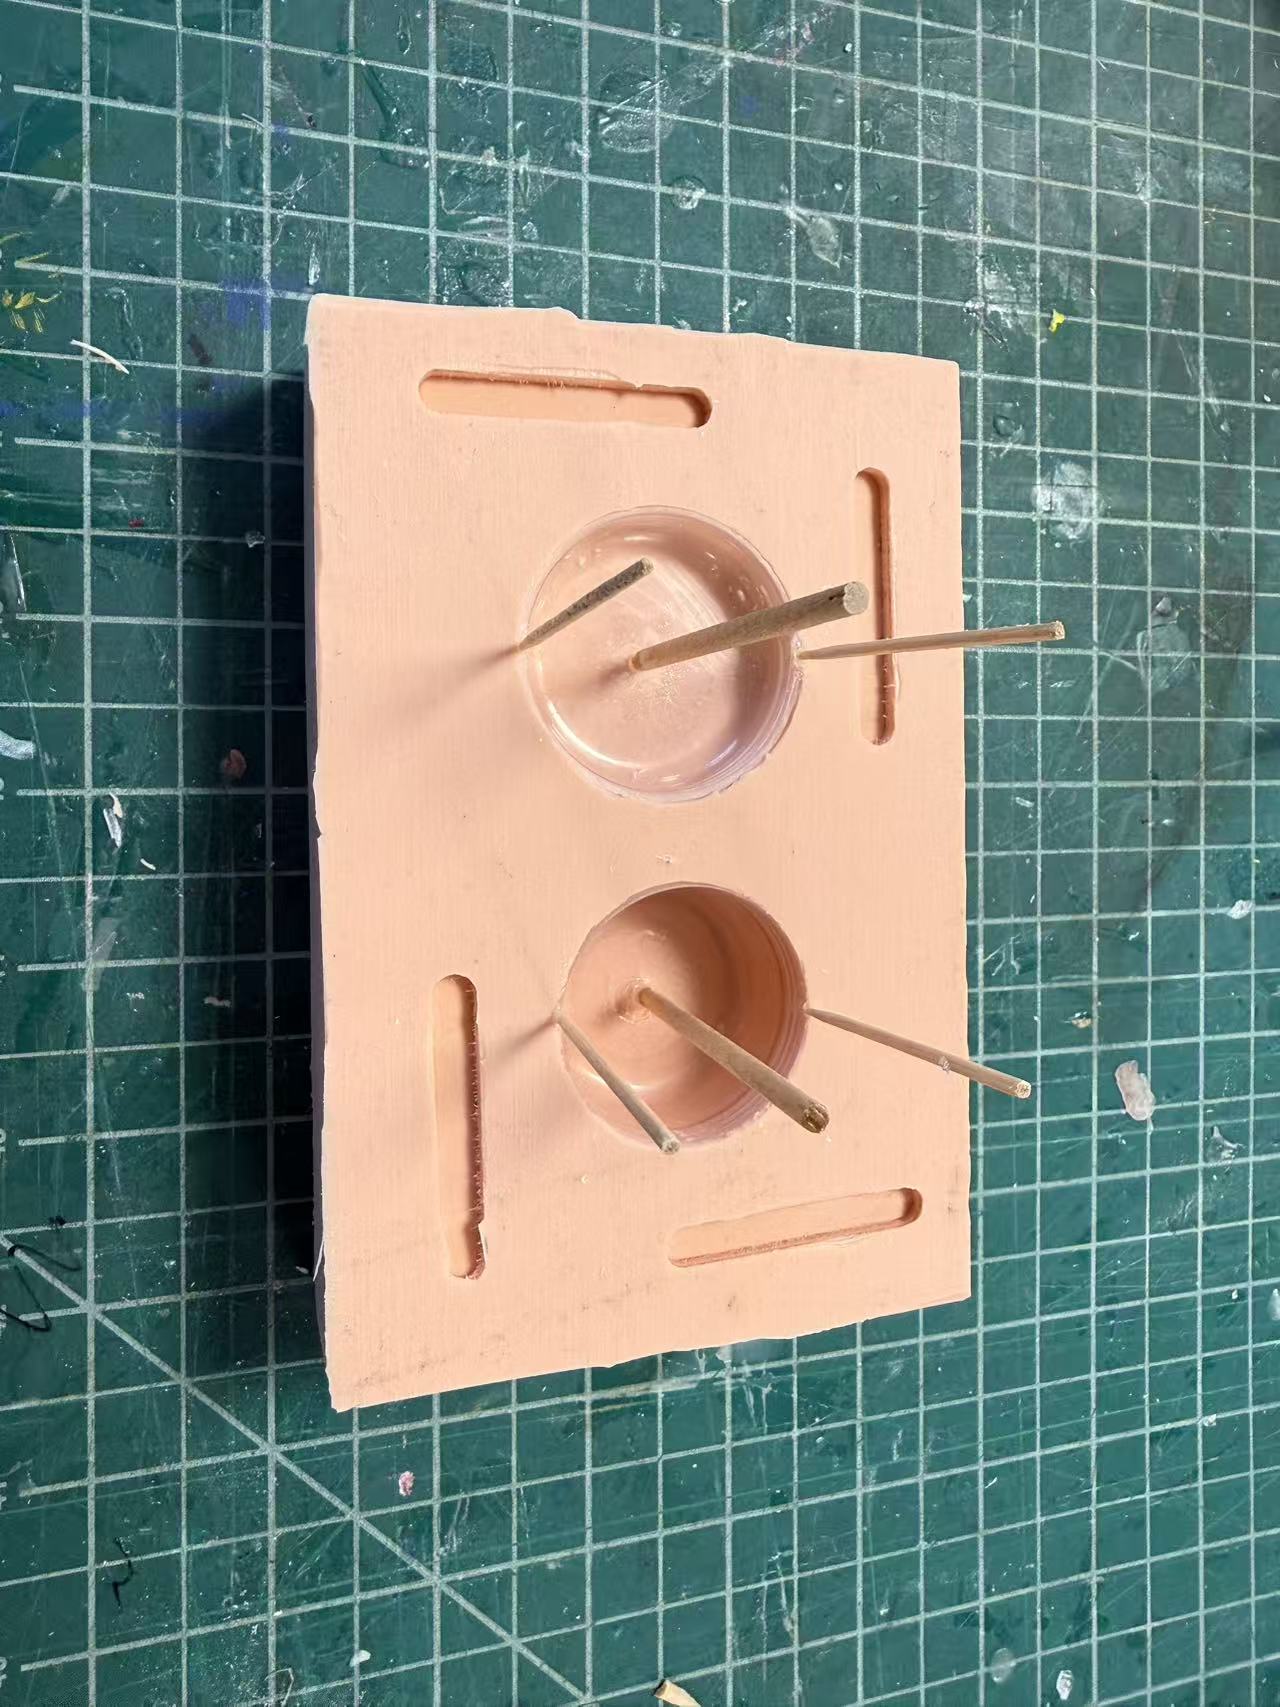
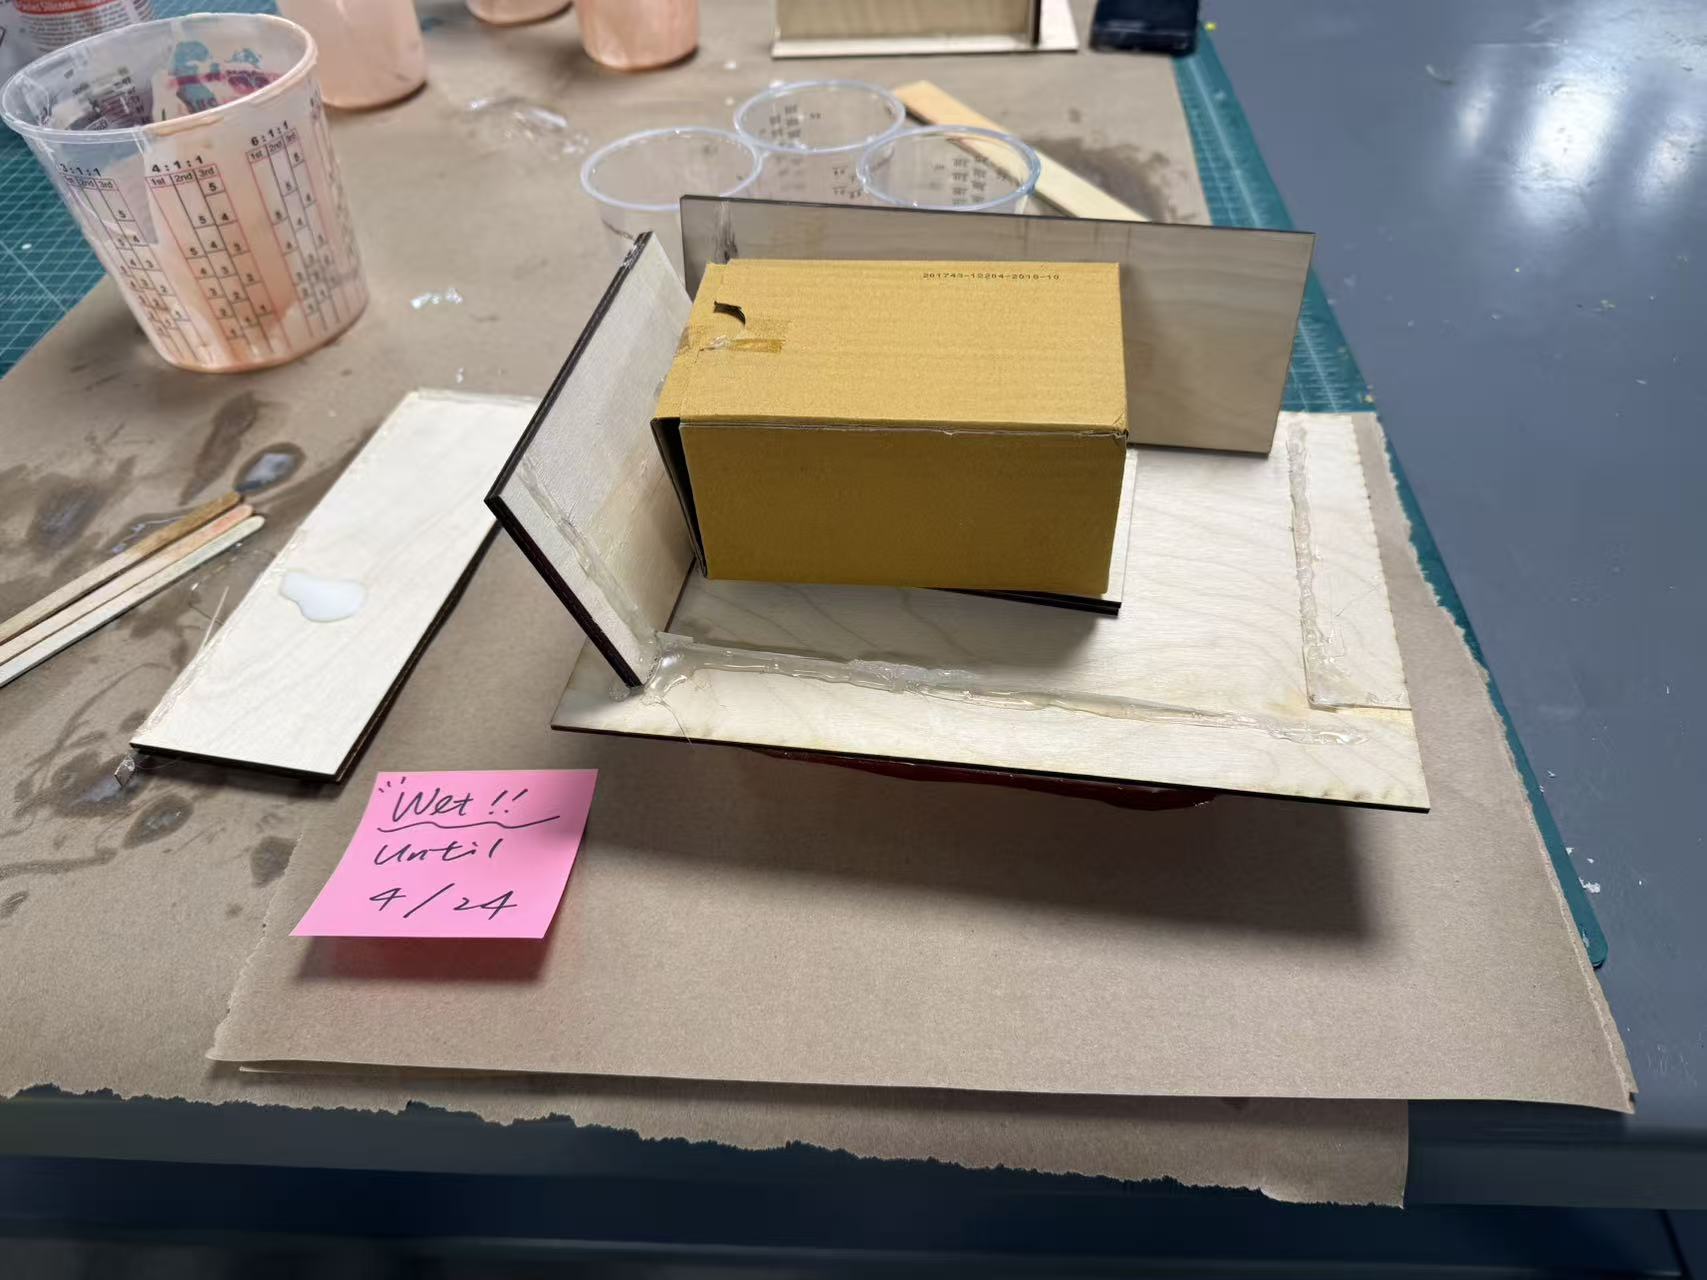
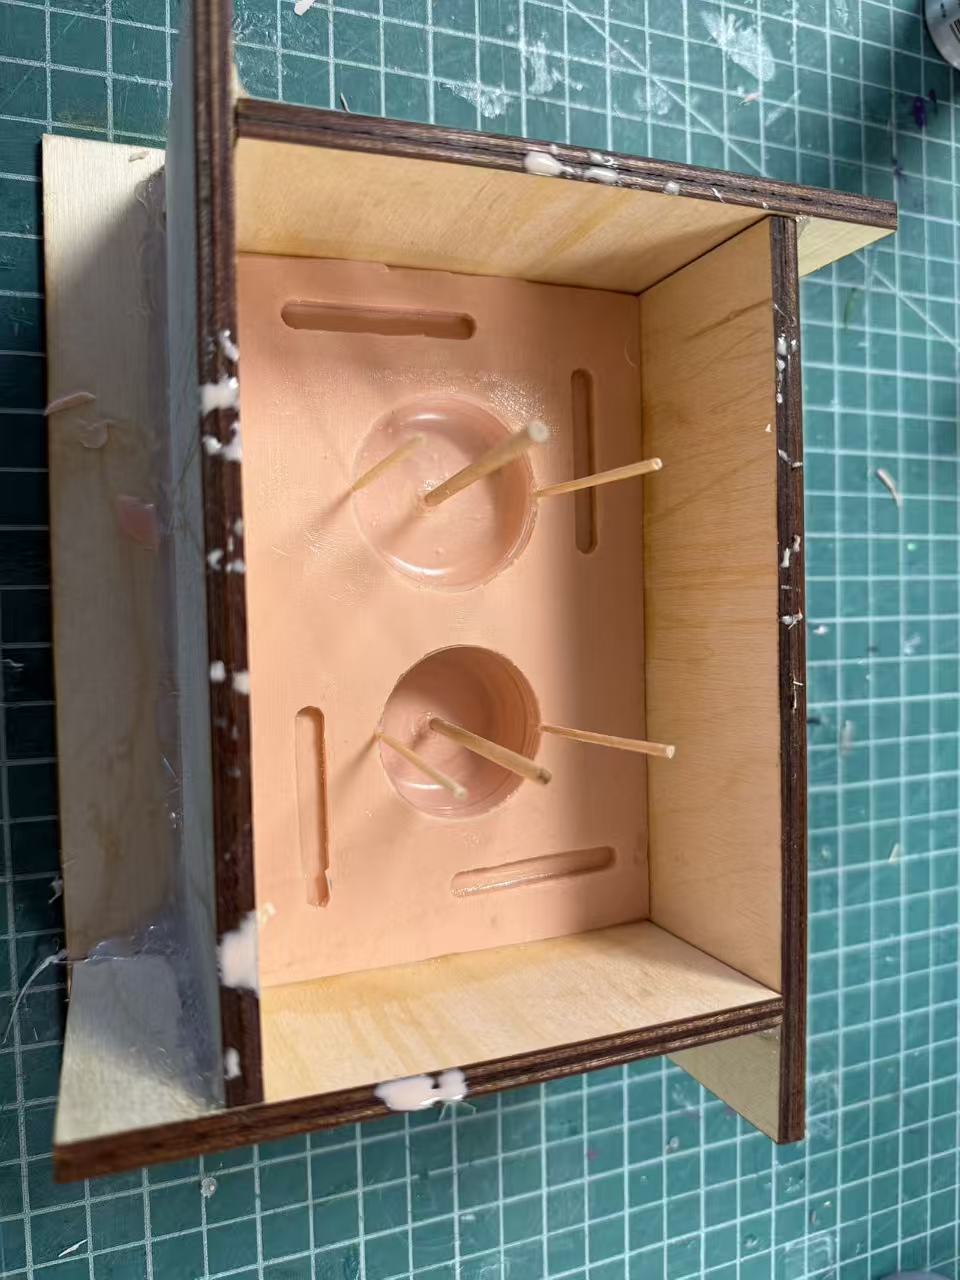
Second pour. Applied vaseline to the exposed silicone half, rebuilt the mold box, then poured the silicone very slowly and close to the surface — the toothpick and stick are only attached by a tiny contact area, and a heavy pour could knock them over. Kevin said if they fall, there's not much you can do except re-attach and hope the next pour covers it. Another overnight wait.
第二次浇注。 在裸露的硅胶面涂上凡士林,重新搭建模具盒,然后贴近表面非常缓慢地倒入硅胶——牙签和细棍仅靠很小的接触面粘着,倒得太猛可能把它们冲倒。Kevin说如果倒下了,除了重新粘好再祈祷下次浇注能盖住就没什么好办法了。又等了一夜。
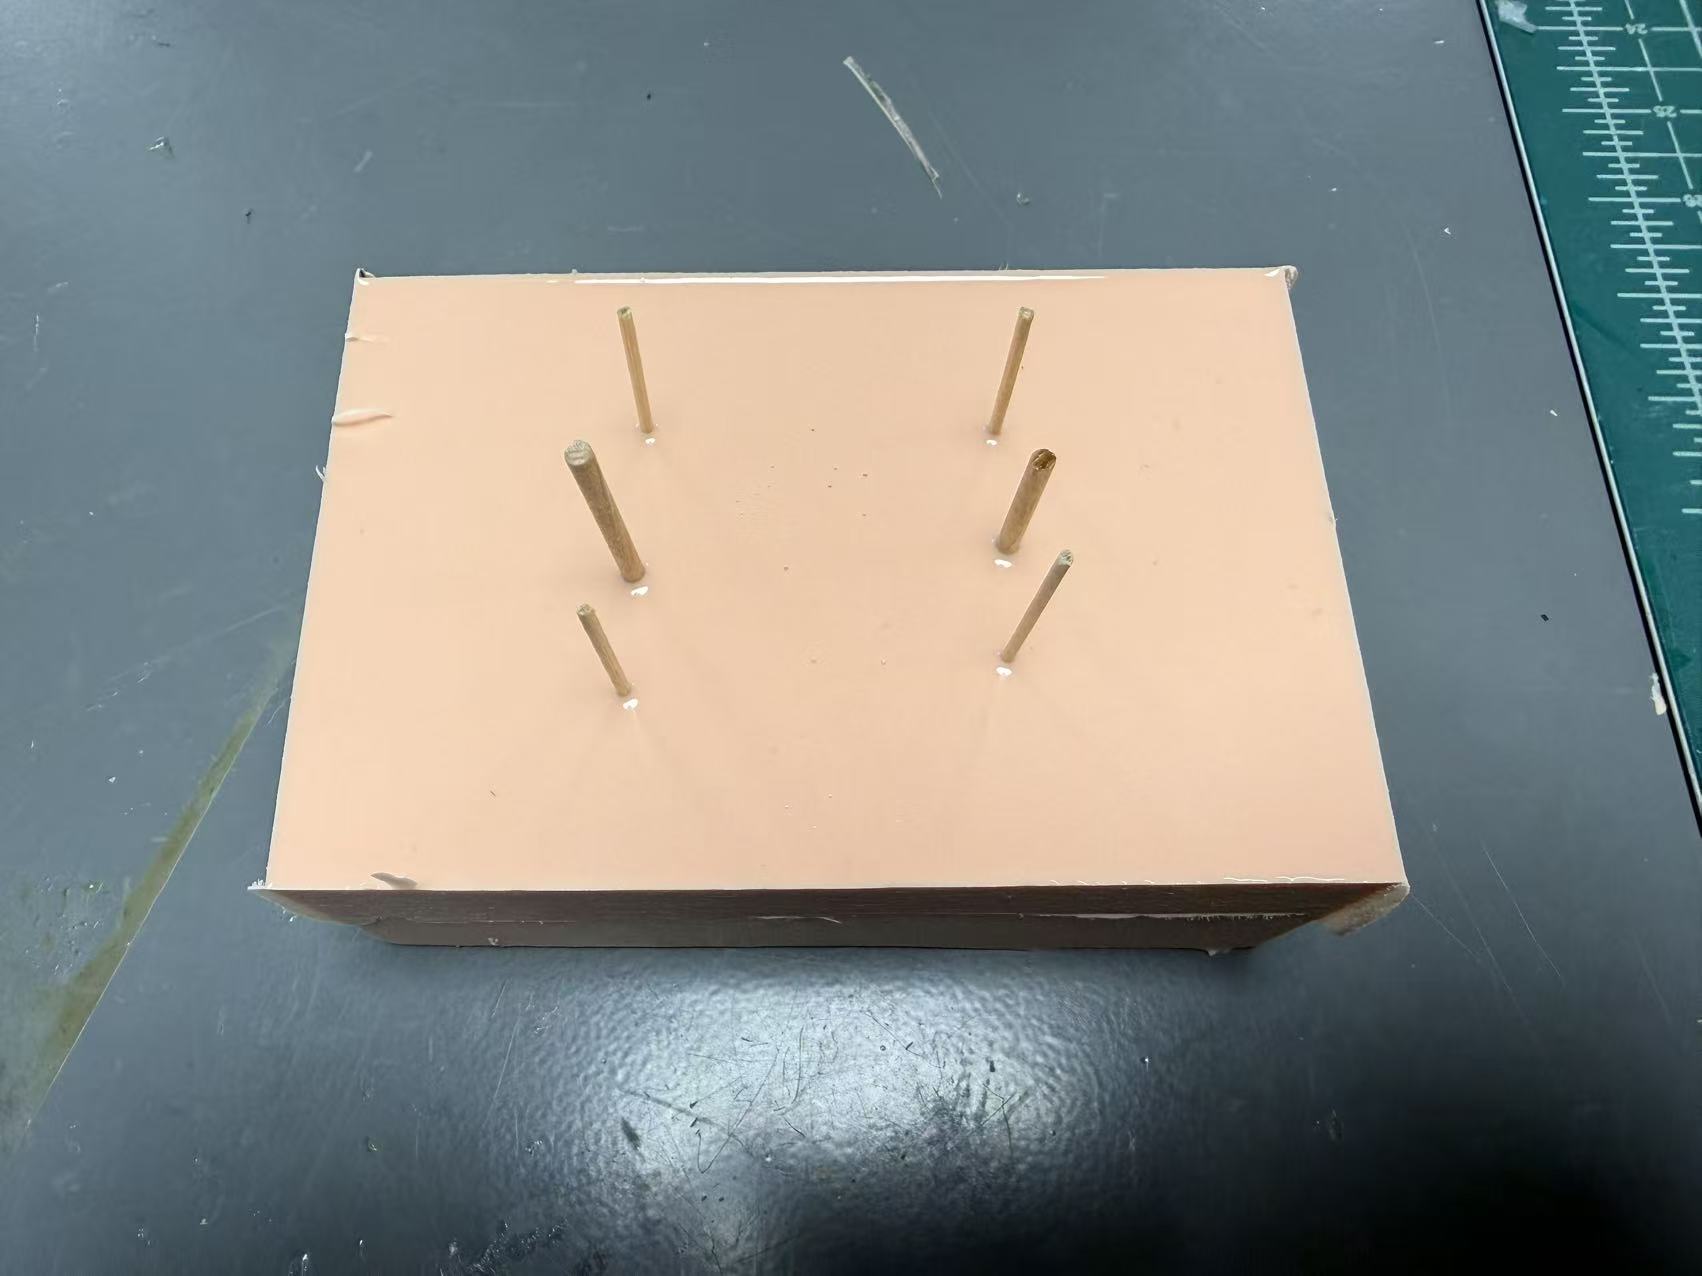
Reveal the channels. Once cured, pulled out the toothpick and stick — the vent and sprue channels are left behind in the silicone.
露出通道。 固化后,拔出牙签和细棍——通气孔和浇口通道就留在了硅胶里。

First cast — learning polyurethane resin第一次浇铸——初识聚氨酯树脂
Why polyurethane. Epoxy resin is viscous — fine for open molds, but too thick to flow through a small sprue. Kevin introduced polyurethane resin: also A+B, 1:1 by volume or weight (both work), but much thinner. It flows easily and cures opaque white.
为什么用聚氨酯。 环氧树脂粘稠——开放模具没问题,但太厚了,无法流过细小的浇口。Kevin介绍了聚氨酯树脂:同样是A+B组分,体积或重量均可1:1混合,但流动性强得多,固化后呈不透明白色。
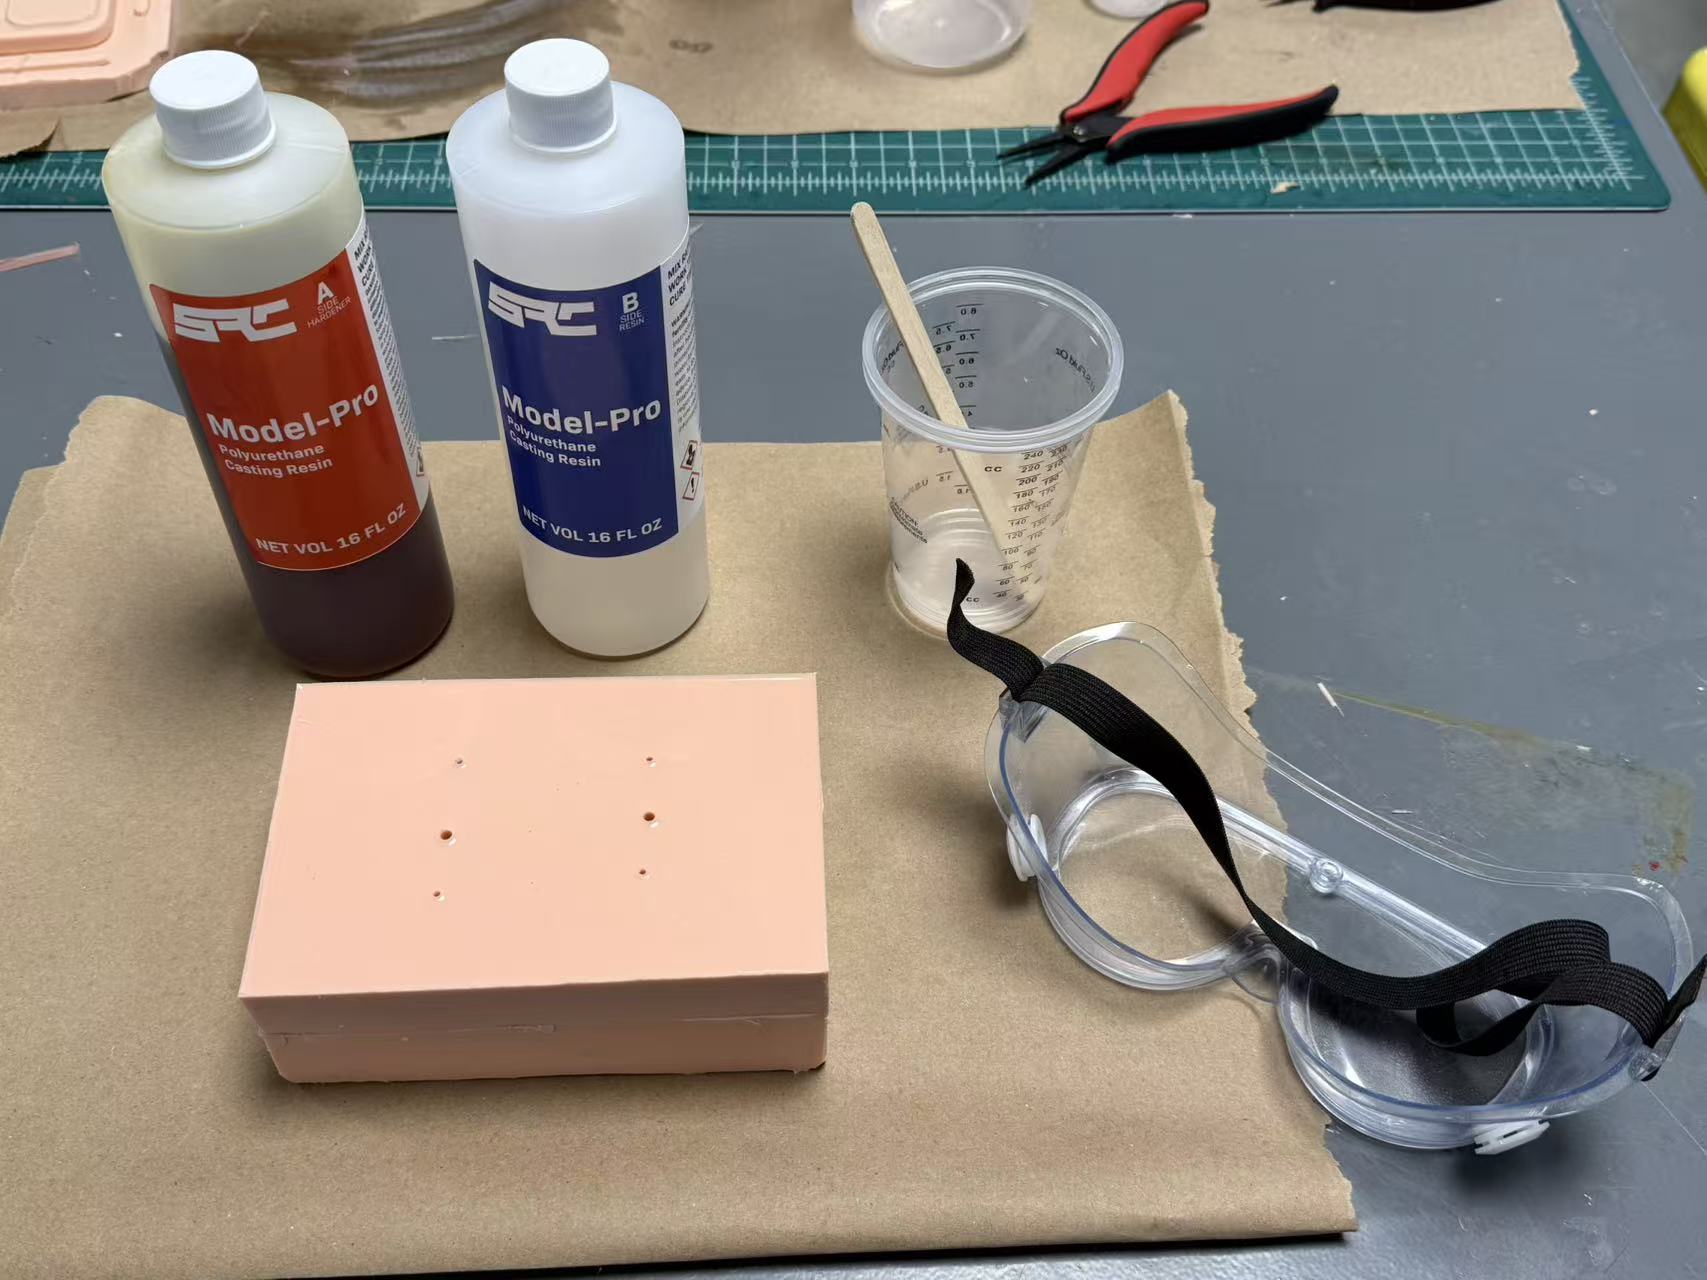
The critical difference: work time. Epoxy gives 15–30 minutes. Polyurethane gives 2–3 minutes, with full cure in 10–15. No time to degas. You must have everything ready — mold in position, workspace clear, channels carved — before mixing A and B. Also: don't overmix. Excess agitation accelerates the exothermic reaction and the resin heats up fast.
关键区别:操作时间。 环氧树脂给你15–30分钟,聚氨酯只有2–3分钟,10–15分钟完全固化。没有时间脱气。在混合A和B之前,必须把一切准备好——模具就位、工作台清空、通道刻好。另外:不要过度搅拌。过度搅拌会加速放热反应,树脂会迅速升温。
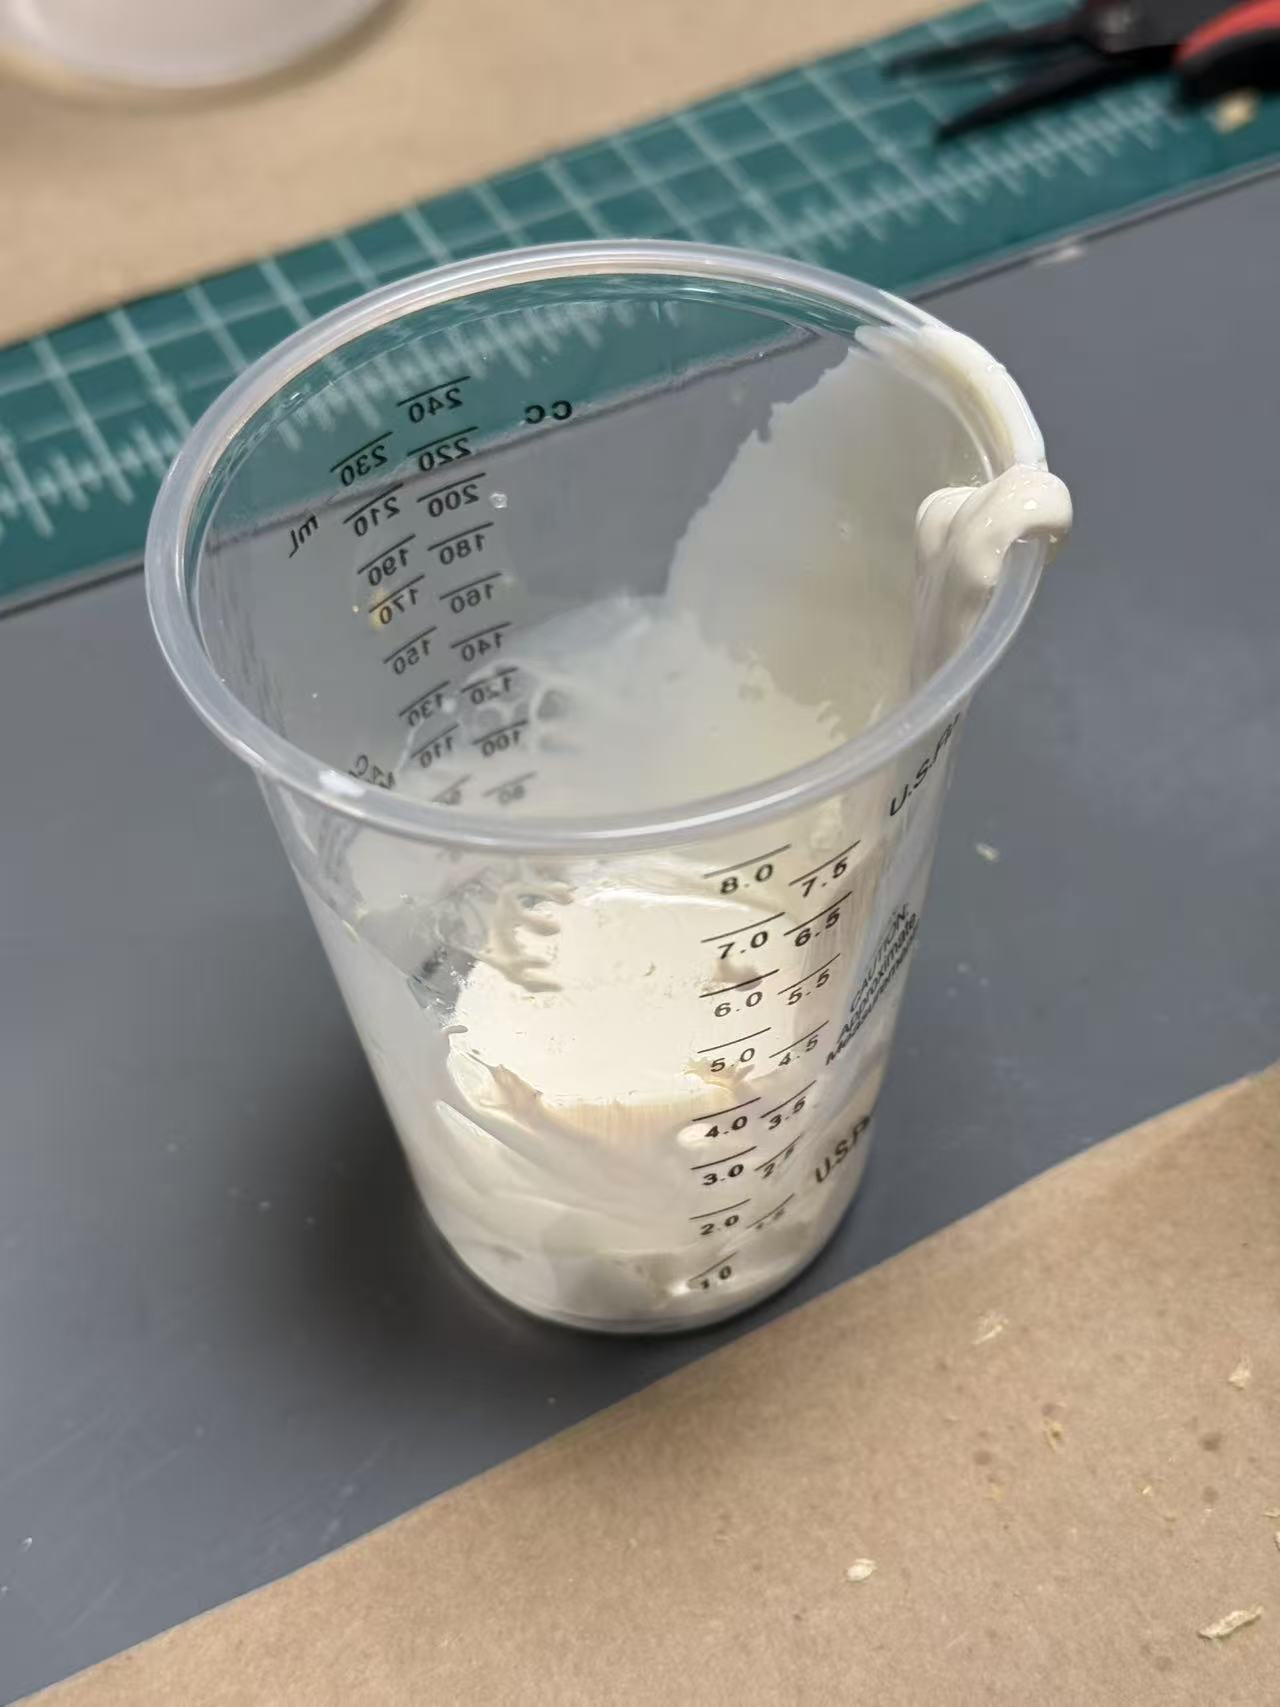
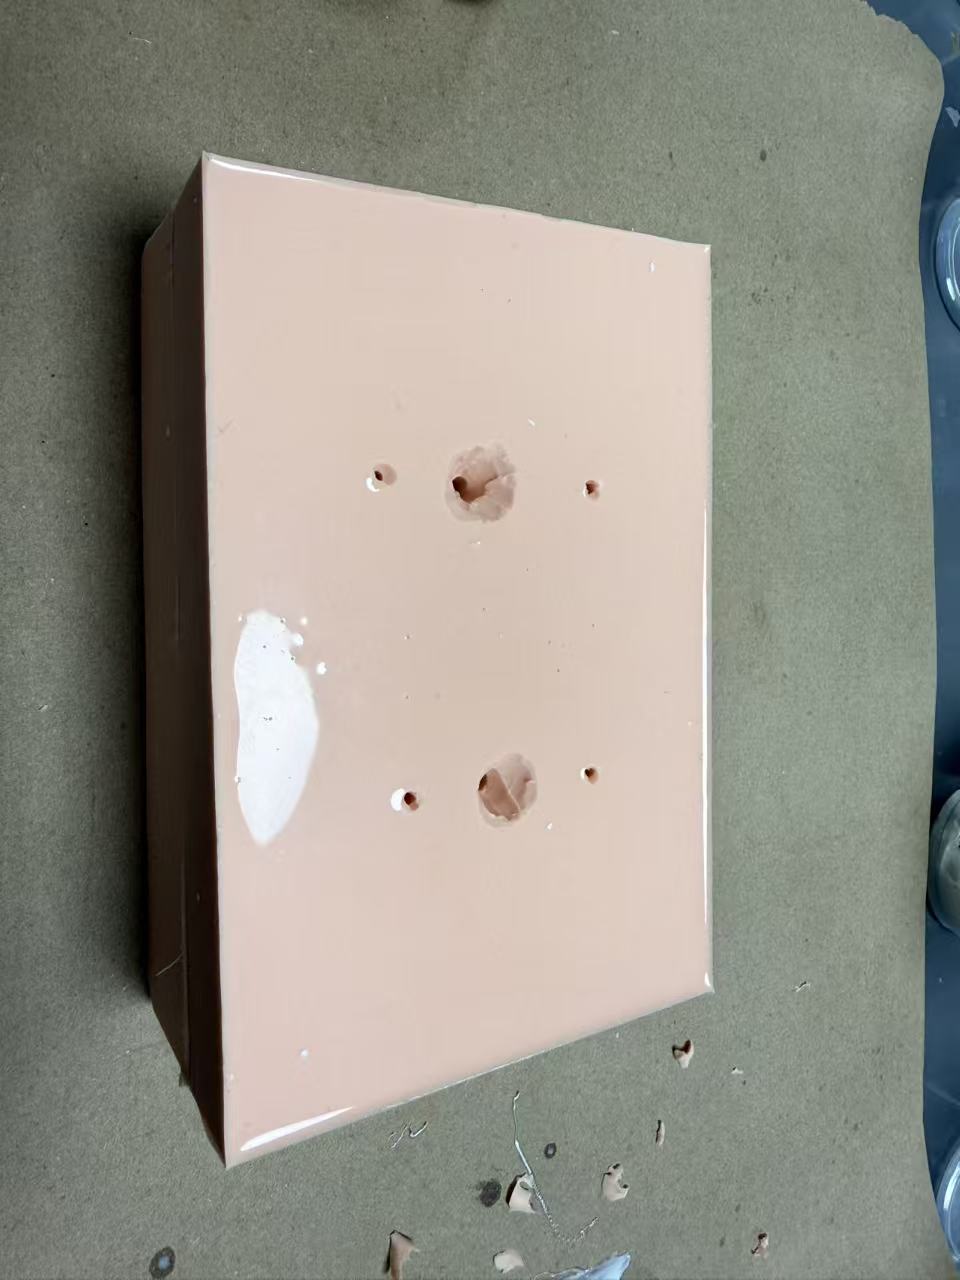
First attempt: overmixed. I tried to move quickly, but overmixing cut the already-short work time even further. The resin started turning white before I finished pouring — most of it hardened in the cup.
第一次尝试:过度搅拌。 我试图快速操作,但过度搅拌让本已短暂的操作时间更加缩短。还没倒完,树脂就开始变白——大部分在杯子里就硬化了。
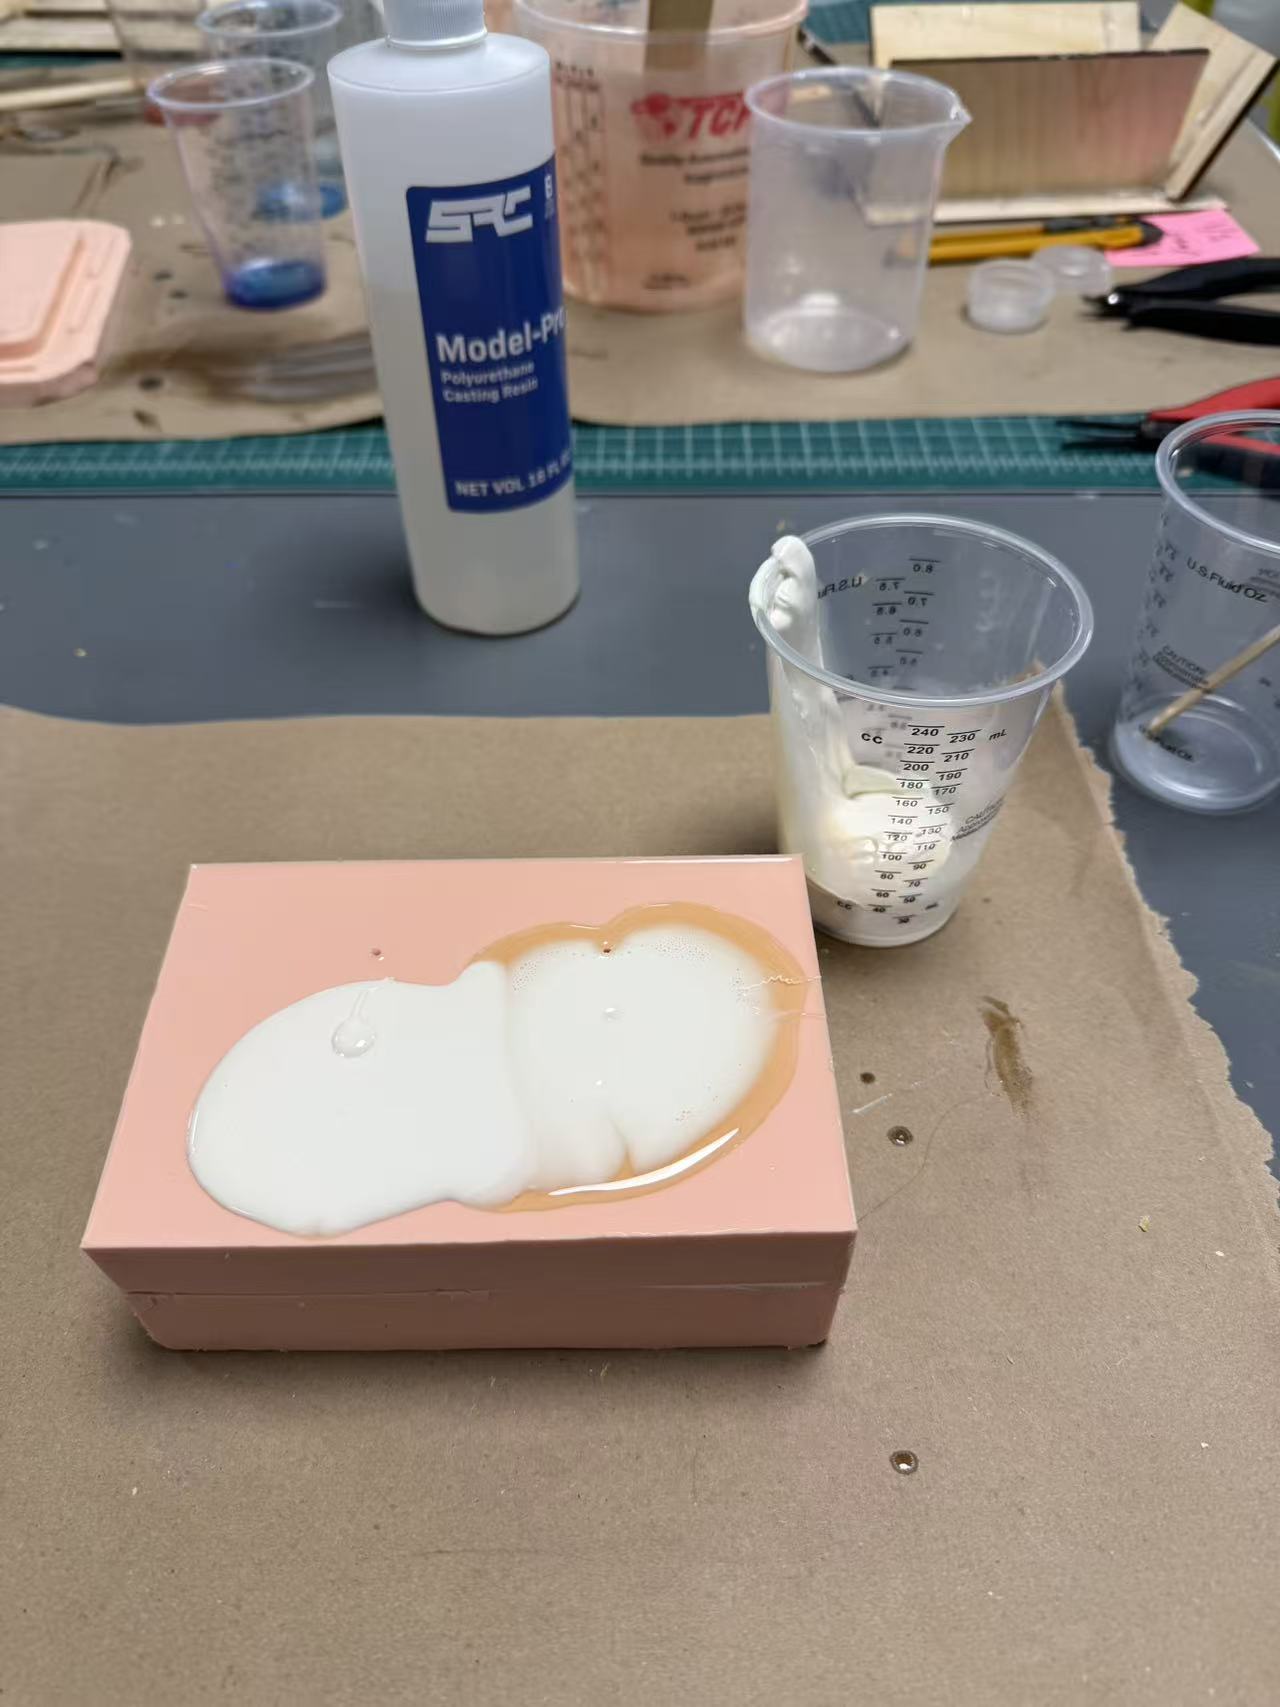
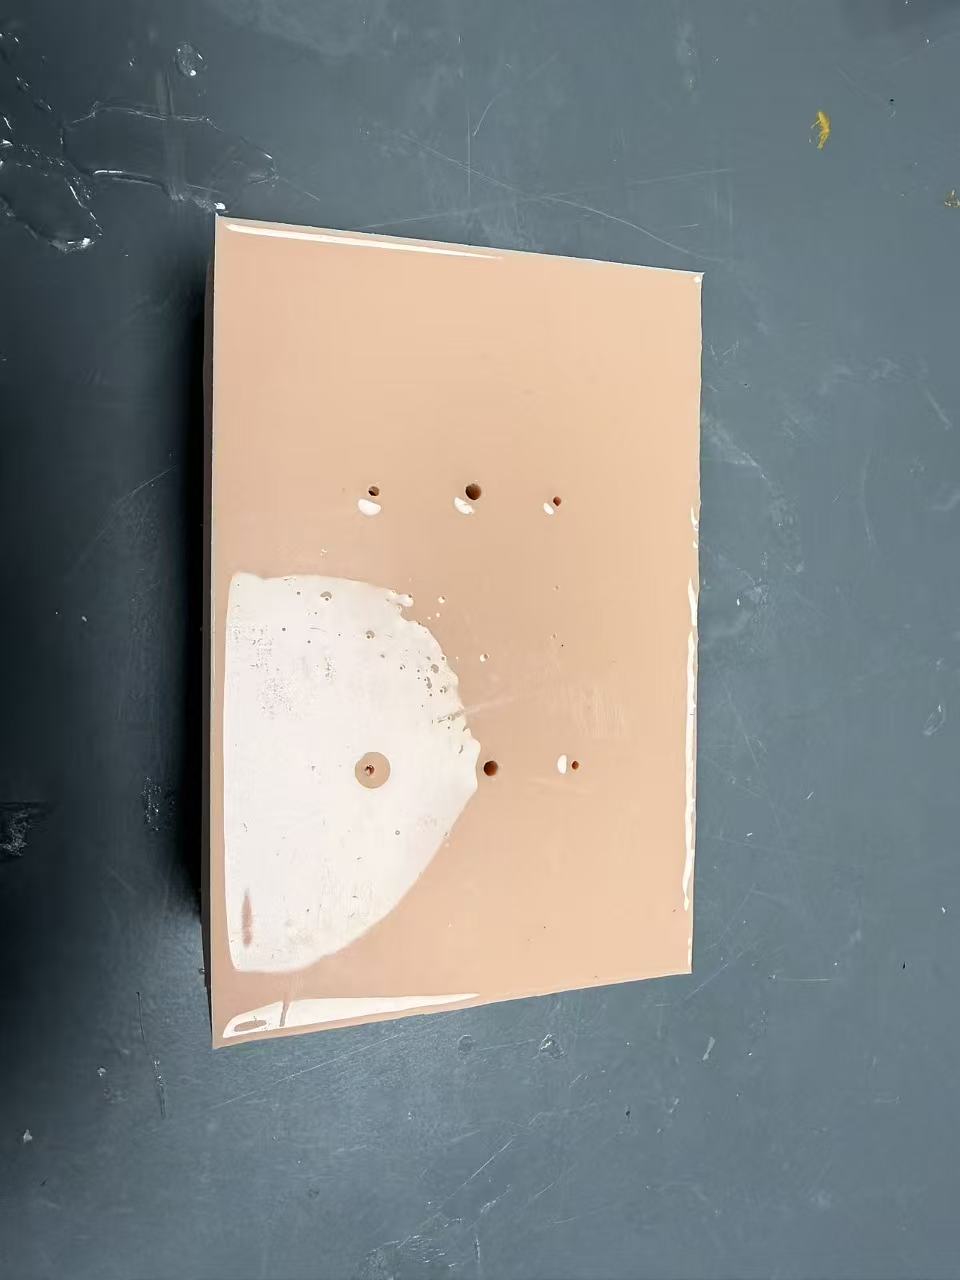
Second problem: the convex lip. Surface tension makes the silicone around vent holes slightly raised — a tiny convex rim. Resin couldn't get past it; almost none entered the mold at all. What did make it in wasn't nearly enough to fill the cavity.
第二个问题:凸起的边沿。 表面张力使通气孔周围的硅胶略微隆起——形成一个微小的凸边。树脂无法越过,几乎没有进入模具。即使进去的那一点点也远不够填满腔体。
Second cast — fix and success第二次浇铸——修正与成功
The fix. Kevin's solution: carve funnel-shaped channels leading into each opening so the resin has somewhere to gather and drain in, instead of pooling on the raised lip. I had thought of this before the first pour — and didn't do it. Lesson learned.
改进。 Kevin的解决方案:在每个开口处刻出漏斗形引导槽,让树脂有地方汇聚流入,而不是堆在凸起的边沿上。第一次浇铸前我其实想到过这一点——但没有去做。吃一堑,长一智。
Second attempt: success. With channels carved and mixing time kept short, the resin flowed in and filled the cavity cleanly.
第二次尝试:成功。 刻好引导槽,控制好搅拌时间,树脂顺利流入并干净地填满了腔体。
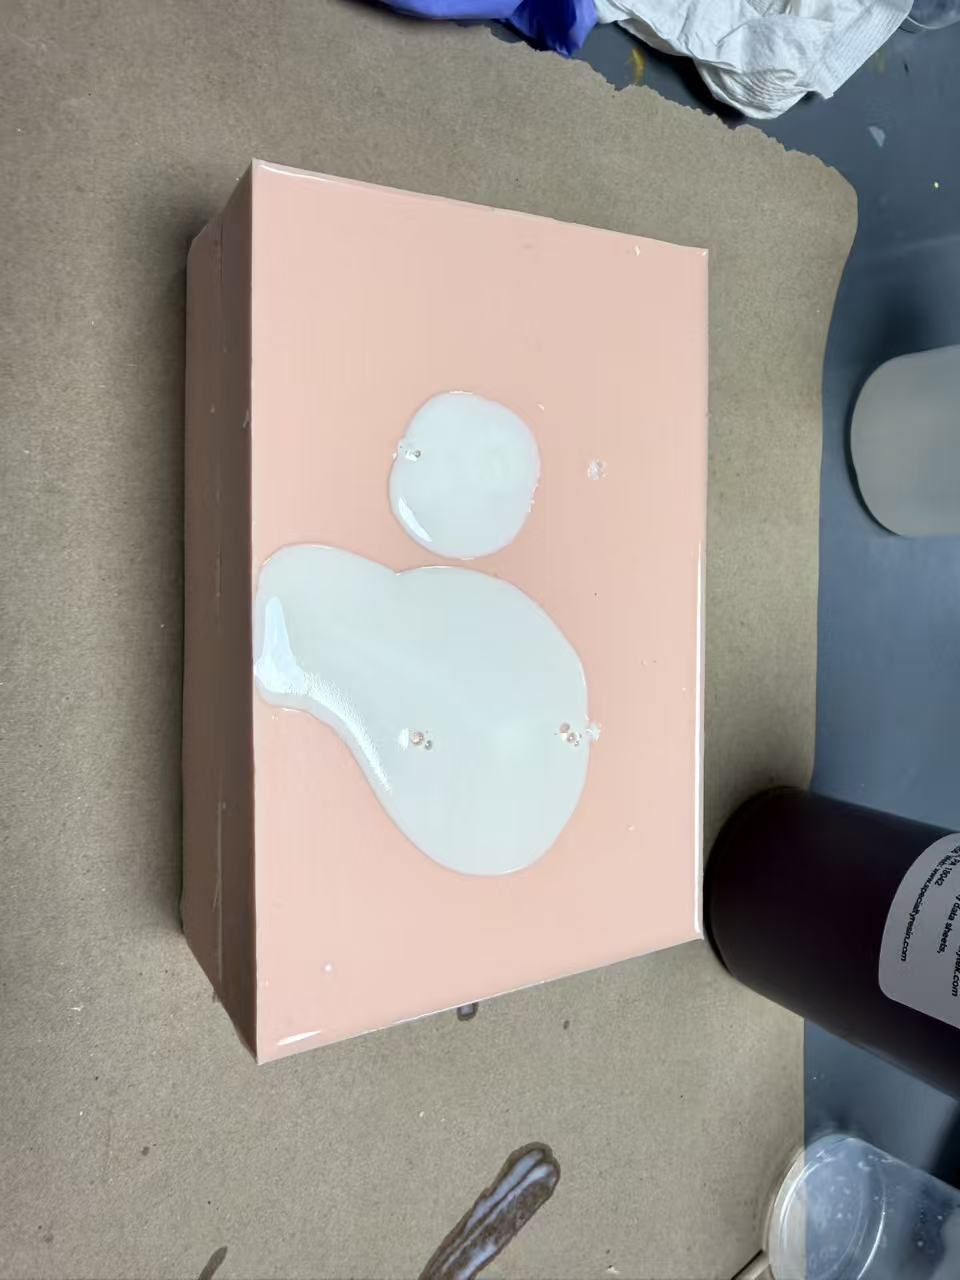
This time I didn't overmix. 2–3 minutes sounds short, but it was enough to act. After filling, I gently squeezed the mold — a tiny thread of resin overflowed from the vent, which meant the cavity was full. Ten minutes later, I demolded a successful cast.
这次没有过度搅拌。2–3分钟听起来很短,但足够操作了。充填后,我轻轻挤压模具——一细丝树脂从通气孔溢出,说明腔体已满。十分钟后,我成功脱模了一个完整的铸件。
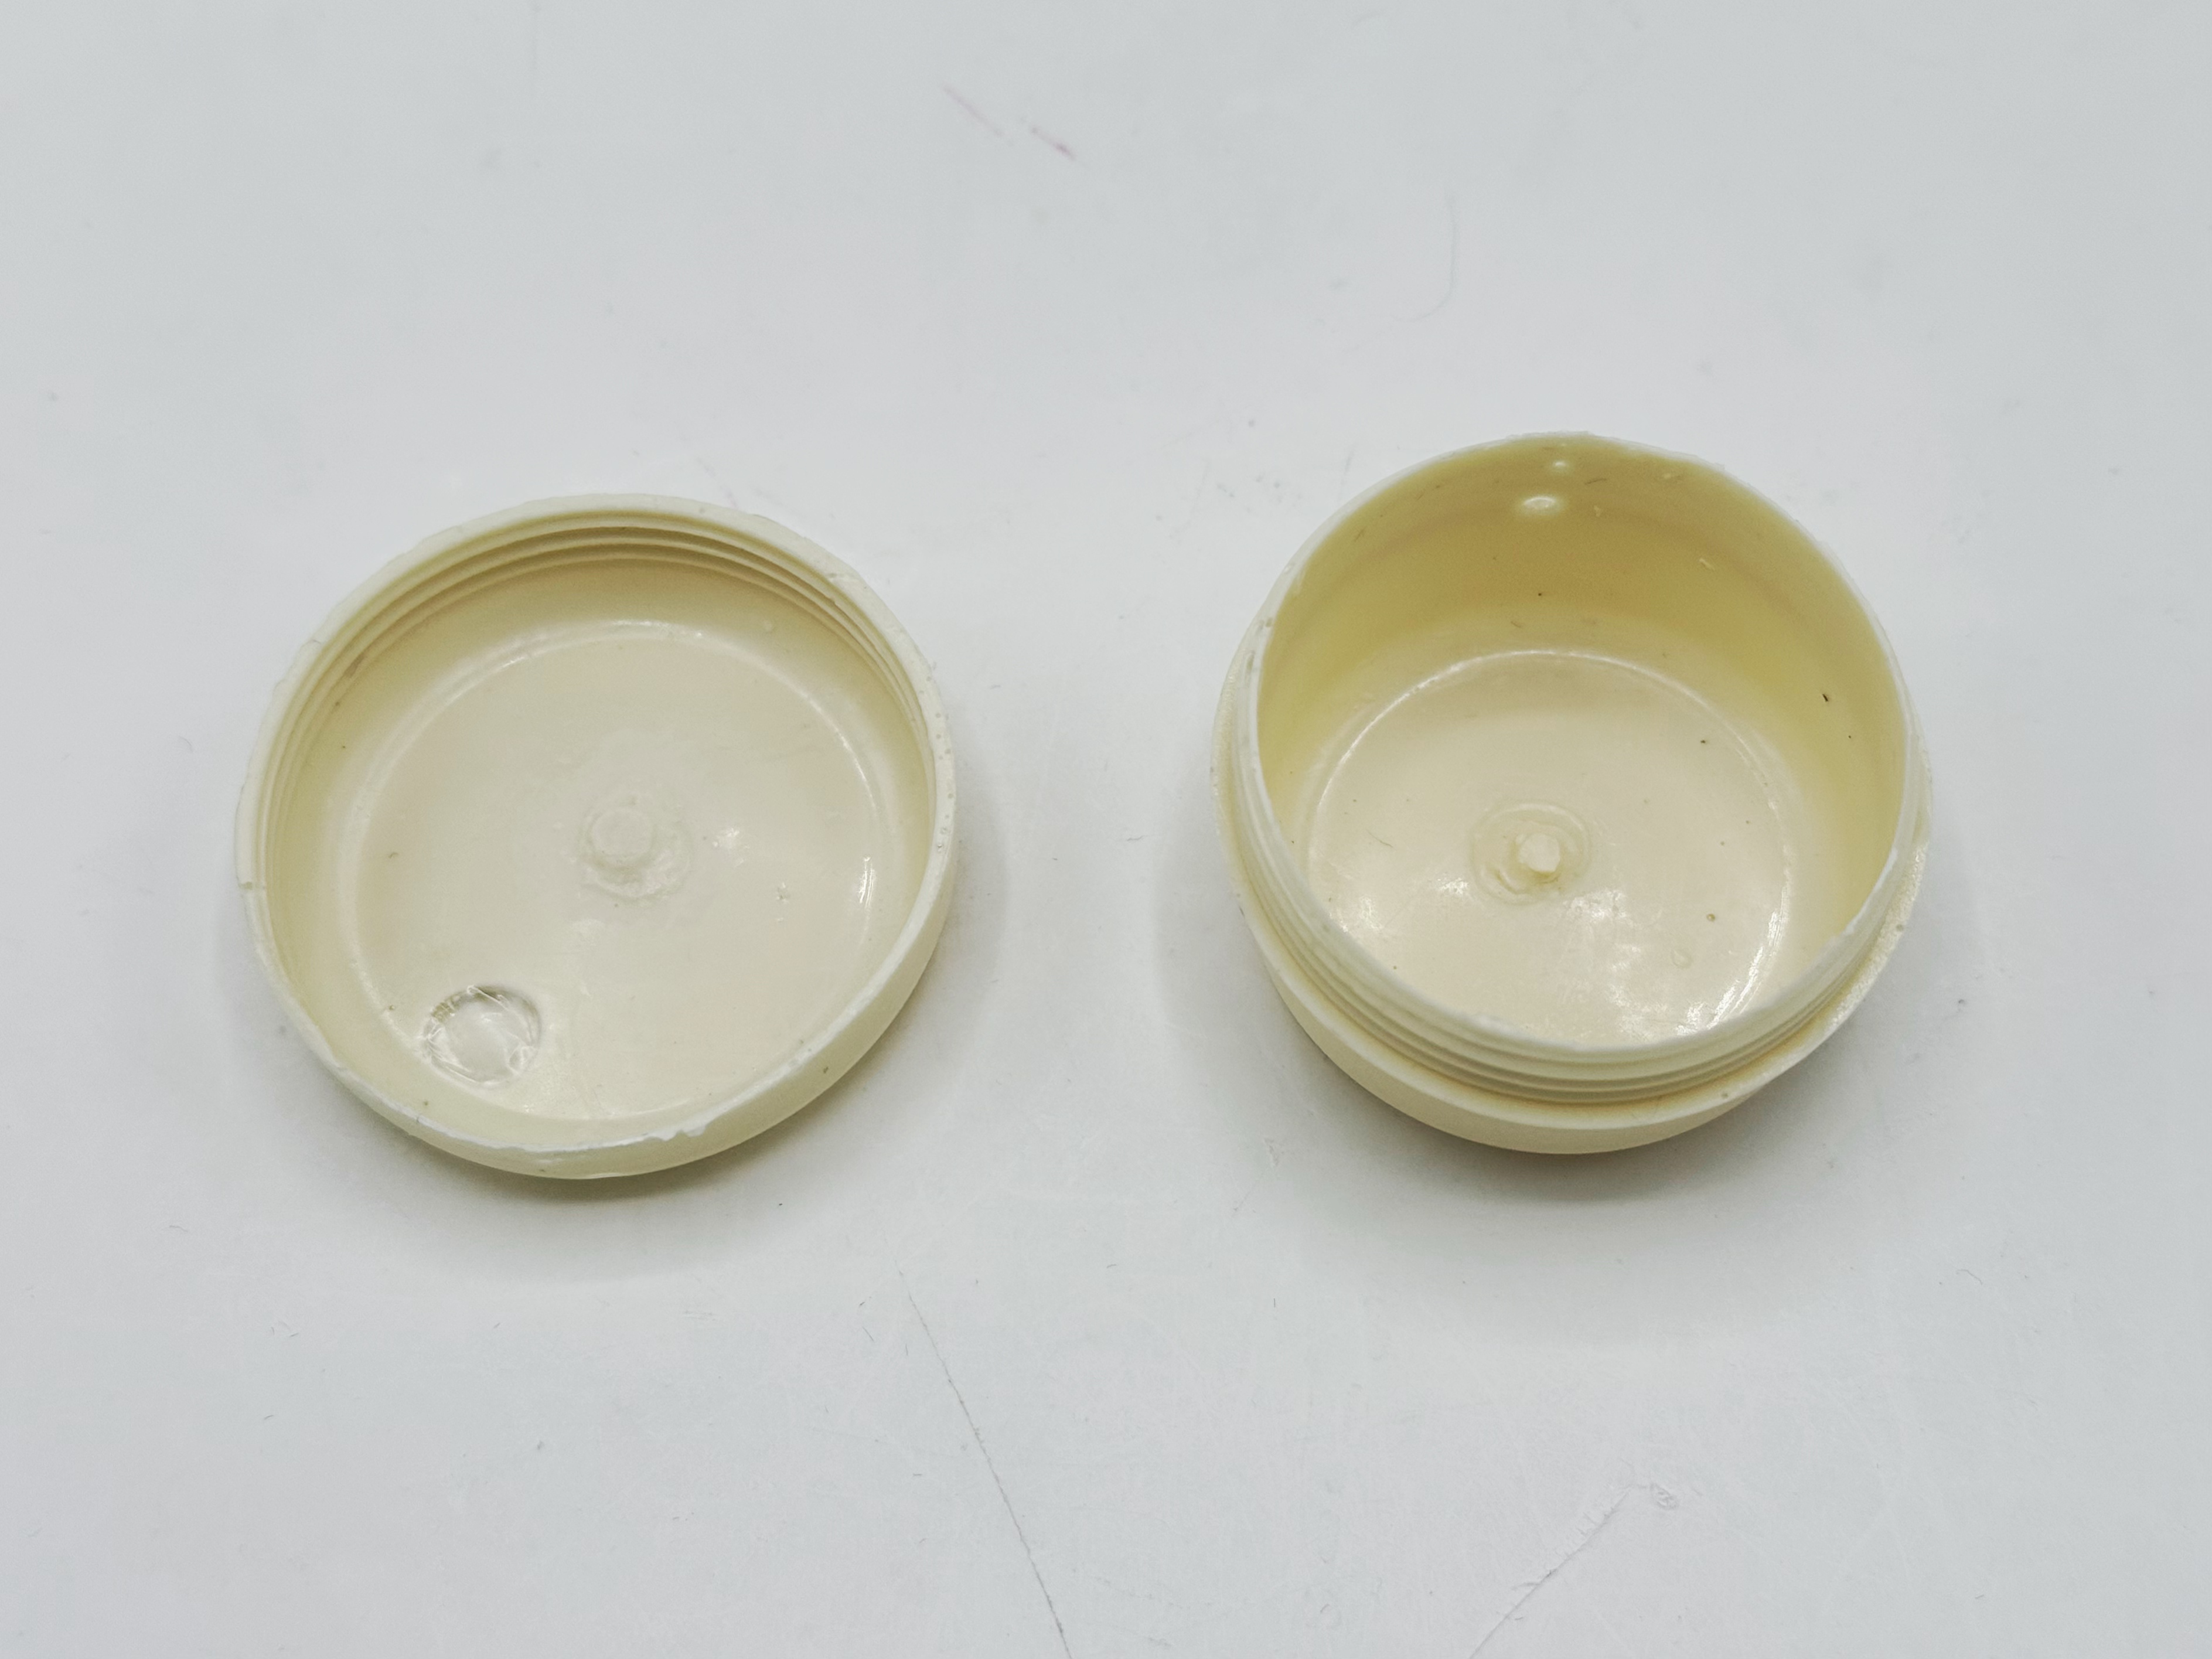
After trimming the sprues, the threads came out crisp — I could actually screw the lid onto the container and it closed. The walls are slightly thinner than the original, and the threads engage but don't lock firmly.
修剪浇口后,螺纹清晰可见——我实际上可以把盖子拧上去,完全合拢。壁厚比原件略薄,螺纹能咬合但不够紧固。
Why undersized? Silicone shrinks slightly when curing — typically 0.1–1% depending on the type. The bottom mold has a concave cavity (凹): when the silicone contracts inward, that cavity gets smaller, so the cast outer walls come out marginally thinner than the original. The top mold has more solid silicone mass surrounding the lid geometry (凸): its shrinkage is distributed through that bulk, with less effect on the actual cavity dimensions. Small overall, but noticeable at thread scale.
为什么偏小? 硅胶在固化时会略微收缩——通常收缩0.1–1%,取决于硅胶类型。底部模具有一个凹形腔体(凹):当硅胶向内收缩时,腔体变小,铸件外壁就会比原件略薄。顶部模具周围的硅胶较为实心(凸):其收缩分布在整个体积中,对腔体尺寸的实际影响较小。整体来说影响很小,但在螺纹精度上就能察觉到。
One visible issue: bubbles. Kevin mentioned this is hard to avoid with polyurethane — the 2–3 minute window leaves no time for vacuum degassing. There are more specialized machines that mix under vacuum and inject directly into the mold, but that's industrial-grade equipment GIX doesn't have. Going forward I might try injecting epoxy through a syringe, casting inside the vacuum chamber, or something else to revisit this mold.
一个可见的问题:气泡。 Kevin提到这在聚氨酯中很难避免——2–3分钟的操作窗口完全没有时间进行真空脱气。有专门的设备可以在真空下混合并直接注射到模具中,但那是GIX没有的工业级设备。未来我可能会尝试用注射器注入环氧树脂、在真空箱内浇铸,或者其他方式来重新挑战这个模具。
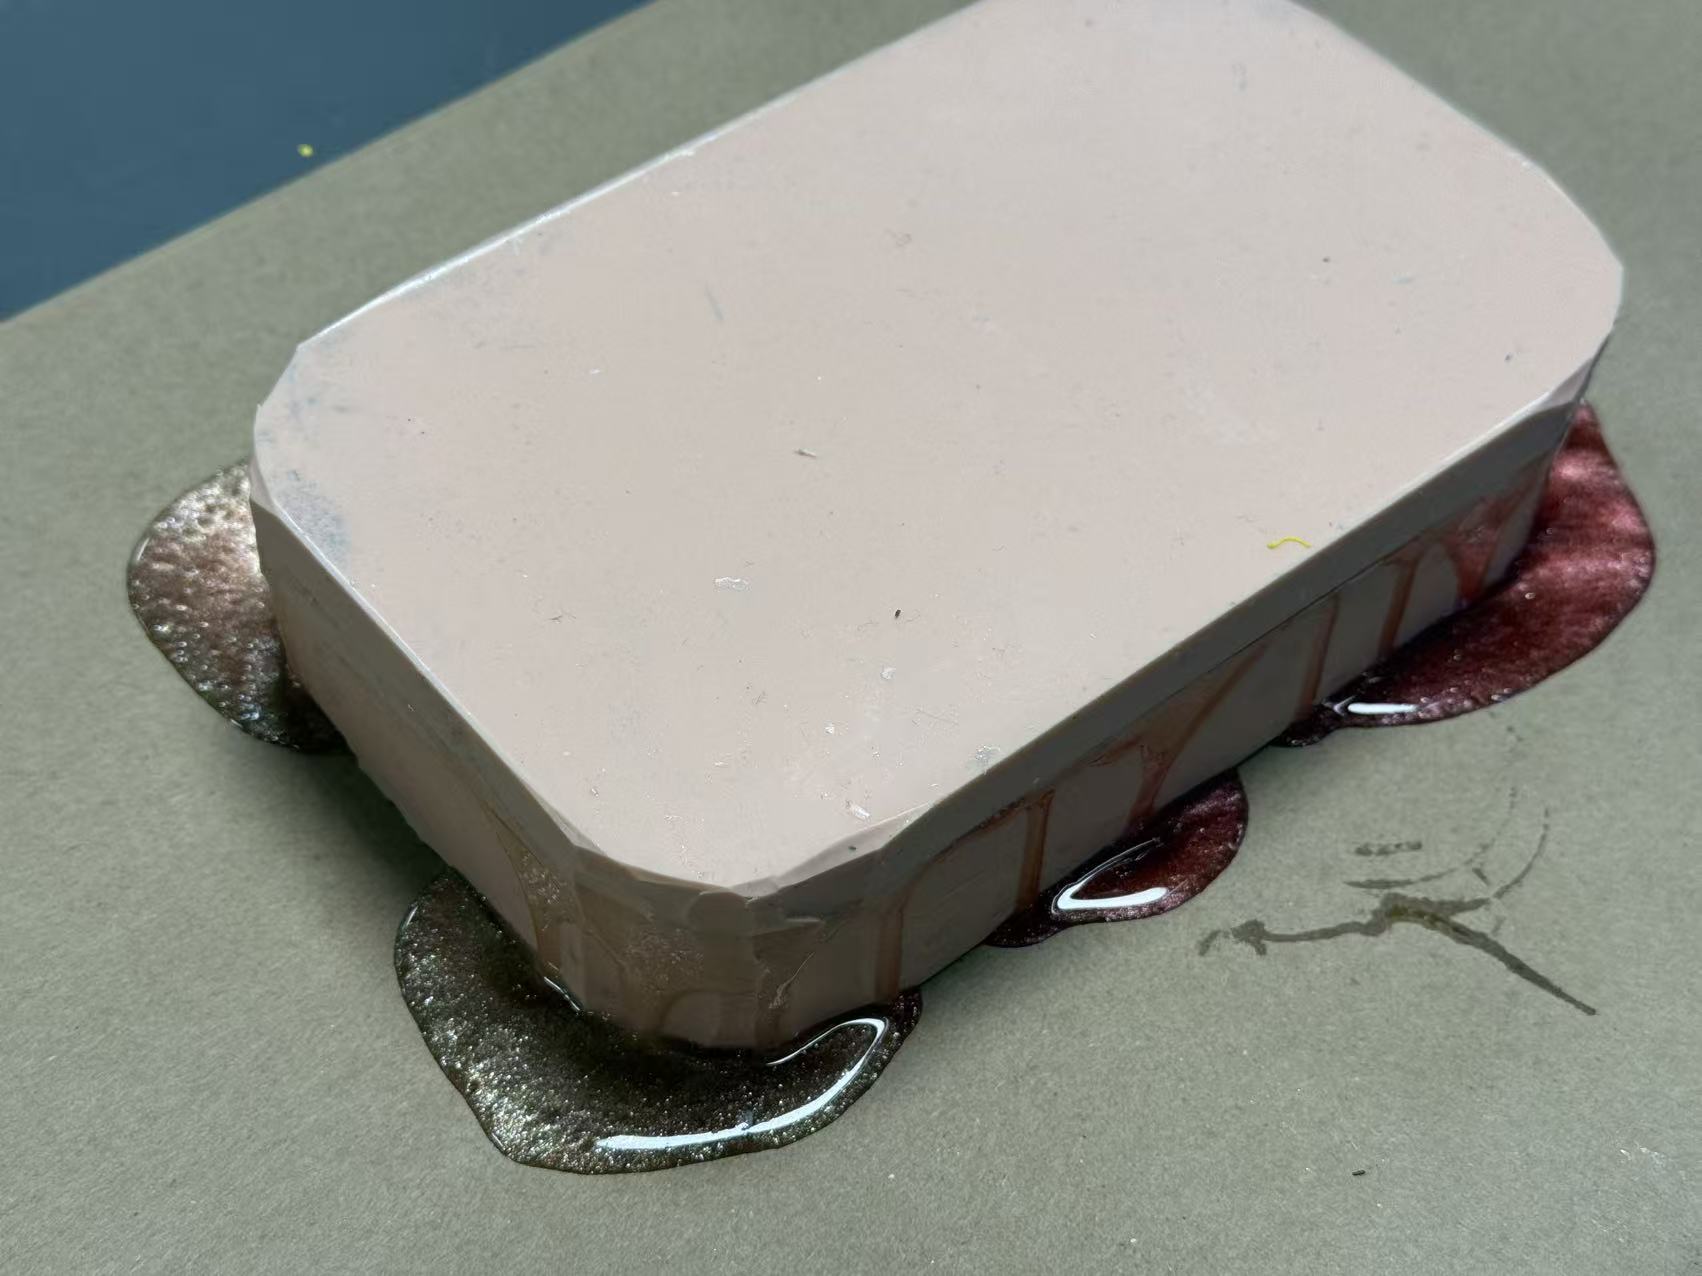
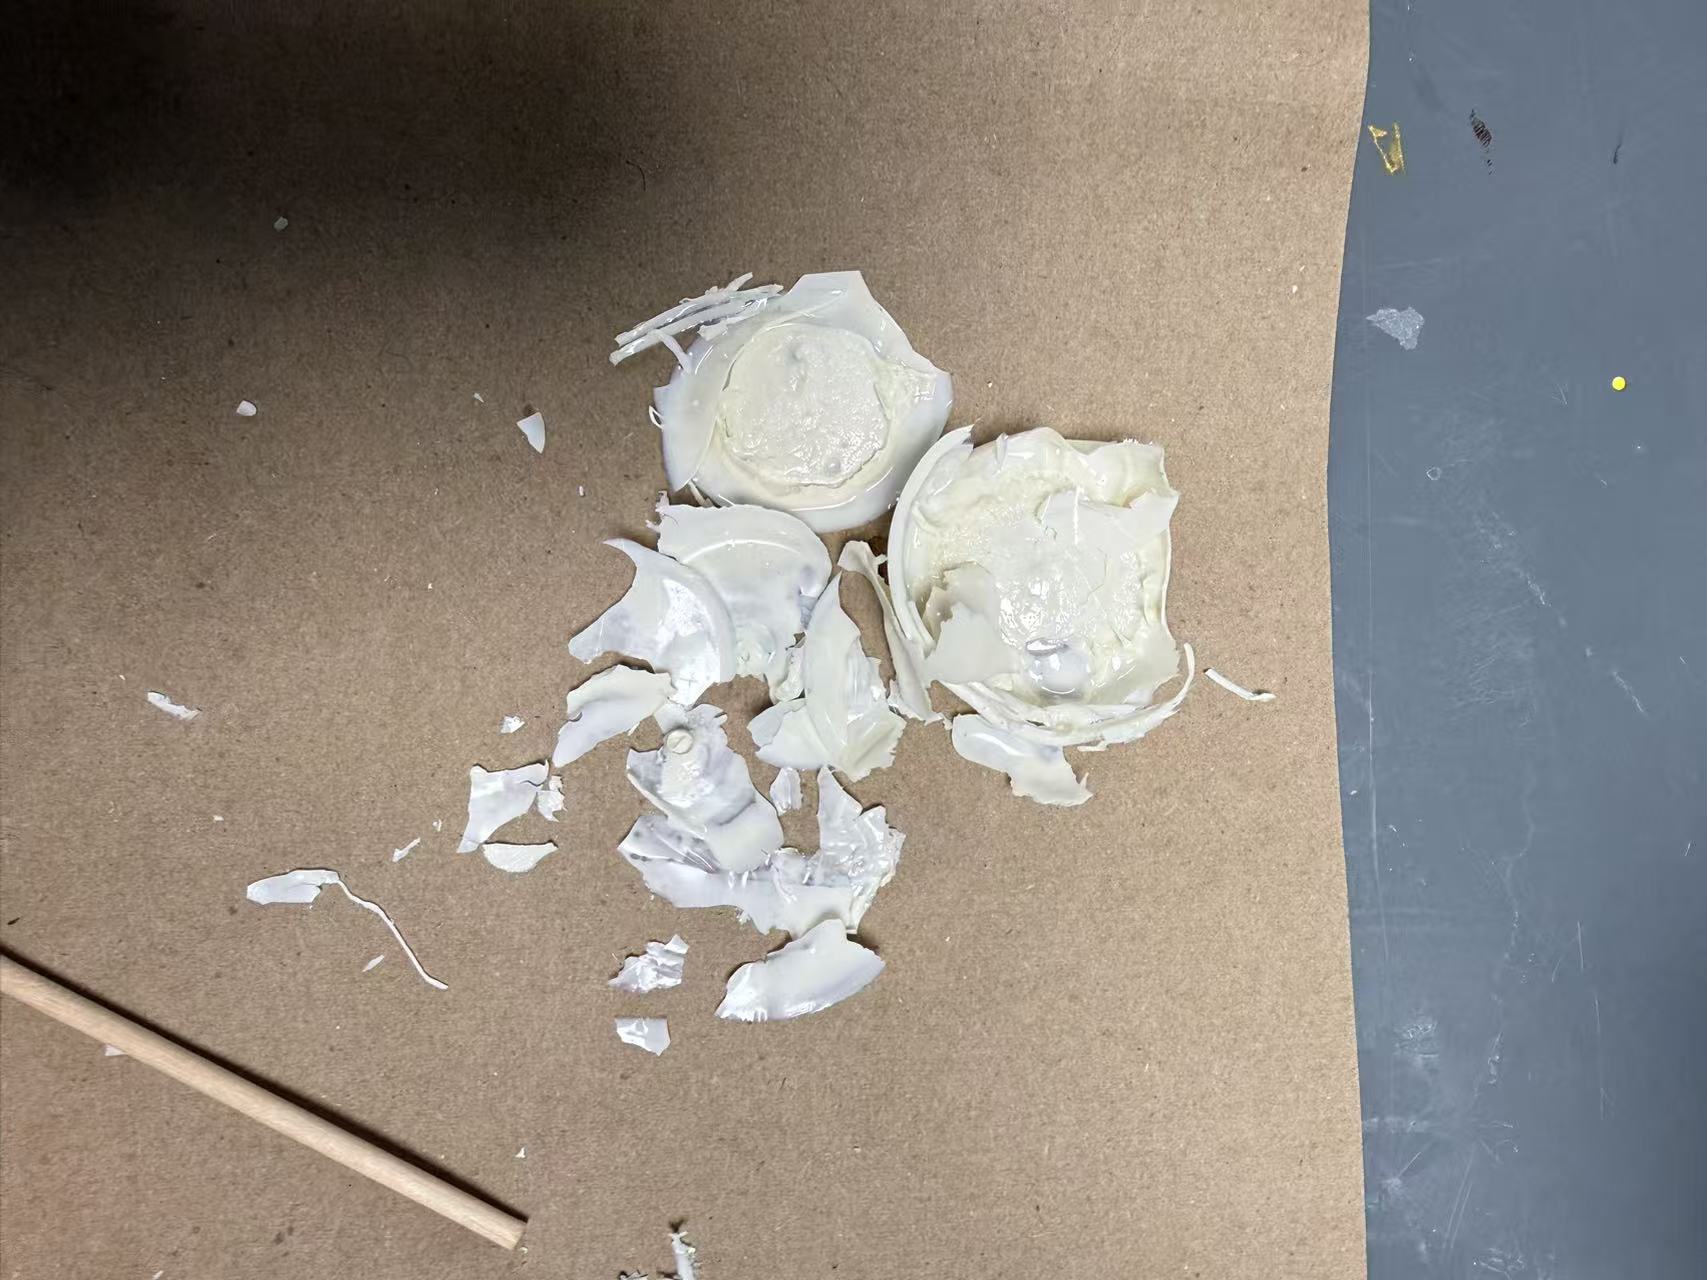
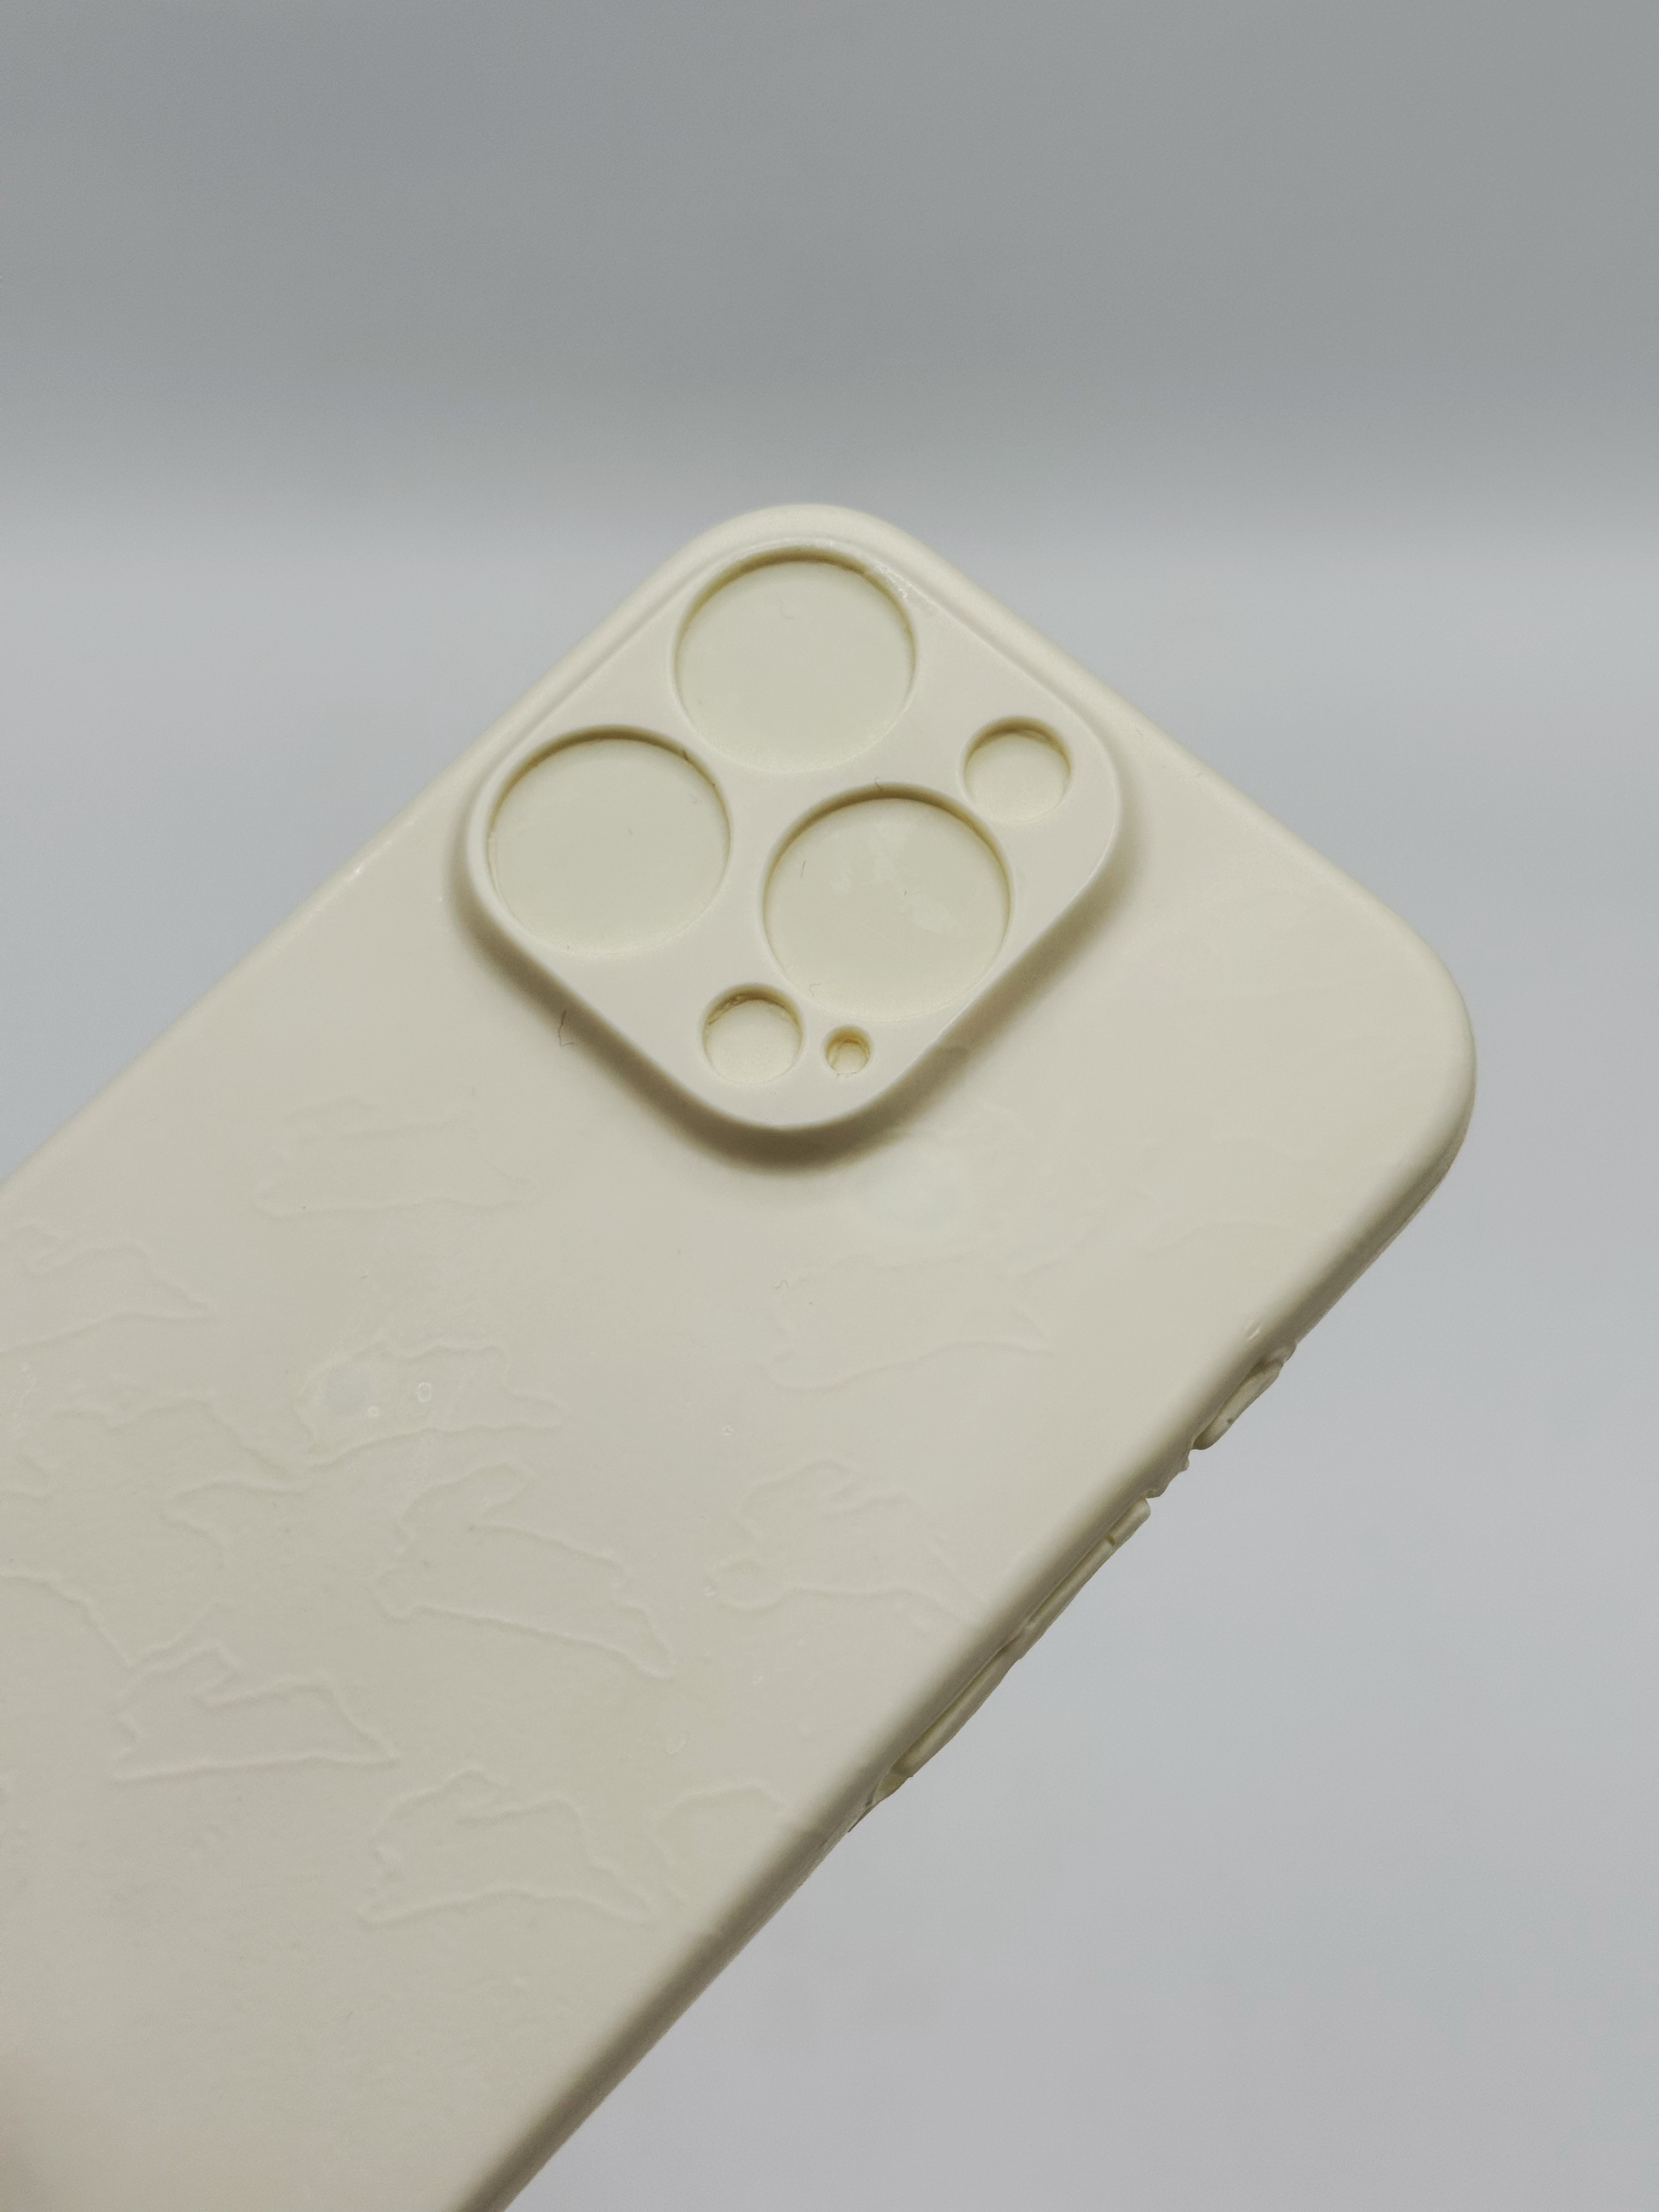
Bonus: leftover resin. I poured the remaining polyurethane into the idle phone case mold. Demolded it a bit too early — one edge hadn't set, stuck to itself. Still mostly fine.
附赠:剩余树脂。 我把剩下的聚氨酯倒进了闲置的手机壳模具。脱模时间稍微早了点——一个边缘还没完全固化,粘连在一起了。但基本上还是完好的。
The feel is noticeably different from the epoxy phone cases: harder, more brittle, almost like ivory. For these specific products that observation is correct — rigid fast-cure polyurethane (stiff and opaque by design) versus a flexible art-casting epoxy formulated for clarity and some give. Worth noting: this is not a general material rule. Engineering epoxies are often far harder and more brittle than structural polyurethanes, and polyurethane ranges from soft foam to rigid plastic depending on formulation. It's product-specific, not material-type-specific.
手感与环氧树脂手机壳明显不同:更硬、更脆,接近象牙质感。对于这两款具体产品来说,这一观察是准确的——硬质快速固化聚氨酯(设计上就是刚性不透明的)对比为透明度和一定弹性设计的艺术级浇铸环氧树脂。值得注意的是,这并非材料类型的普遍规律。工程用环氧树脂往往比结构用聚氨酯硬得多、脆得多,而聚氨酯的范围从软质泡沫到硬质塑料都有,完全取决于配方。这是产品特性,而非材料类型特性。
Part C第 C 部分
Pressure Pot — Revisiting the Container压力罐浇铸——重试容器模具
After the polyurethane success, the same mold got a second run — this time with standard clear epoxy resin, inside a pressure pot. The goal: see whether pressure could eliminate the bubble problem that polyurethane's short work time makes unavoidable.
聚氨酯成功之后,同一个模具又跑了第二次——这次换成普通透明环氧树脂,放进压力罐里浇铸。目标:看看加压能不能解决聚氨酯因操作时间太短而没法处理的气泡问题。
Clear epoxy under pressure透明环氧树脂加压浇铸
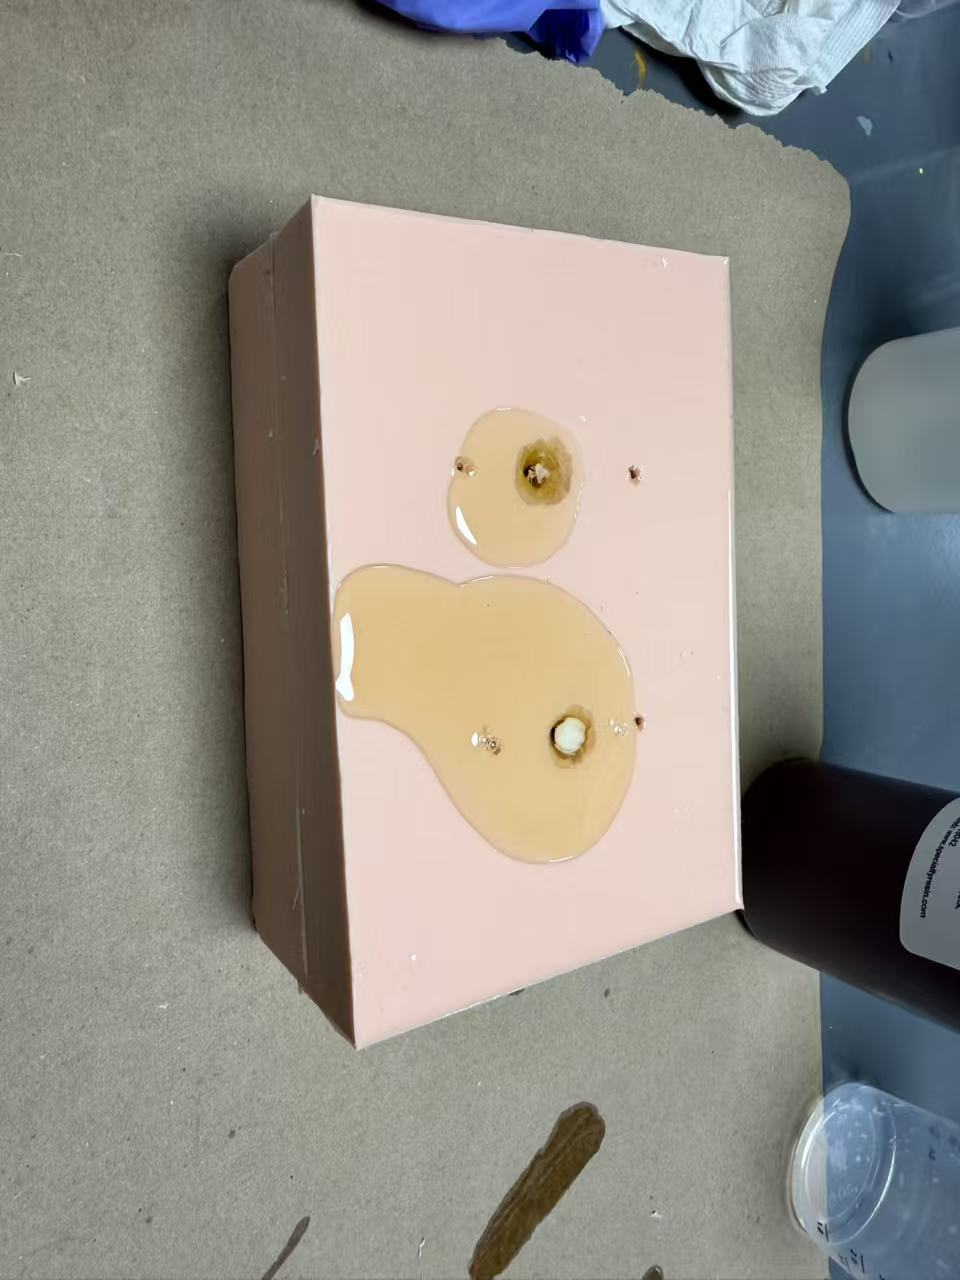
Same mold, same sprue — but epoxy this time. Epoxy is more viscous than polyurethane, but its much longer work time (15–30 minutes) means there's actually time to pour carefully and make sure everything fills. After pouring through the sprue, the mold goes straight into the pressure pot.
同一个模具,同一个浇口——但这次用的是环氧树脂。环氧树脂比聚氨酯粘稠,不过它的操作时间长得多(15–30分钟),足够仔细地倒入并确保填满。浇铸完成后,把模具直接放进压力罐。
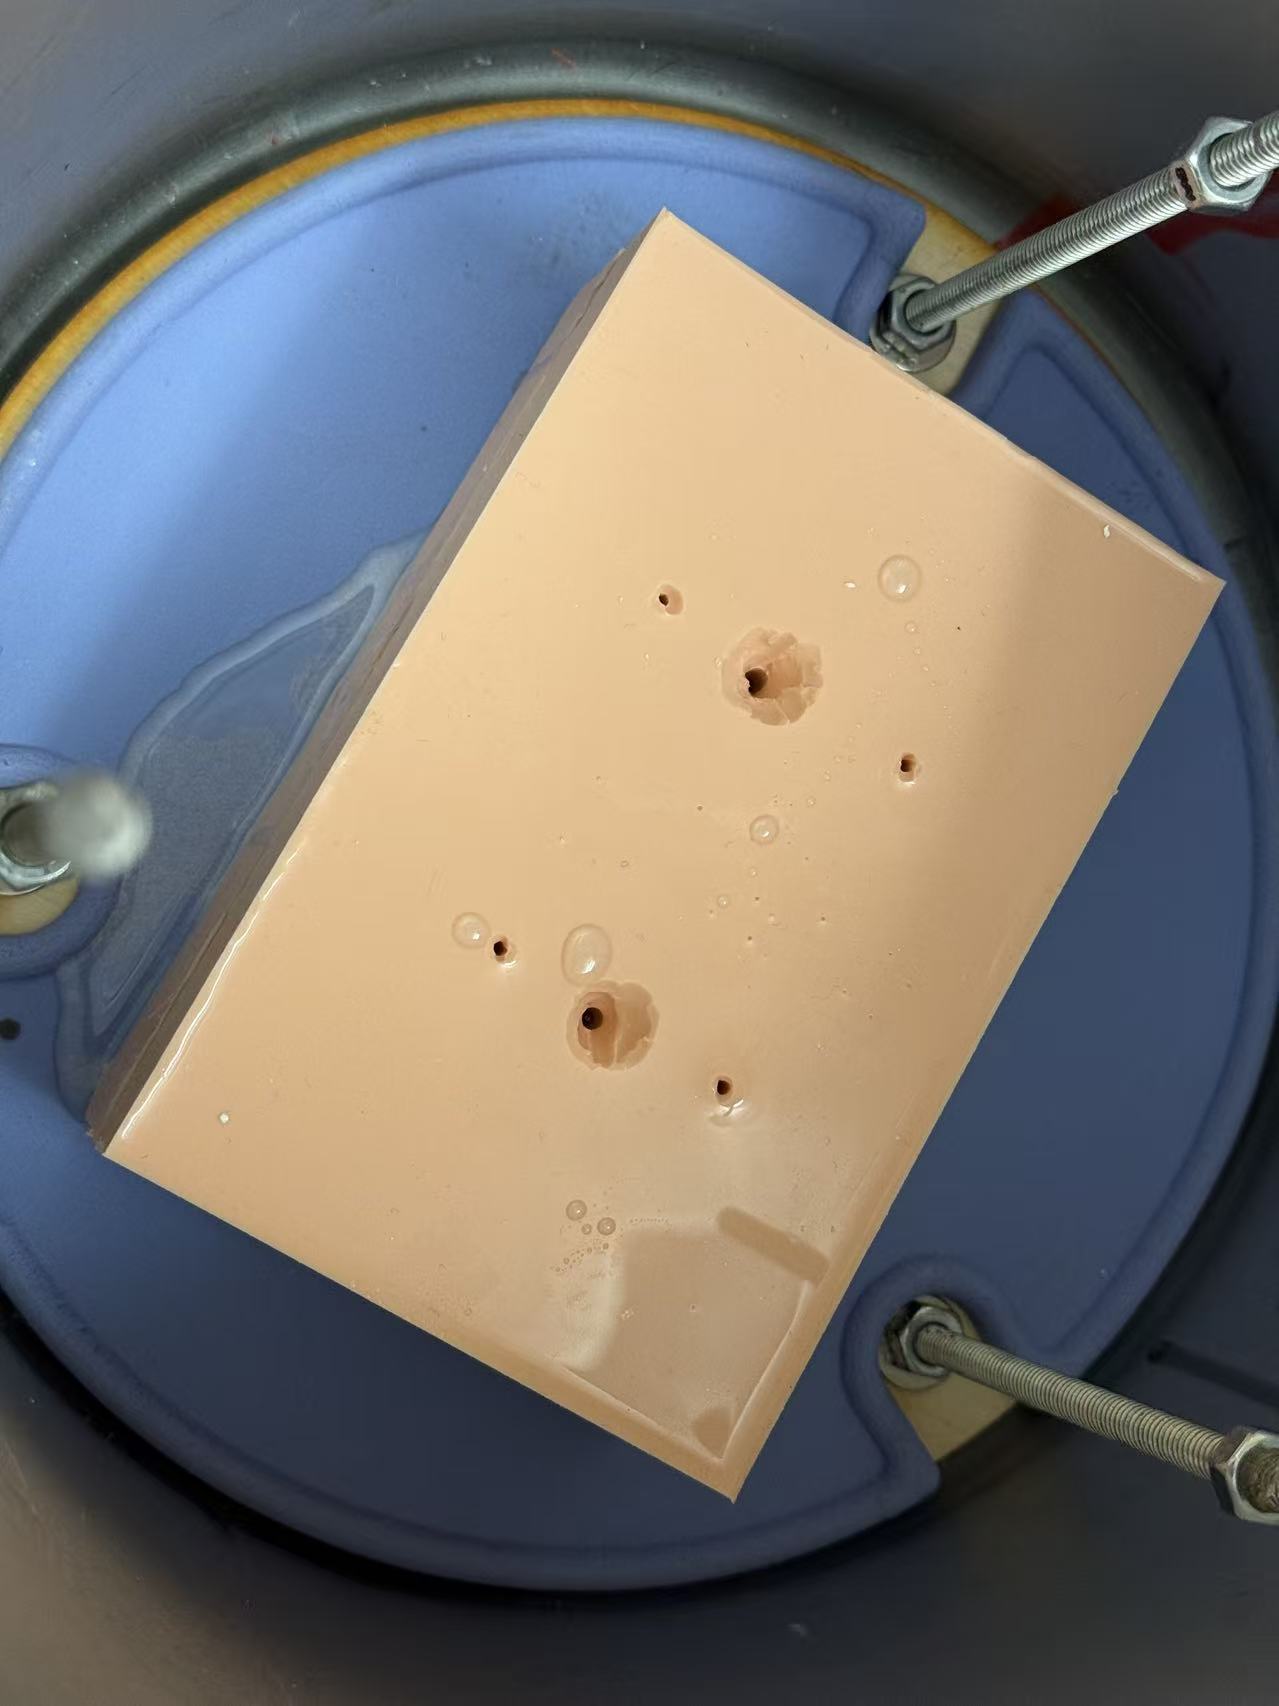
How it works. Once sealed, air is pumped in to raise the internal pressure — typically 40–60 PSI. Under that pressure, any air bubbles trapped in the resin are compressed down to a size invisible to the naked eye. They don't disappear — they're still there — but they're permanently locked in at that microscopic scale when the resin cures. The result looks completely clear.
原理。 盖上盖子后,向罐内打气加压——通常约40–60 PSI。在这个压力下,树脂内的气泡被压缩到肉眼无法看见的大小。气泡并没有消失——它们还在——只是在树脂固化时被永久封存在这个微小的尺度里。成品看起来就是完全透明的。
This is the opposite approach from vacuum degassing: a vacuum chamber removes bubbles by expanding them until they pop and escape before the resin cures; a pressure pot hides them by compressing them until they no longer matter. Both work — pressure pots tend to be more forgiving because timing is less critical.
这和真空脱气的思路正好相反:真空箱是通过让气泡膨胀、破裂、逸出来消除气泡;压力罐则是把气泡压缩到无关紧要的大小来隐藏它们。两者都有效——压力罐通常更宽容,对时机的要求没那么苛刻。
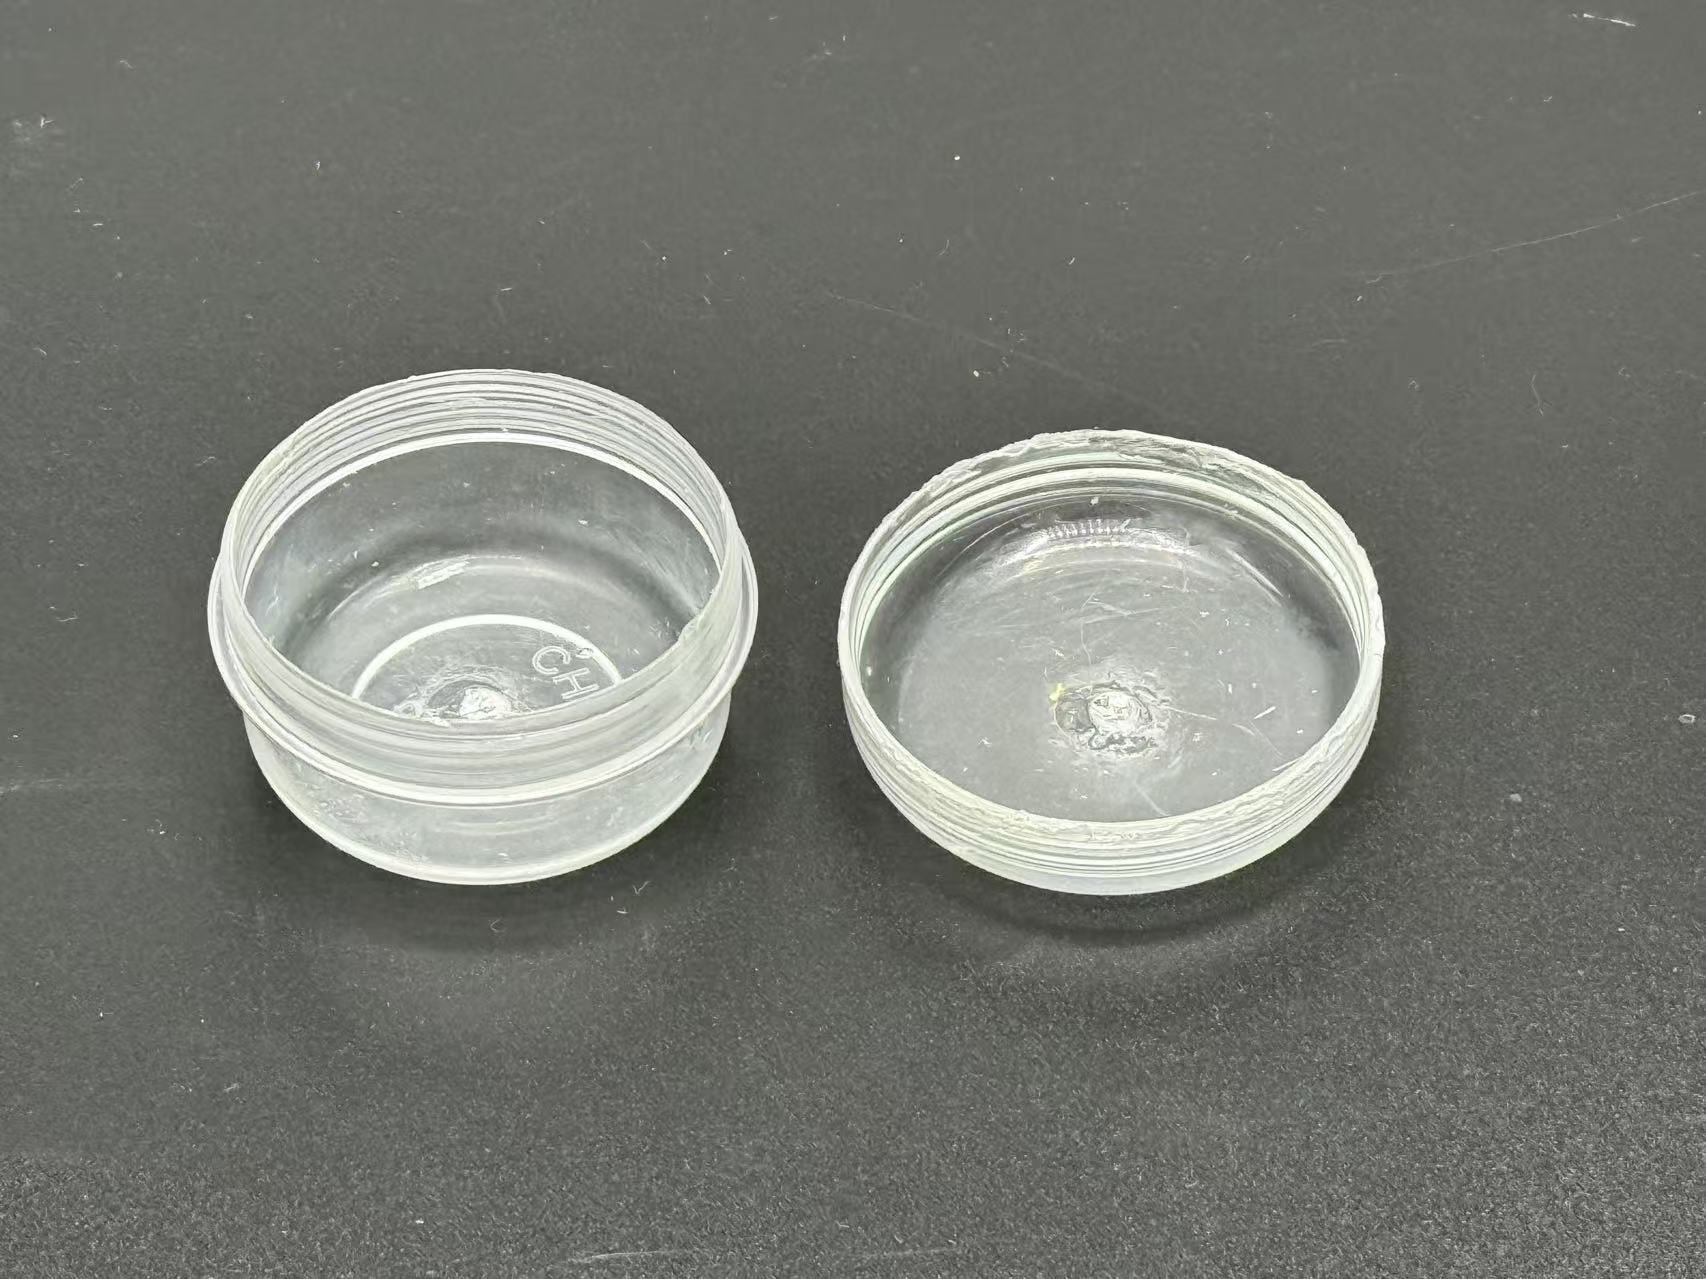
The result. Exceptional. Crystal clear, every thread and surface detail captured — almost indistinguishable from the original. A complete contrast to the polyurethane cast from the same mold.
结果。 出乎意料地好。完全透明,每一条螺纹、每一处细节都清晰还原——和原件几乎一模一样,神了。和之前聚氨酯铸件放在一起,简直不像同一个模具出来的东西。
03 Knowledge Points知识点
Things to remember值得记住的事
Close the mold from one side, not straight down从一侧合模,而非垂直向下
Starting from one edge and rolling the mold closed pushes air out ahead of the resin. Pressing straight down traps air in the middle and creates bubbles. This one change made the biggest difference between round 2 and round 3.
从一侧边缘开始、向前滚合,会把空气推到树脂前方排出。垂直向下合模会把空气困在中间, 产生气泡。这一个改变,造就了第二轮和第三轮之间最大的区别。
Polyurethane: prepare everything before you mix聚氨酯:混合前把一切准备好
Work time is 2–3 minutes. Have the mold in position, craft paper down, and channels carved before mixing A and B. Don't overmix — it speeds up the reaction and the resin heats up fast, leaving nothing to pour with.
操作时间只有2–3分钟。在混合A和B之前,模具就位,铺好打底纸,刻好引导槽。 不要过度搅拌——这会加速反应,树脂迅速升温,导致还没倒入就硬化了。
Carve funnel channels at the sprue and vents在浇口和通气孔处刻出漏斗引导槽
Surface tension makes silicone vent openings slightly convex — resin won't flow past the raised lip on its own. Carve a shallow funnel into the silicone at each opening so resin has somewhere to collect and drain in.
表面张力会使硅胶通气孔开口略微向上隆起——树脂无法自行越过凸起的边沿。 在每个开口处向硅胶内刻出浅漏斗,给树脂一个汇聚和流入的通道。
Pressure pot vs. vacuum chamber — two different strategies压力罐 vs. 真空箱——两种不同的思路
A vacuum chamber removes bubbles: reduced pressure makes them expand, rise, and pop before the resin cures. A pressure pot hides them: elevated pressure (typically 40–60 PSI) compresses bubbles until they're too small to see, then holds that pressure while the resin cures around them. Both work well; pressure pots are generally more forgiving because timing isn't as tight as vacuum degassing.
真空箱的逻辑是消除气泡:降低气压让气泡膨胀、上升、破裂,在树脂固化前逸出。 压力罐的逻辑是隐藏气泡:升高气压(通常40–60 PSI)把气泡压缩到肉眼看不见的大小, 在树脂固化过程中保持这个压力。两种方法都有效;压力罐通常更宽容,因为对操作时机的要求没那么苛刻。
Superglue + activator for attaching thin vent cores瞬间胶+活化剂用于粘接细小通气芯
Superglue alone is slow on smooth plastic. Activator makes it bond in seconds. Don't spray the activator directly — dab it on with a small brush to keep it exactly where you want it. Practice on scrap first.
瞬间胶单独使用在光滑塑料上固化很慢。活化剂能让它数秒内粘牢。不要直接喷活化剂—— 用小刷子蘸取点涂,确保只接触目标位置。先在废料上练习一次。
04 Notes & Reflection笔记与反思
What I took away我的收获
Week 3 – 5 · Spring 2026第 3 – 5 周 · 2026年春季学期
This session covered more ground than expected. Two experiments in parallel, a new type of resin, and a mold with actual vents. A lot of firsts.
这个阶段涵盖的内容超出预期。两个并行实验、一种新树脂、一个真正带通气孔的模具。很多个第一次。
The phone case iterations went well. Round 3 basically solved the bubble problem just by changing how I close the mold. Such a small thing, such a big difference.
手机壳的迭代进展顺利。第三轮仅仅通过改变合模方式,就基本解决了气泡问题。如此小的改变,带来如此大的差异。
The ESP32 container mold was a bigger challenge. The toothpick vents were fiddly. Polyurethane resin was stressful the first time — 2–3 minutes feels very short when you're also trying to aim resin into a tiny hole. The funnel carving was obvious in hindsight. I just needed to fail once to actually do it.
ESP32容器模具是更大的挑战。牙签通气芯很难操作。第一次用聚氨酯树脂很有压力—— 2–3分钟在还要把树脂瞄准一个小孔的情况下感觉极短。漏斗刻槽事后看来显而易见。 我只是需要失败一次才会真正去做。
The pressure pot cast was the surprise of the whole quarter. Same mold, completely different result — clear epoxy under pressure came out looking almost identical to the original. It made everything before it feel like practice.
压力罐浇铸是整个季度最大的惊喜。同一个模具,结果完全不同—— 加压后的透明环氧树脂铸件和原件几乎一模一样。让前面所有的尝试都像是在热身。
- What worked: Rolling the mold closed from one edge eliminated most bubbles. The superglue + activator technique held well under the silicone pour. Polyurethane flows much better than epoxy through small openings. The pressure pot + clear epoxy combination produced the cleanest result of the whole project. 做得好的: 从一侧滚合合模消除了大部分气泡。瞬间胶+活化剂技术在硅胶浇注下表现稳定。聚氨酯流过小开口的效果远优于环氧树脂。压力罐+透明环氧树脂的组合做出了整个项目最干净的铸件。
- What I'd do differently: Calculate silicone volume properly before starting. Carve the funnel channels before the first pour, not after the first failure. Don't overmix polyurethane — once it heats up, it's done. 下次会改变的: 开始前正确计算硅胶用量。第一次浇铸前就刻好漏斗引导槽,而不是等到失败之后。不要过度搅拌聚氨酯——一旦升温就没了。
- What this taught me for the main project: Vent and sprue design is not optional for closed molds. Always test a new material with a quick trial before committing to the real thing. Fast-curing materials need a very deliberate setup step before any mixing happens. 对主项目的启示: 封闭模具的通气孔和浇口设计不是可选项。在正式使用新材料前,务必先快速试用。快速固化材料在混合之前需要非常谨慎的准备工作。
Idea — TECHIN 515 Final Model via 3D Print + Resin Casting想法——TECHIN 515 终期模型:3D打印+树脂翻模
For the TECHIN 515 group project final model, I'm thinking about combining 3D printing and resin casting: epoxy resin for transparent or translucent parts (lenses, windows, display covers), polyurethane resin for white opaque structural parts. The two-part silicone mold workflow from this quarter makes it feasible — I just need to design the molds and part geometry to be compatible with casting.
对于TECHIN 515小组作业的终期模型,我在考虑结合3D打印和树脂翻模:环氧树脂用于透明或半透明部件(镜片、窗口、显示盖),聚氨酯树脂用于白色不透明结构件。本学期学到的双拼硅胶模具工作流程让这一想法具有可行性——只需要把模具和零件几何形状设计成适合浇铸的形式。
Would be worth discussing with Kevin whether this is in scope for the final deliverable, and which resin type is the right call for each component depending on finishing, assembly, and tolerance requirements.
值得和Kevin讨论一下这是否在终期交付物的范围之内,以及根据表面处理、装配和公差要求,每个零件究竟该选哪种树脂。