01 Overview概述
The starting point起点
Before starting the main enclosure project, Kevin wanted me to do a practice run first. Pick an existing object, make a silicone mold, cast a copy. Not for a perfect result. Just to get familiar with the materials and the workflow before anything important was on the line.
在开始主要外壳项目之前,Kevin让我先做一次练习。找一个现有的物件,制作硅胶模具,浇铸一个复制品。 结果不需要完美,只是在正式开始之前,先熟悉材料和工作流程。
I picked a phone case. Kevin warned me it would be a tricky first object since it has thin walls and a bunch of cutouts. But that's exactly what made it more interesting.
我选了一个手机壳。Kevin提醒我这对第一个练习对象来说有点难——薄壁加上一堆开孔。 但正是这些特点让它更有挑战性,也更有意思。
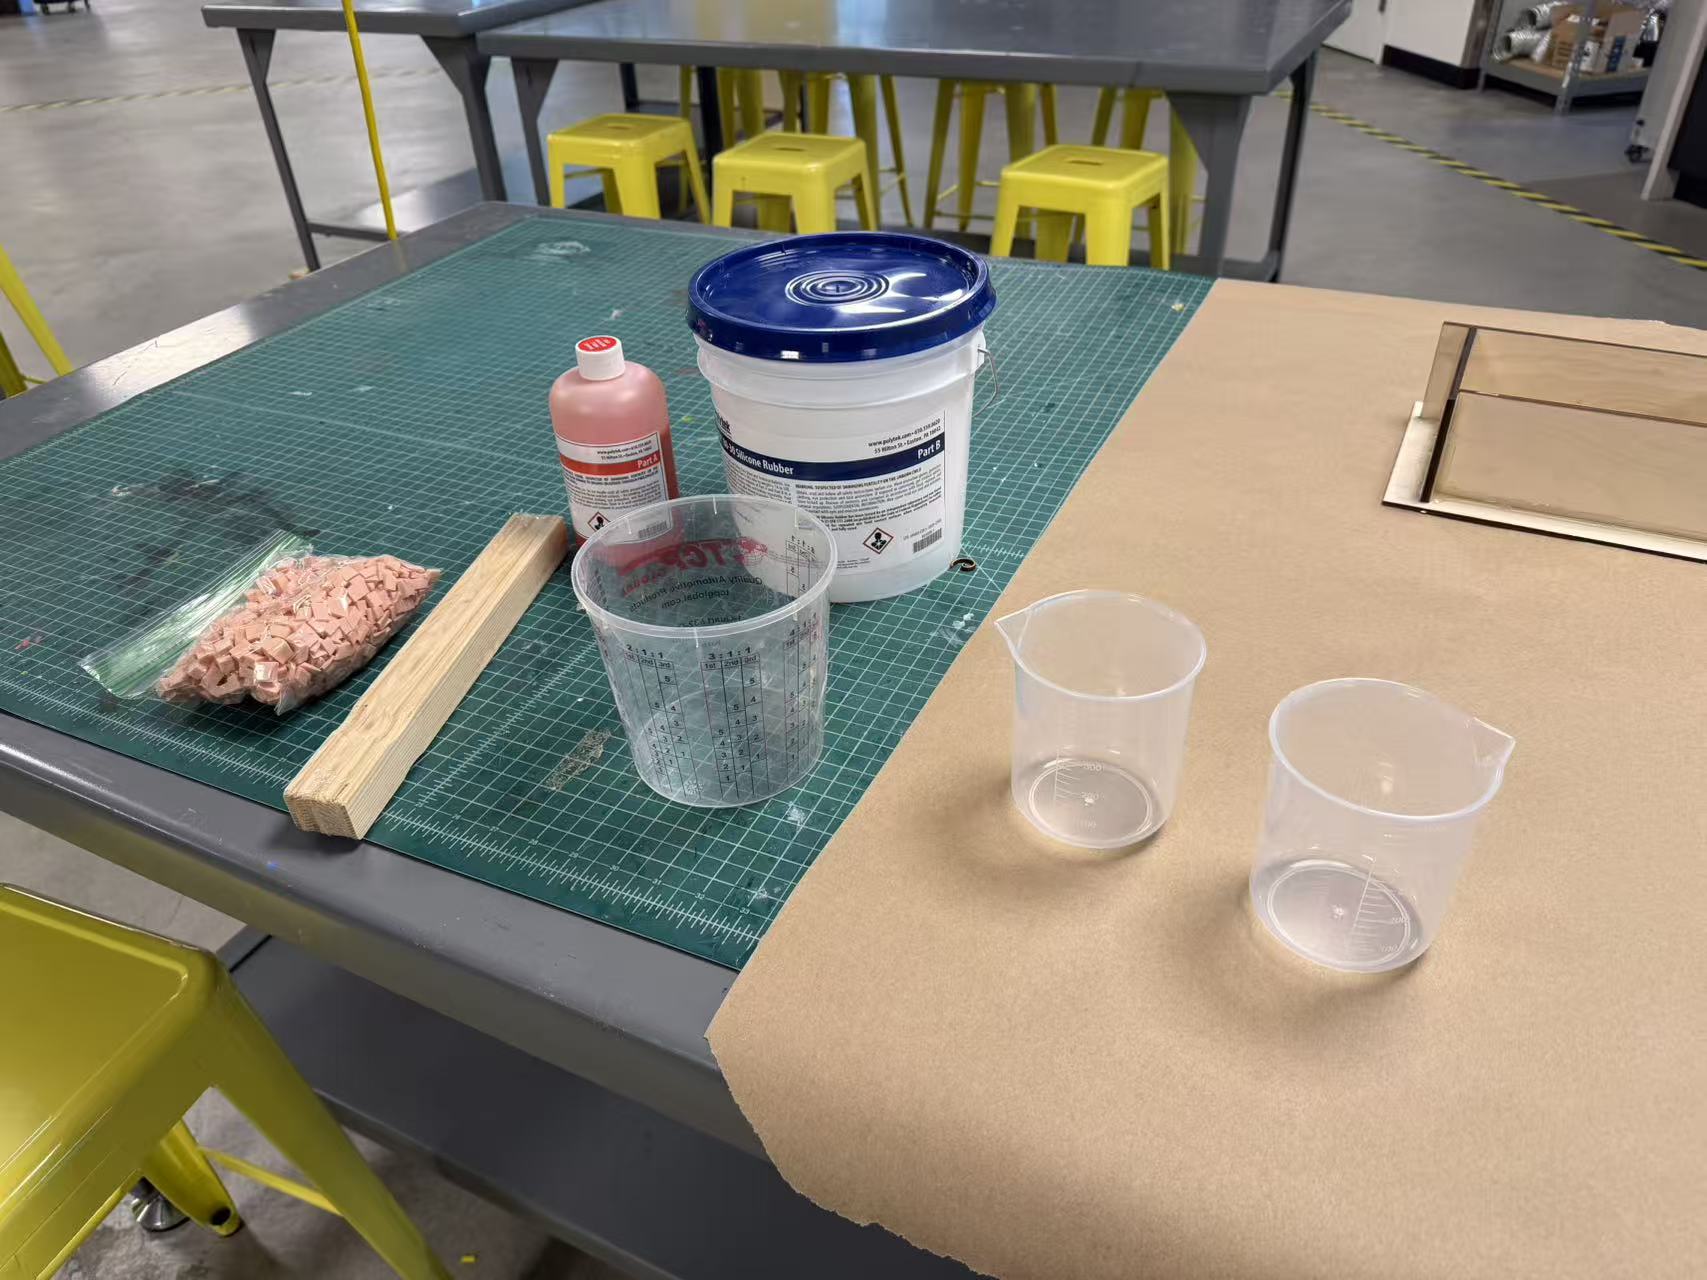
Materials Used使用材料
02 Theory理论
Pre-learning课前准备
Kevin shared some references before we started:
开始之前,Kevin 分享了一些参考资料:
"Don't trust this guy on his power tool usage, but his mold making is pretty good." 「他的电动工具操作不太值得参考,但模具制作部分相当不错。」 — YouTube: Mold making tutorial ↗
"Here's another process, but with a very experienced mold maker critiquing it. I like this guy much more." 「这是另一个制作过程,有一位经验丰富的模具师进行点评。我更喜欢这个。」 — YouTube: Expert critique walkthrough ↗
"Here's another article that might be useful for you when we get into injection molding." 「这篇文章在我们学习注塑成型时可能会用到。」 — Article: Mold guide (injection molding reference) ↗
03 Process制作过程
Step by step制作步骤
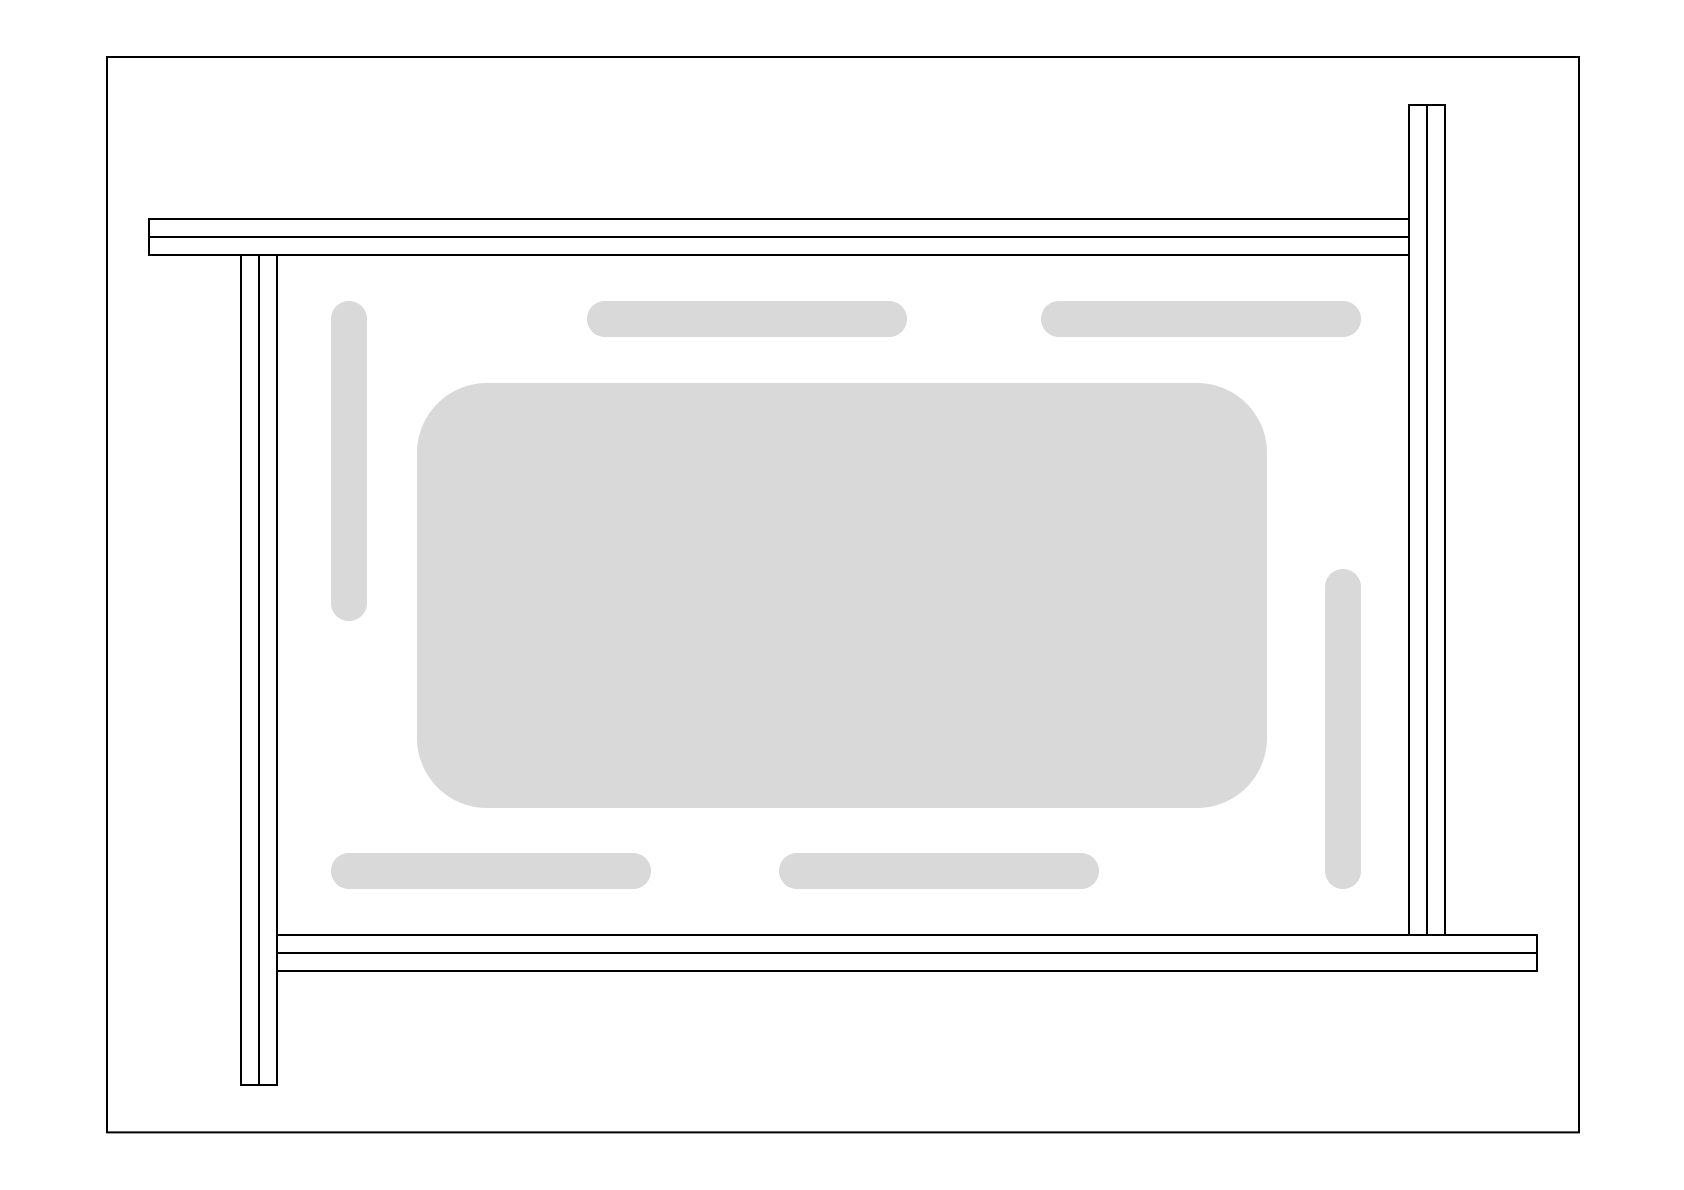
Build the mold box制作模具盒
I laser-cut the mold box sides from cherry plywood. The boards were a bit thin on their own, so I stacked two layers per wall. The extra thickness keeps the walls upright and strong enough to hold the weight of the silicone. Sealed all seams with hot glue.
我用樱桃木胶合板激光切割了模具盒的各个侧面。单层板材稍薄,所以每面墙叠了 两层。额外的厚度让侧壁保持竖直,足以承受硅胶的重量。 所有接缝用热熔胶封好。
Pre-process the prototype预处理原型
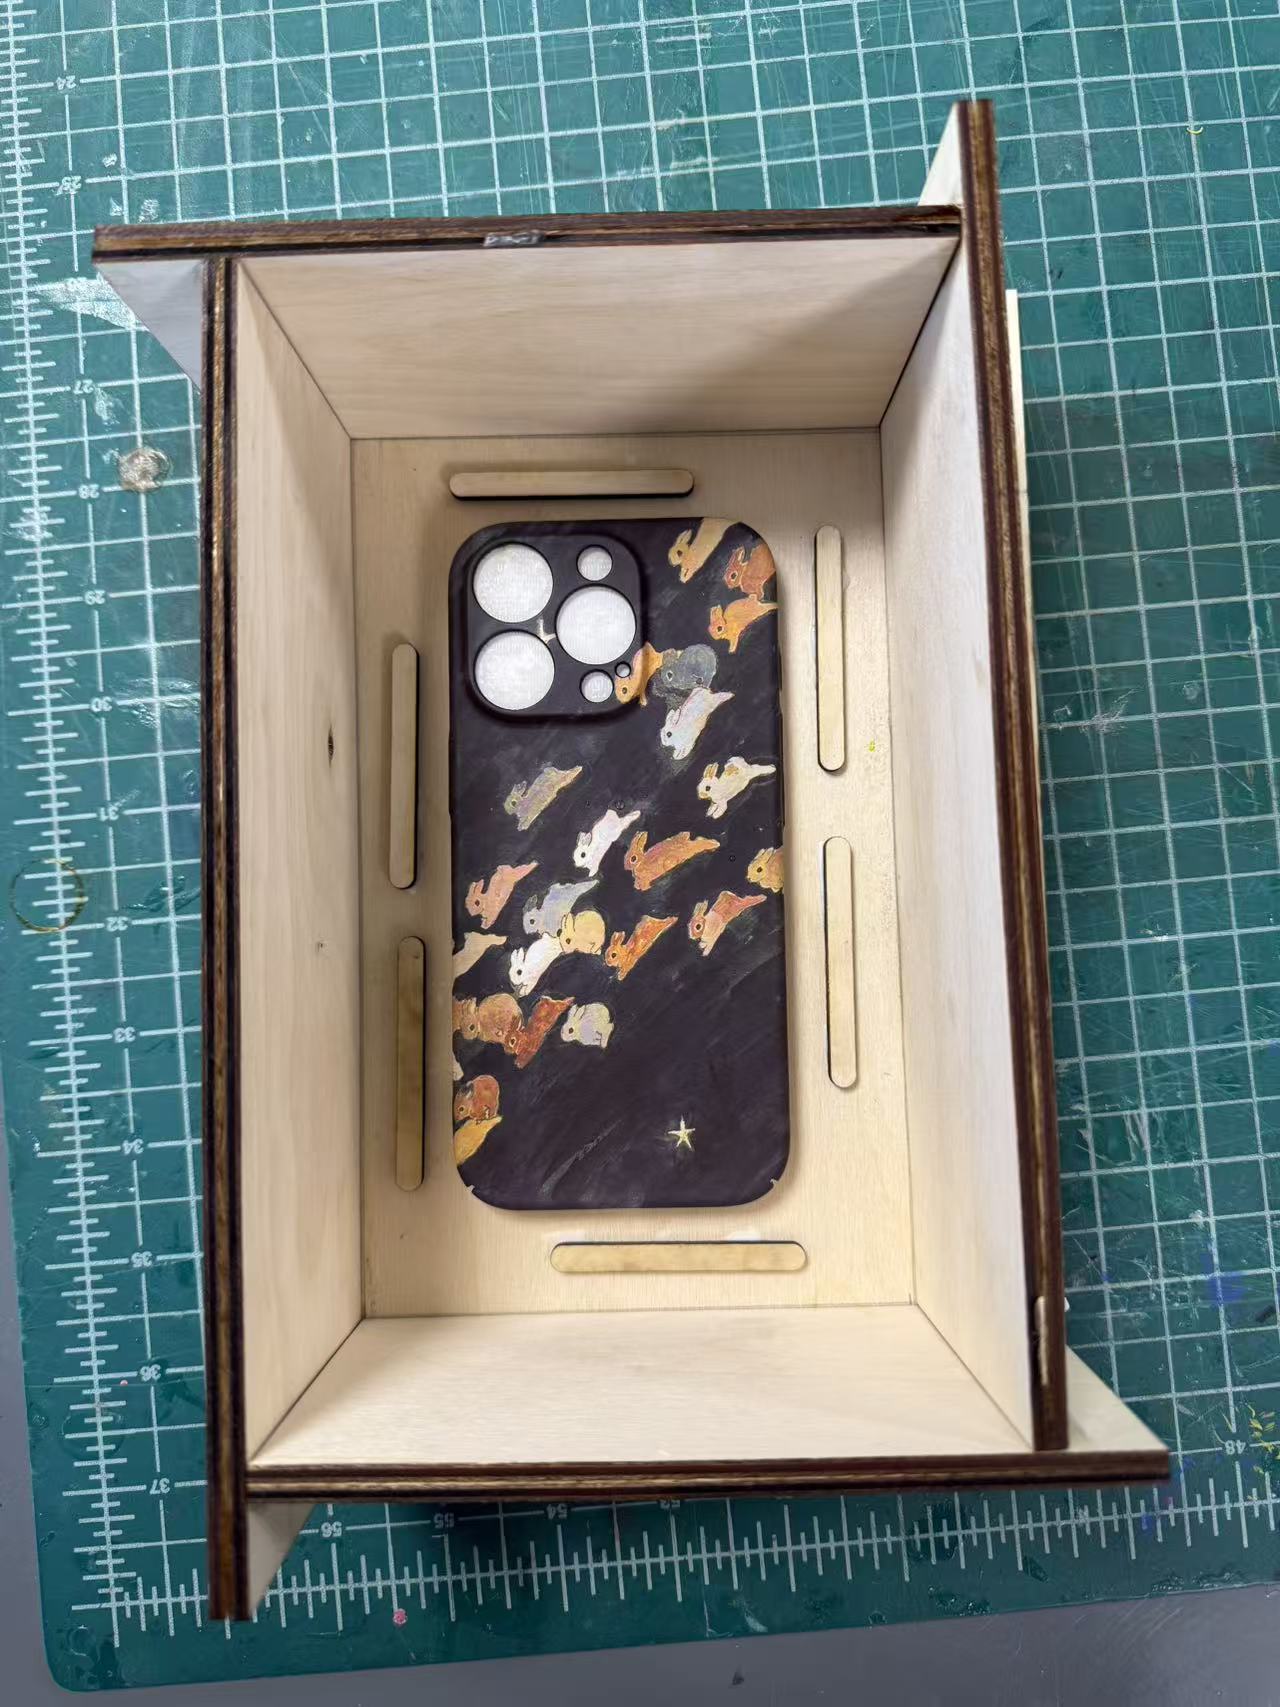
The phone case has a lot of openings: button cutouts, charging port, and three large openings for the camera module. If left unsealed, silicone would flow in and lock the case inside the mold permanently. You'd never get it out.
手机壳有很多开口:按键开孔、充电口,以及摄像头模组的三个大开口。如果不封堵,硅胶会流入, 将手机壳永久锁死在模具里,再也无法取出。
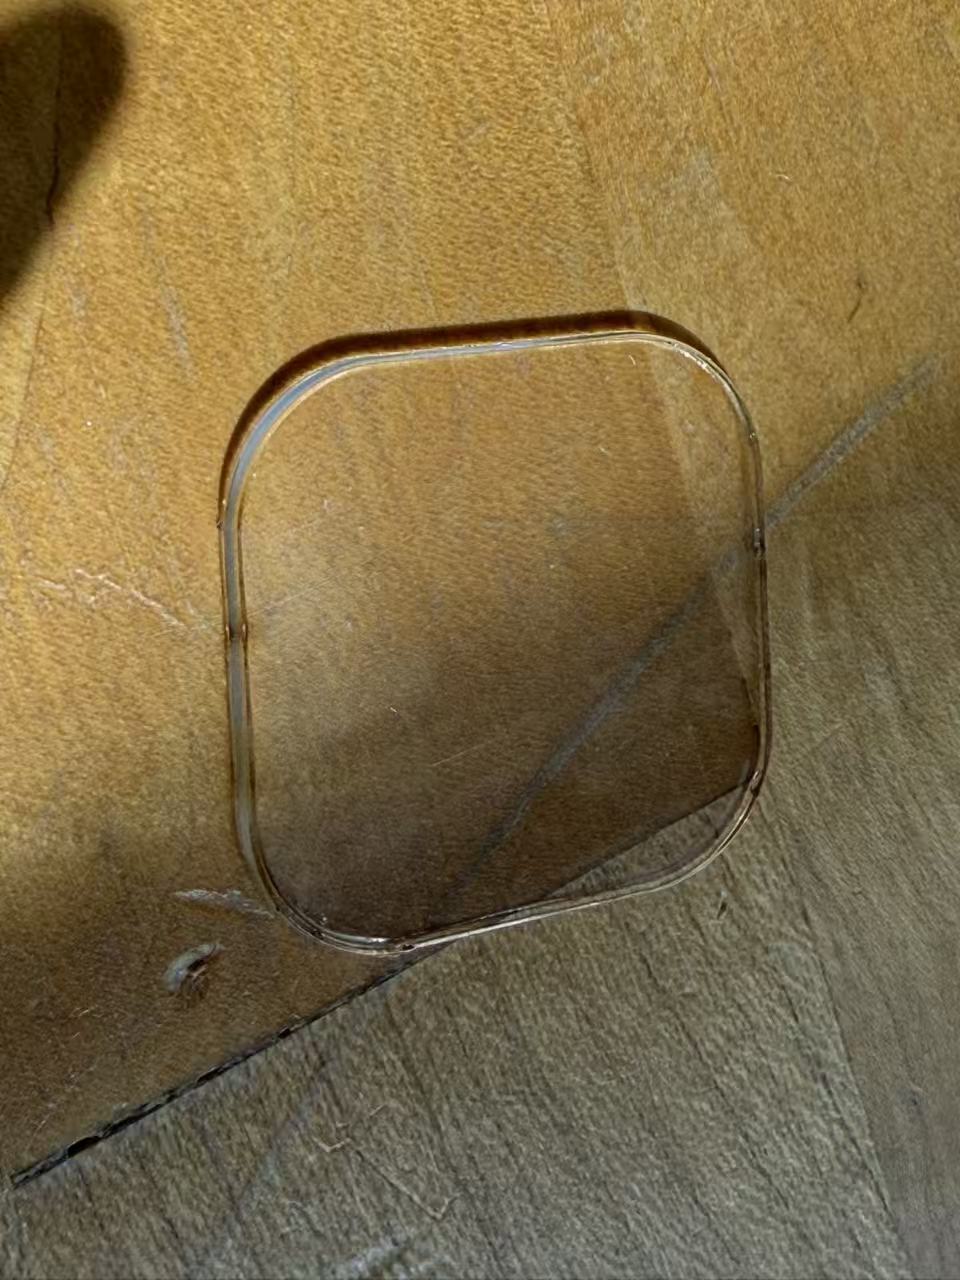
I taped over the smaller holes. For the camera section, tape alone wasn't rigid enough over such a wide span, so I cut a thin acrylic sheet to cover it.
我用胶带封住了较小的孔。摄像头区域跨度太大,胶带单独支撑不够牢固, 所以我切了一块薄亚克力板来覆盖。
Fix the prototype in the box固定原型
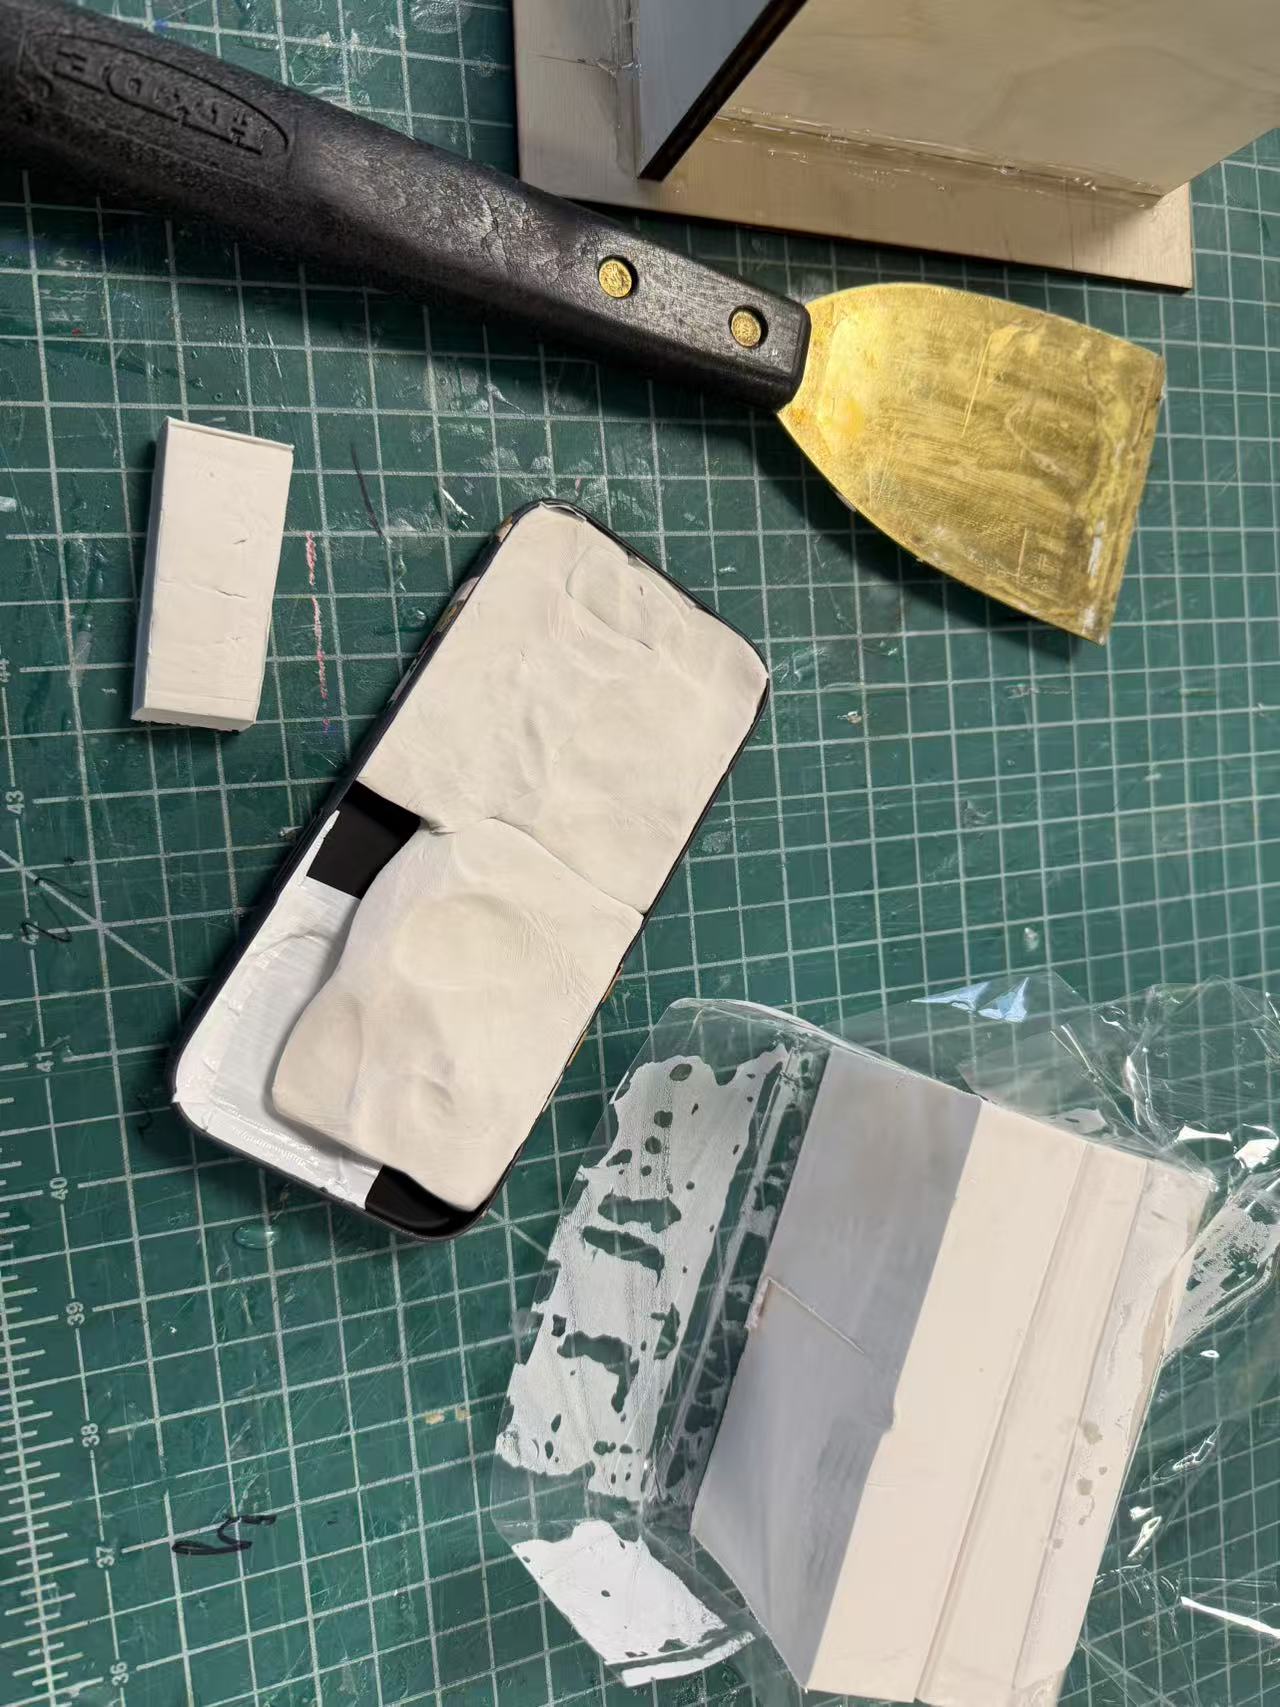
Kevin suggested filling the phone case with clay before placing it in the mold box.
Kevin建议在放入模具盒之前,先用黏土填满手机壳。
Two reasons this helps:
这样做有两个原因:
- The clay adds weight and surface contact. Combined with its stickiness, it anchors the case to the base board so it won't float or shift when silicone is poured in.
- 黏土增加了重量和接触面积。加上其黏附性,它能将手机壳固定在底板上,使其在倒入硅胶时不会浮起或移位。
- It seals the case edges better. Tape is thin. The clay fills any gaps that might let air escape and form bubbles in the mold.
- 黏土能更好地密封手机壳边缘。胶带很薄,黏土可以填充任何可能导致气泡进入模具的缝隙。
With the clay in, I flipped the phone case face-down and pressed it onto the base board. Kevin also suggested adding wood strip registration bosses around the perimeter. Ideally these would be tapered for better alignment guidance, but the laser cutter can't do undercuts, so simple strips were the next best option.
填好黏土后,我将手机壳翻面朝下,压在底板上。Kevin还建议在四周加木条定位销。理想情况下应该 做成锥形以获得更好的对齐效果,但激光切割机无法做出内切形状,所以简单的矩形木条是次优选择。
Mix & degas the silicone混合与脱气
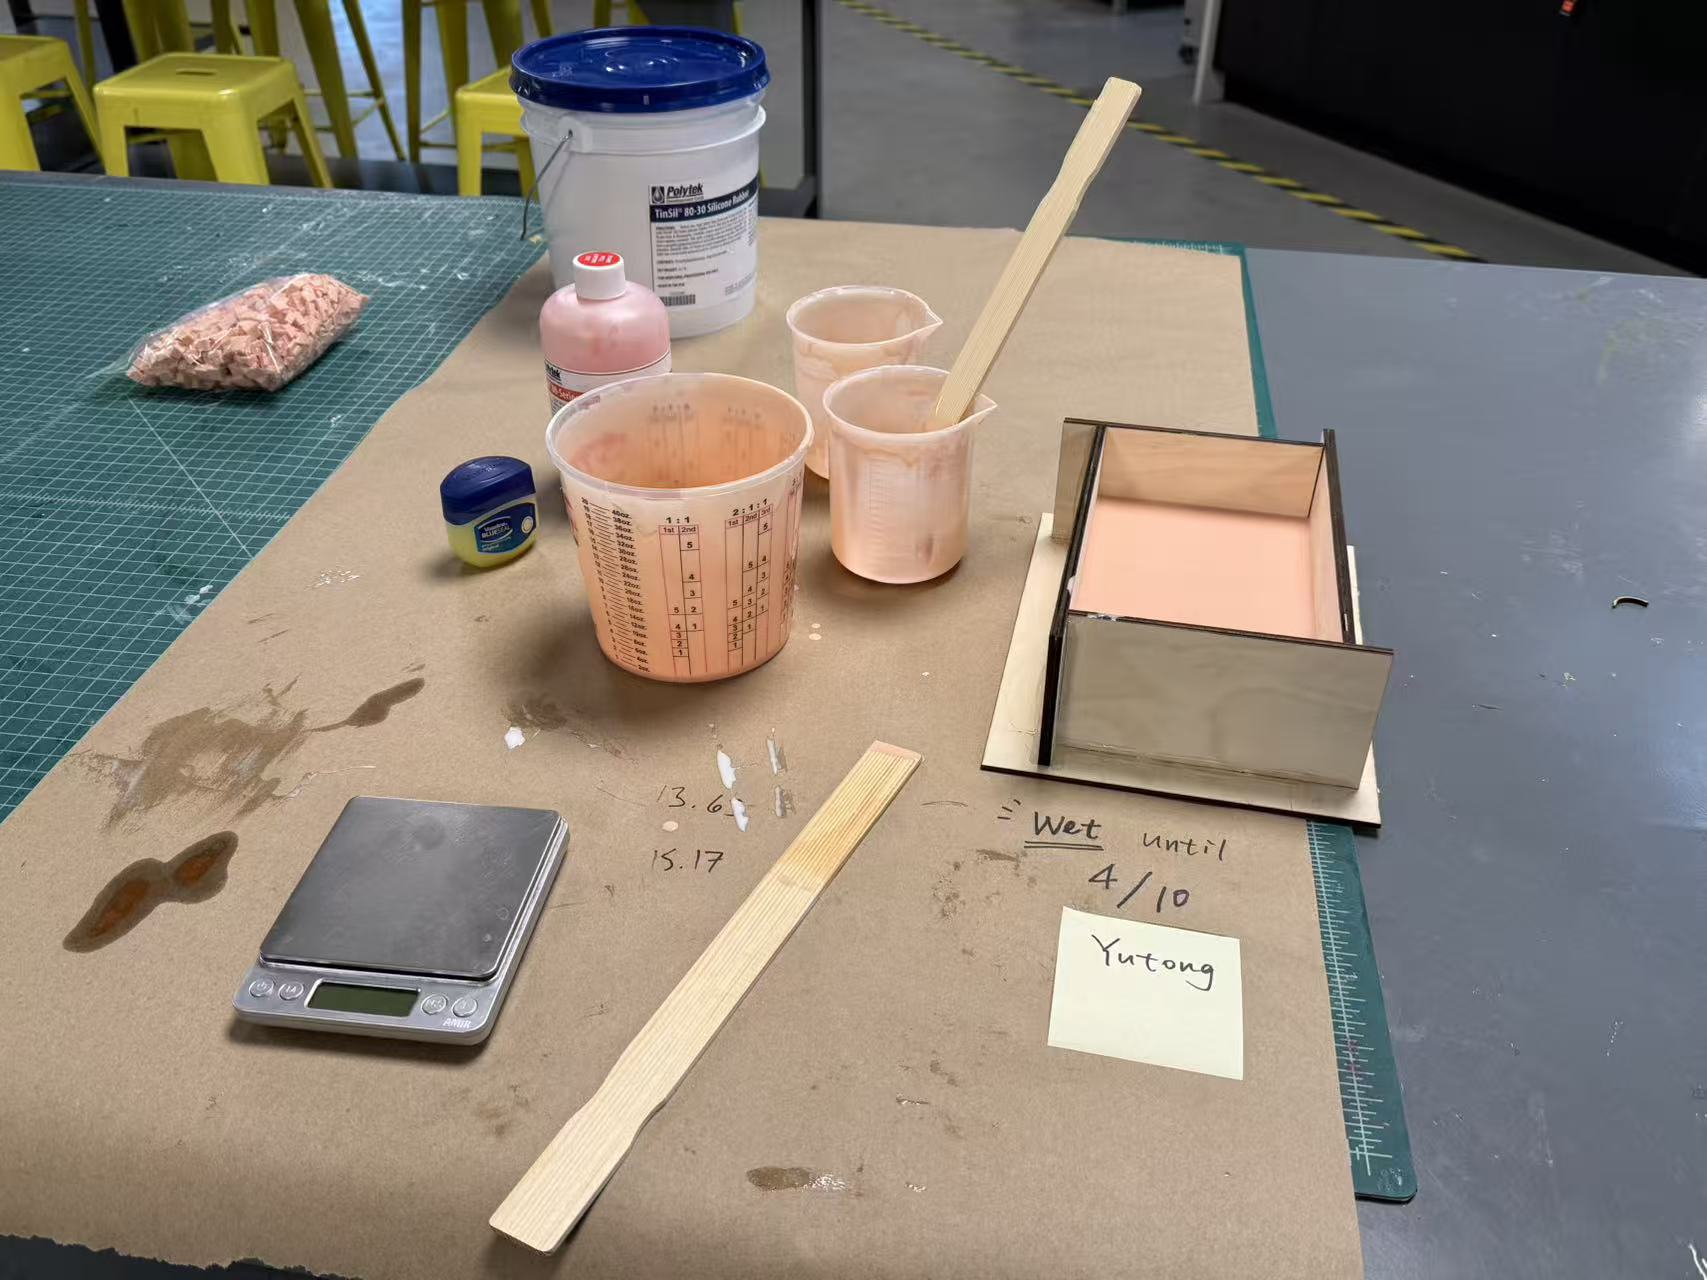
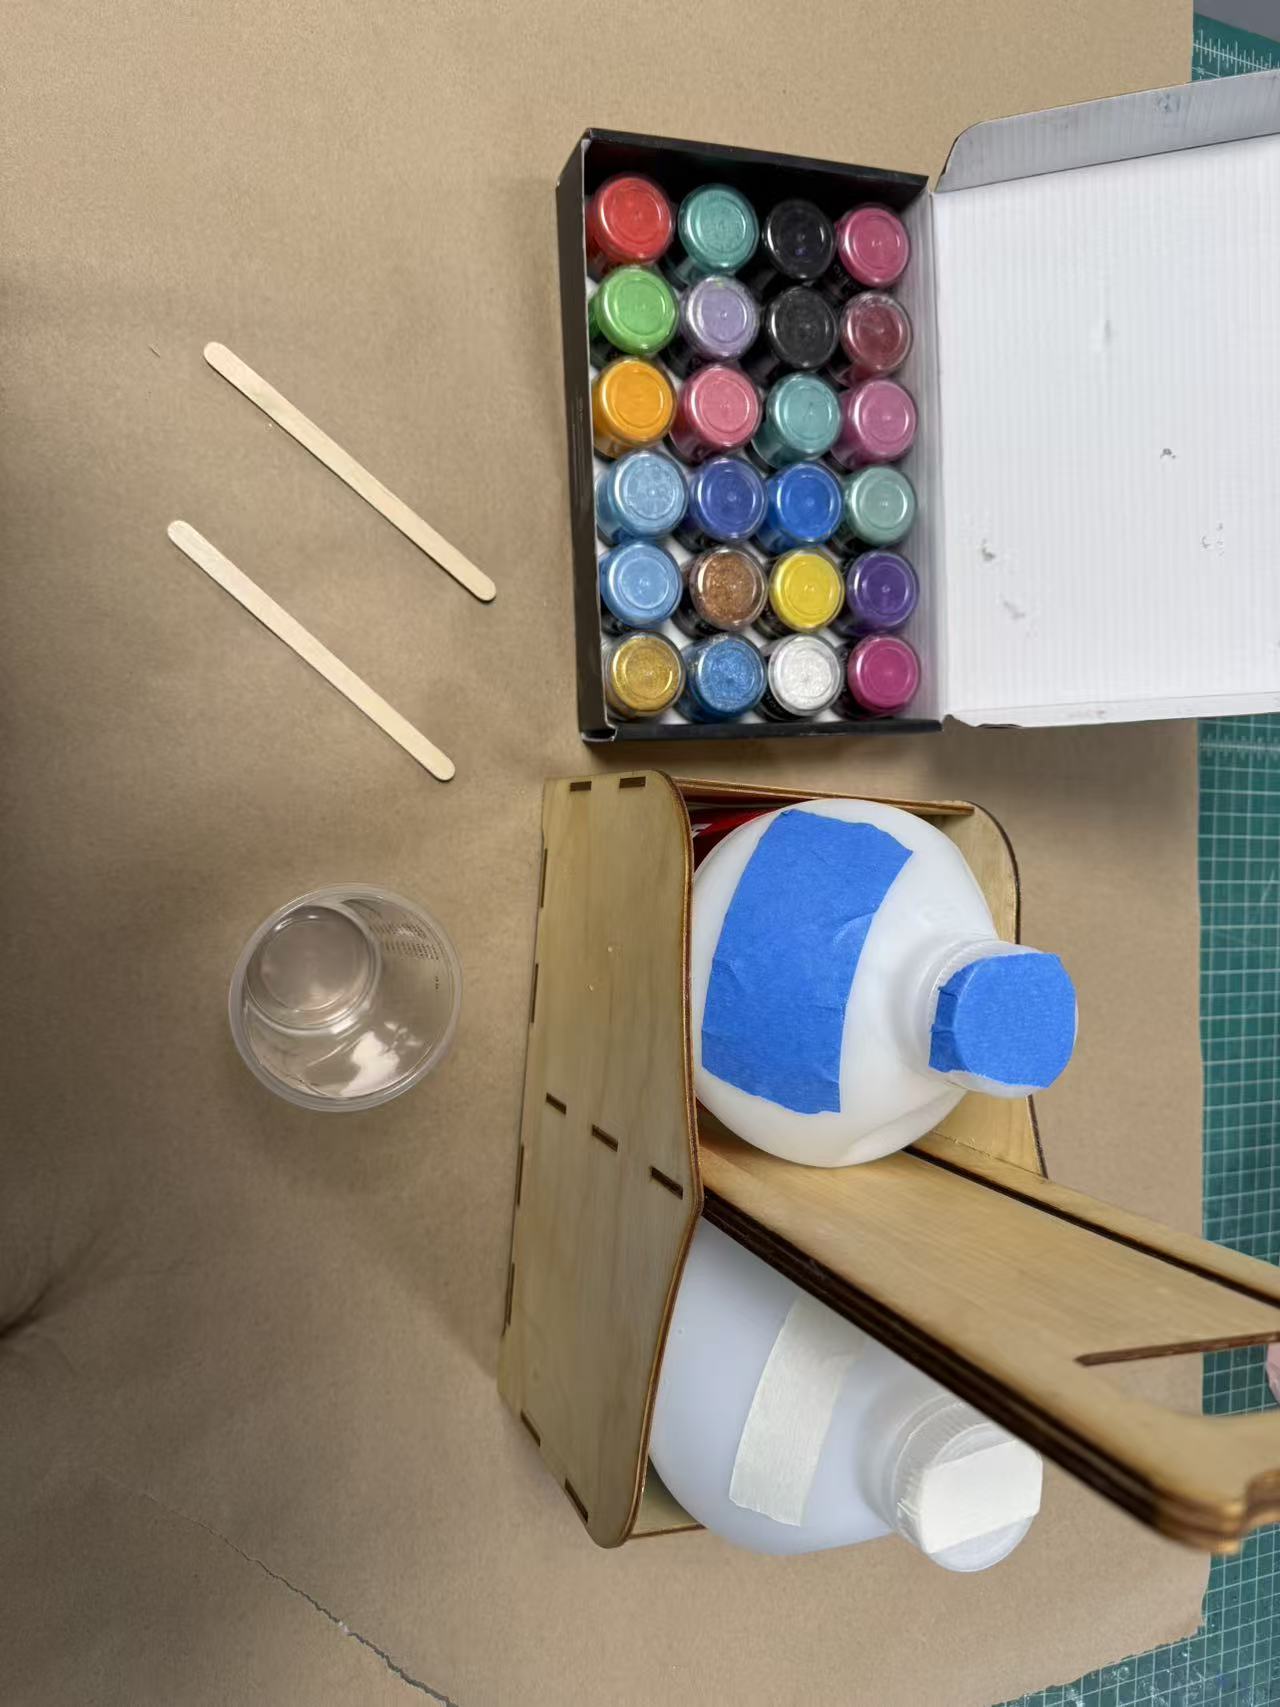
Messy and careful at the same time. Craft paper down, gloves on, cleanup tools nearby. We used tin-cure silicone at a 1:10 A:B ratio by weight.
既需要细心,又难免凌乱。铺好打底纸,戴上手套,清洁工具备在手边。 我们使用的是锡固化硅胶,按重量1:10的A:B比例混合。
A tip Kevin shared: write Part B's weight directly on the craft paper while measuring it, so you have a quick reference when you get to Part A. Simple but genuinely helpful (definitely would have forgotten the number otherwise).
Kevin分享的小技巧:称量B组分时,直接把重量写在打底纸上,这样称A组分时随时可以参考。 方法简单,但真的很有用(否则数字肯定会忘记)。
Stir until the mixture is a completely uniform color — no streaks, no color bands, especially at the cup edges and bottom. Any visible inconsistency means unmixed catalyst, which creates soft or uncured spots in the finished mold.
搅拌直至混合物颜色完全均匀——无条纹、无色带, 尤其要注意杯子边缘和底部。任何可见的不均匀都意味着催化剂未混匀, 会导致成品模具出现软点或未固化区域。
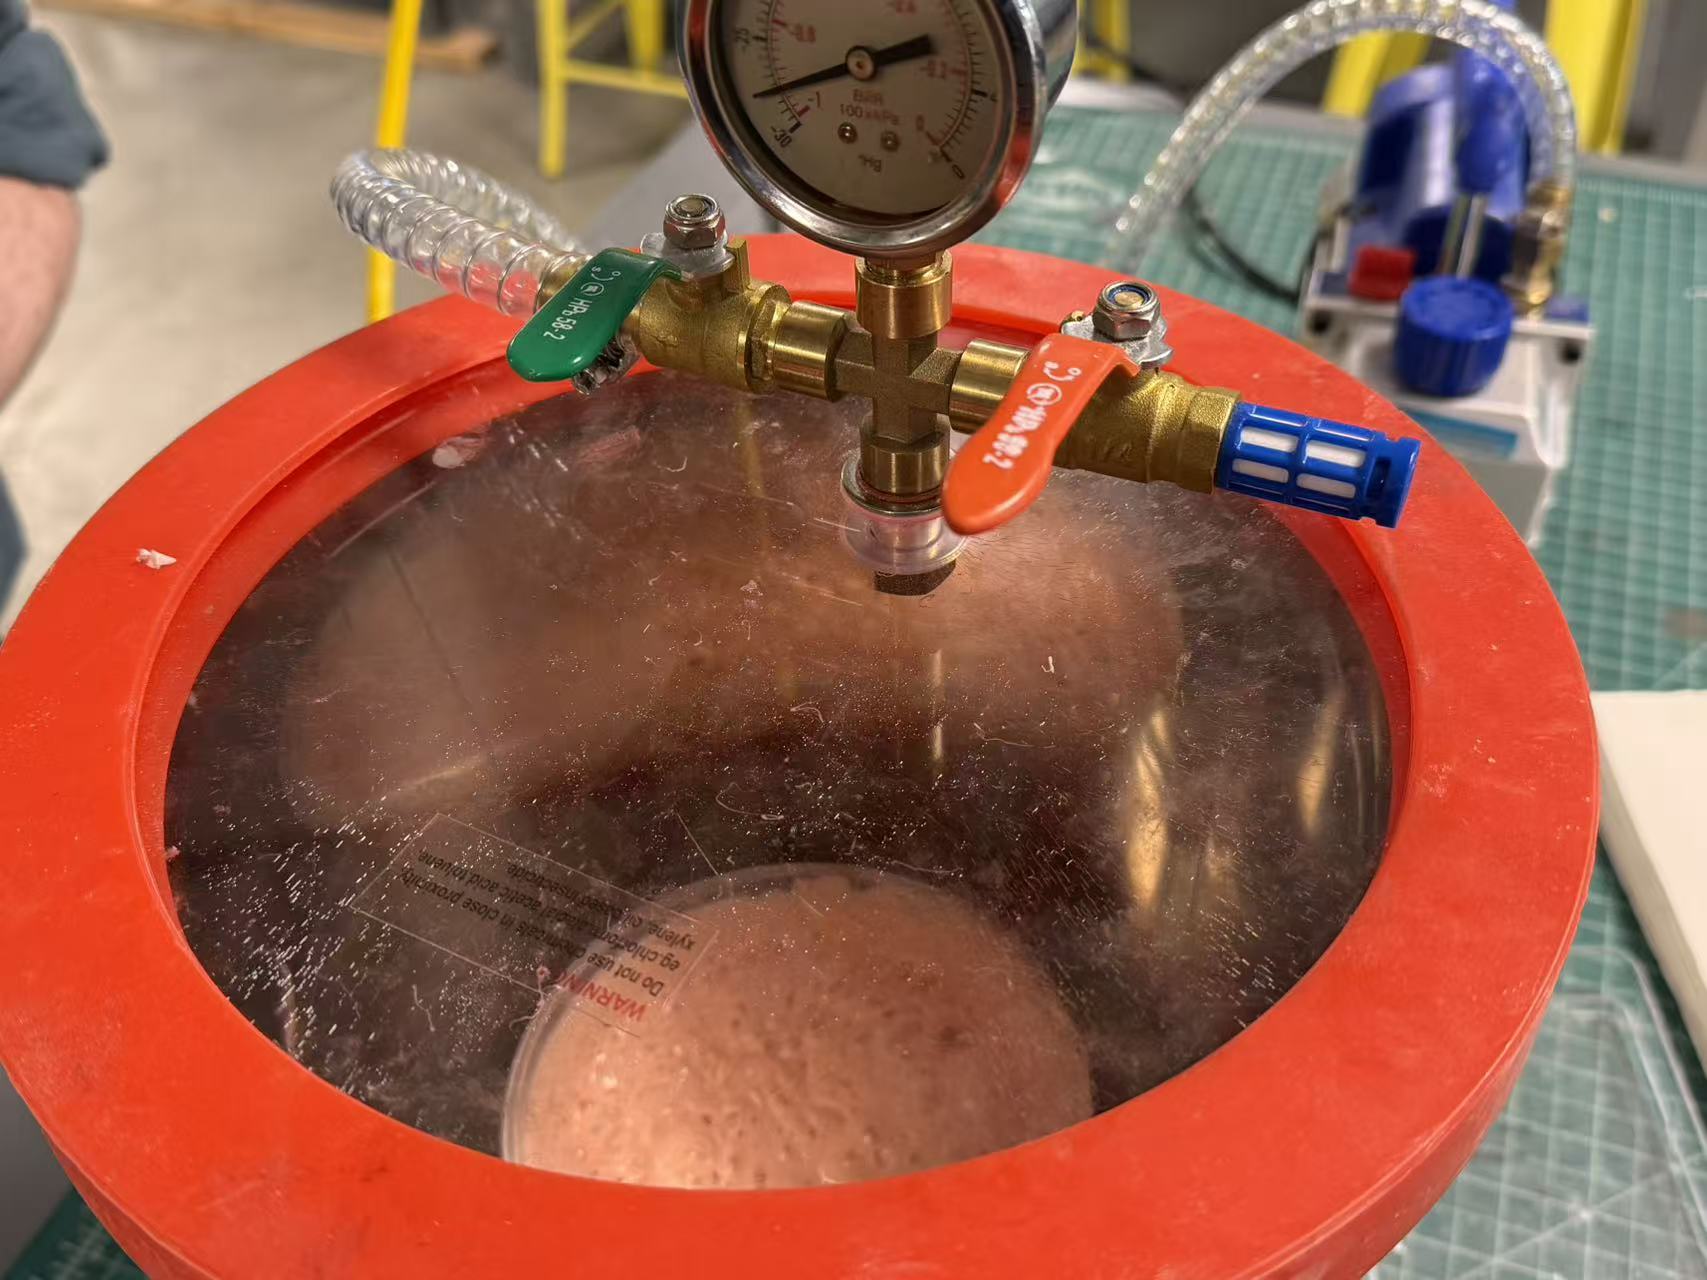
Then into the vacuum degassing chamber. Green valve (left) connects to the pump, red valve (right) vents to atmosphere. Close red, open green, start the pump — watch the pressure drop and the silicone start expanding. When it gets close to the rim, crack the red valve slightly to let it collapse, then close and keep pumping. When it starts collapsing on its own, the bubbles are gone. Close the green valve, wait a couple minutes, then slowly open the red to re-equalize before taking it out.
然后放入真空脱气箱。绿色阀门(左侧)连接泵,红色阀门(右侧)通向大气。关闭红阀,打开绿阀, 启动泵——观察压力下降和硅胶开始膨胀。当硅胶接近容器边缘时,稍微打开红阀让其塌落,然后关闭 继续抽真空。当硅胶开始自行塌落时,气泡已排尽。关闭绿阀,等待几分钟,然后缓慢打开红阀恢复 常压,再取出。
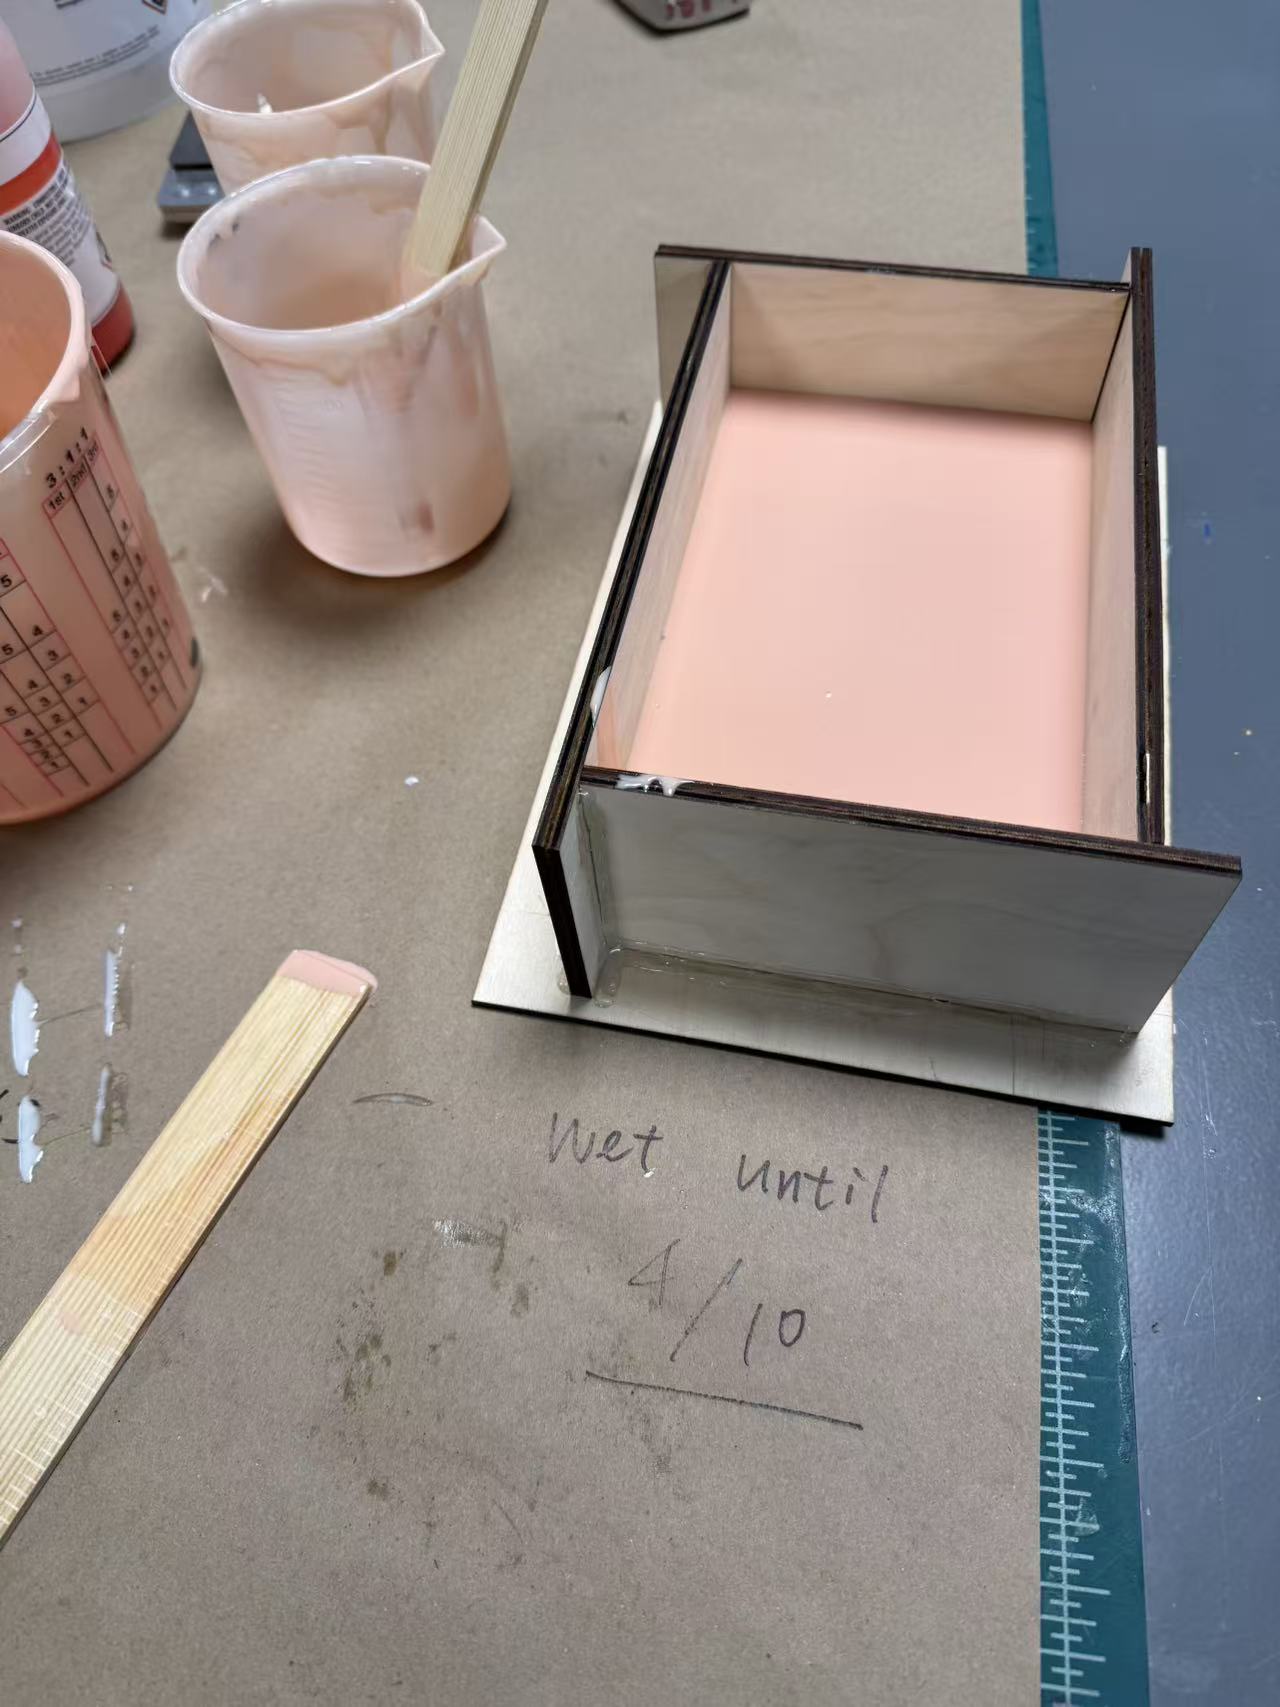
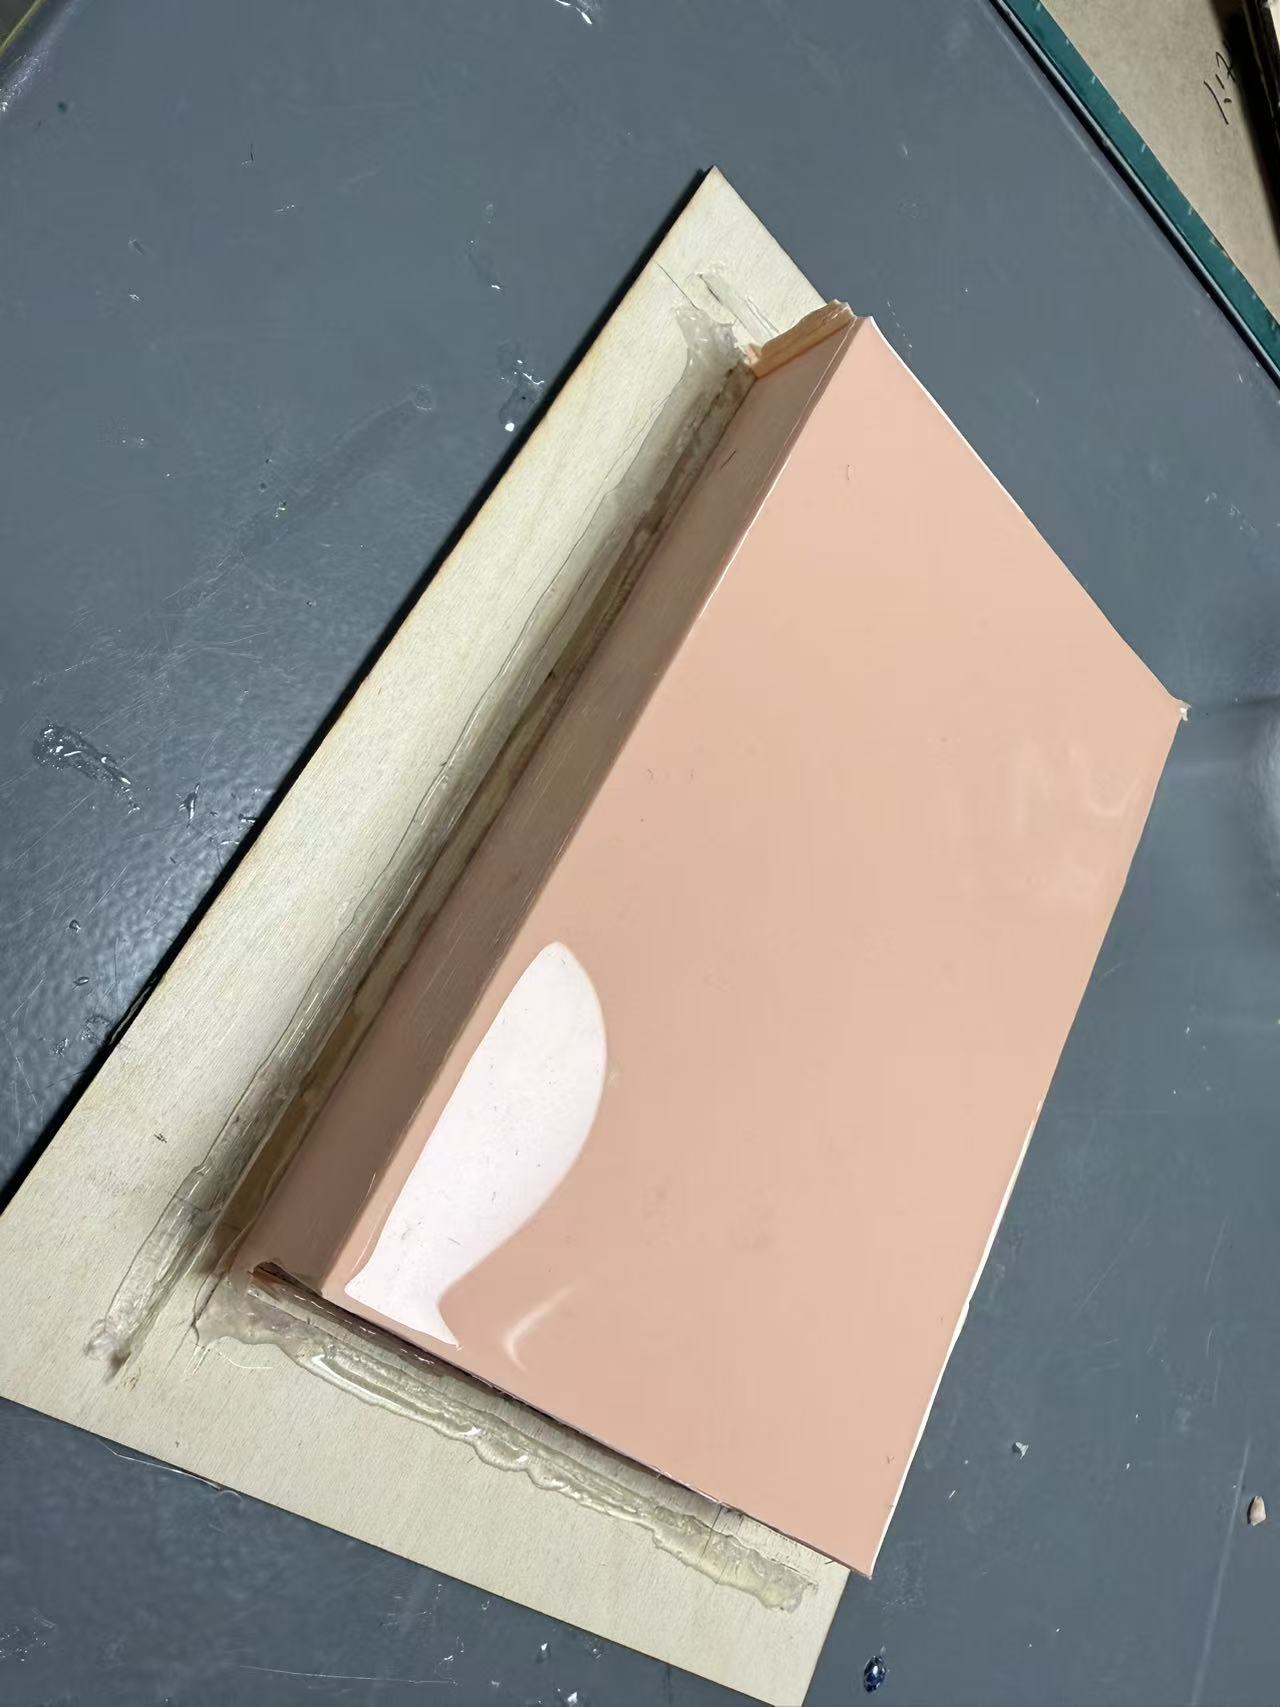
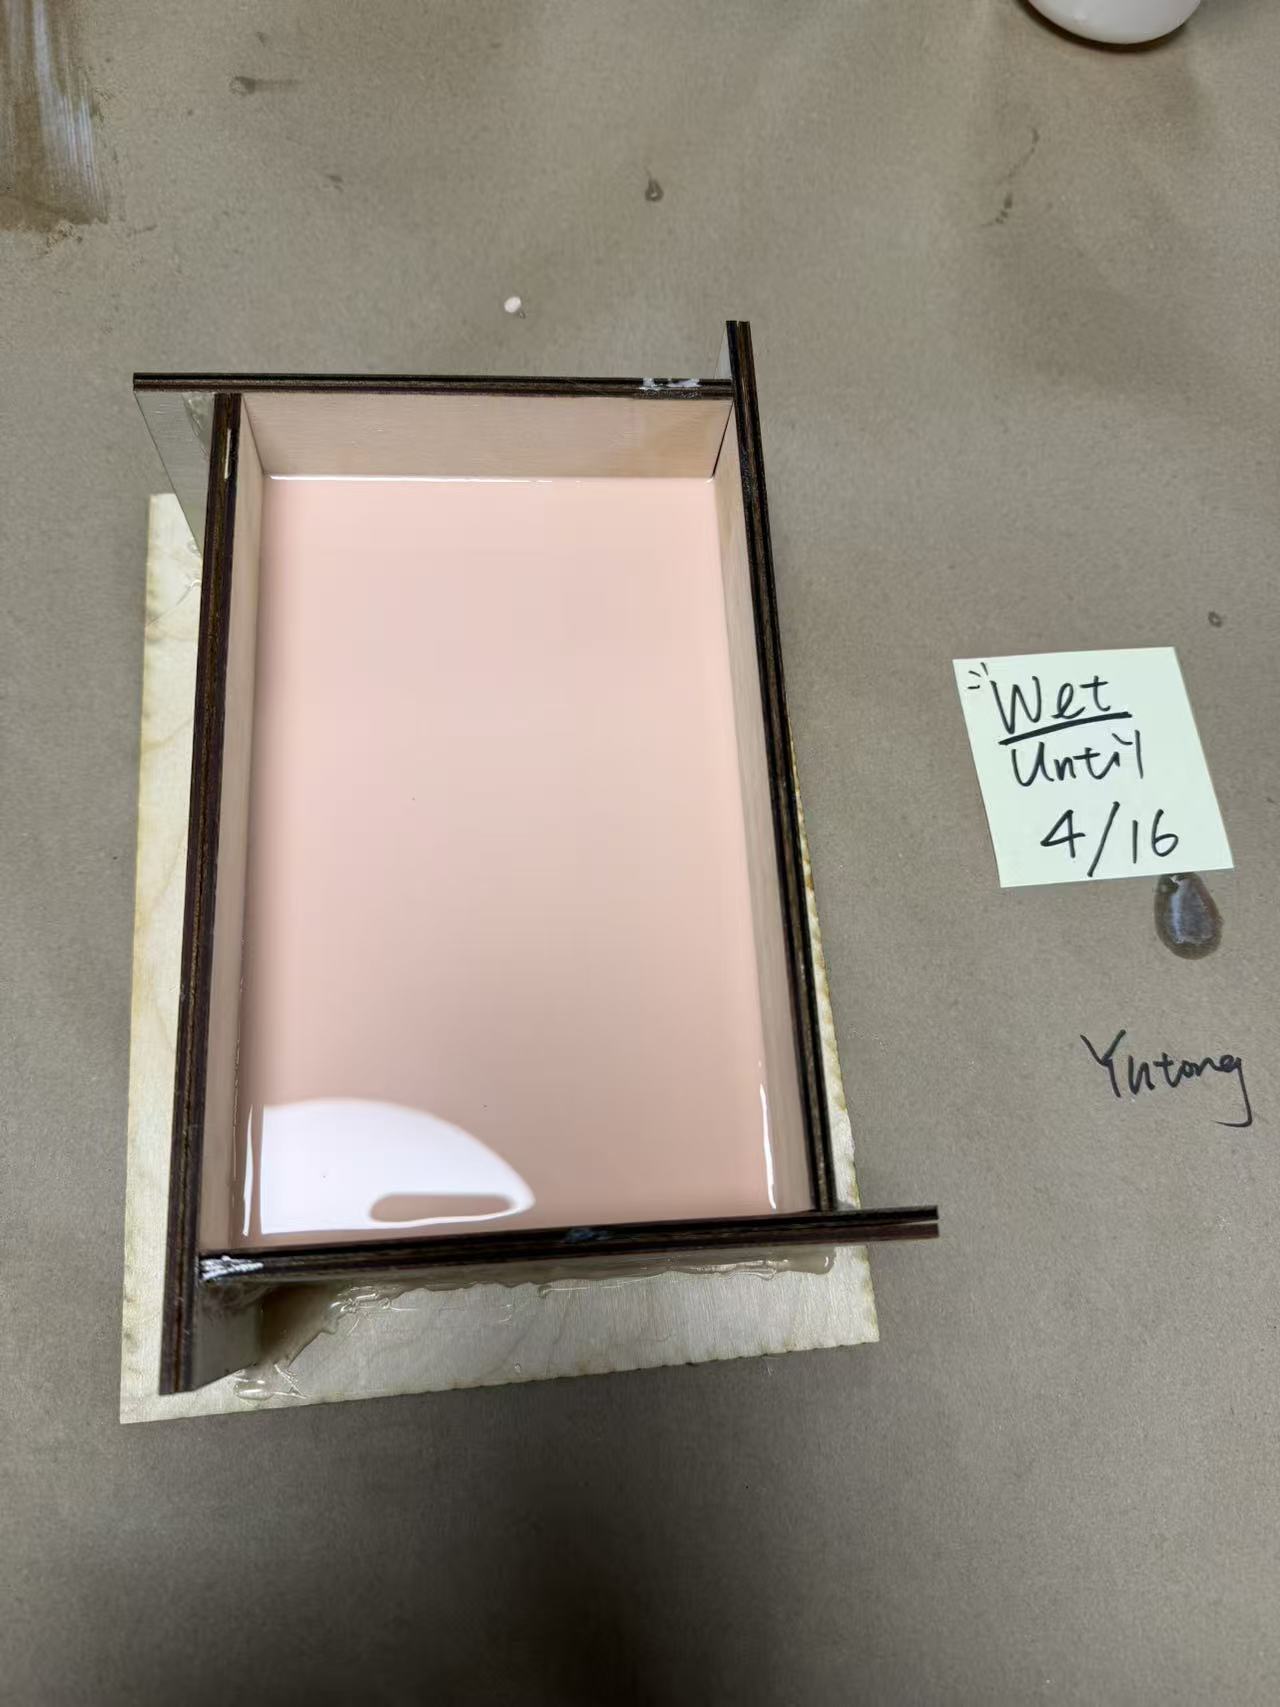
Pour the bottom half — cure overnight浇注底部——等待一夜固化
Pour from one corner. Raise the container as high as you can and let the stream run thin. The narrow stream breaks up any remaining bubbles on the way down, and the silicone flows around the object on its own.
从一个角落开始倒。将容器尽量举高,让硅胶细流缓缓流下。细流在下落过程中会打散残余气泡, 硅胶会自动流淌并包裹住物体。
Then wait. Tin-cure silicone takes about 8 hours at room temperature.
然后等待。锡固化硅胶在室温下约需8小时固化。
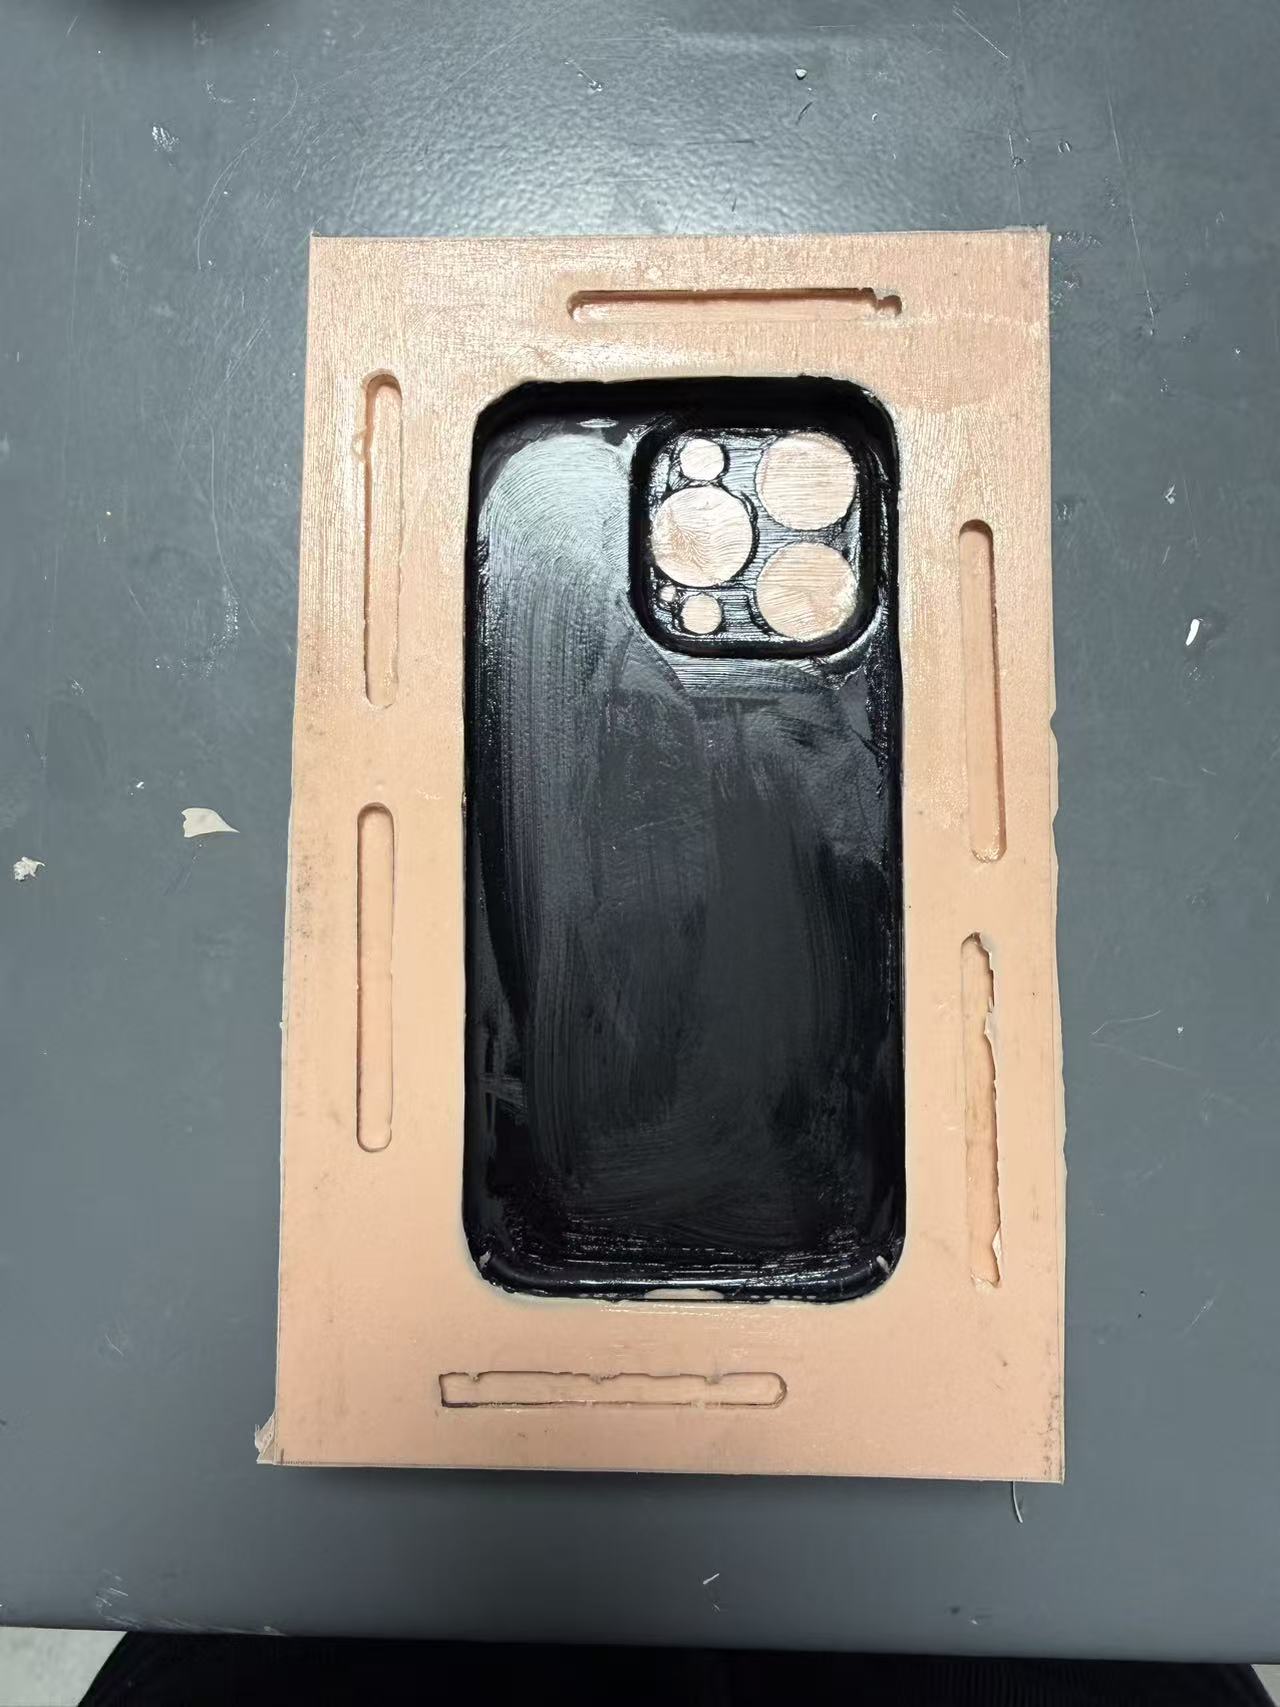
Demold the bottom half & prep for the top脱模底半部分并准备顶部
Once cured, tear apart the mold box walls and carefully lift out the bottom half with the phone case still embedded.
固化后,拆开模具盒侧壁,小心地将底半部(连带手机壳)取出。
Remove the clay and tape. Then the critical part: coat every exposed silicone surface with vaseline. The flat parting face, inside every hole recess, every registration boss. Don't miss any. If bare silicone touches the second pour, the two halves fuse together and you can't open the mold.
取出黏土和胶带。然后是关键步骤:在所有裸露的硅胶表面涂上凡士林。 平整的分型面、每个孔洞的内壁、每个定位销——一处都不能漏。如果裸露的硅胶与第二次浇注的硅胶 接触,两半模具会永久粘合,模具将无法打开。
Trim any rough edges. Set the phone case face-up, rebuild the mold box walls around the bottom half, seal with hot glue.
修整毛边,将手机壳正面朝上,重新围上模具盒侧壁,用热熔胶密封。
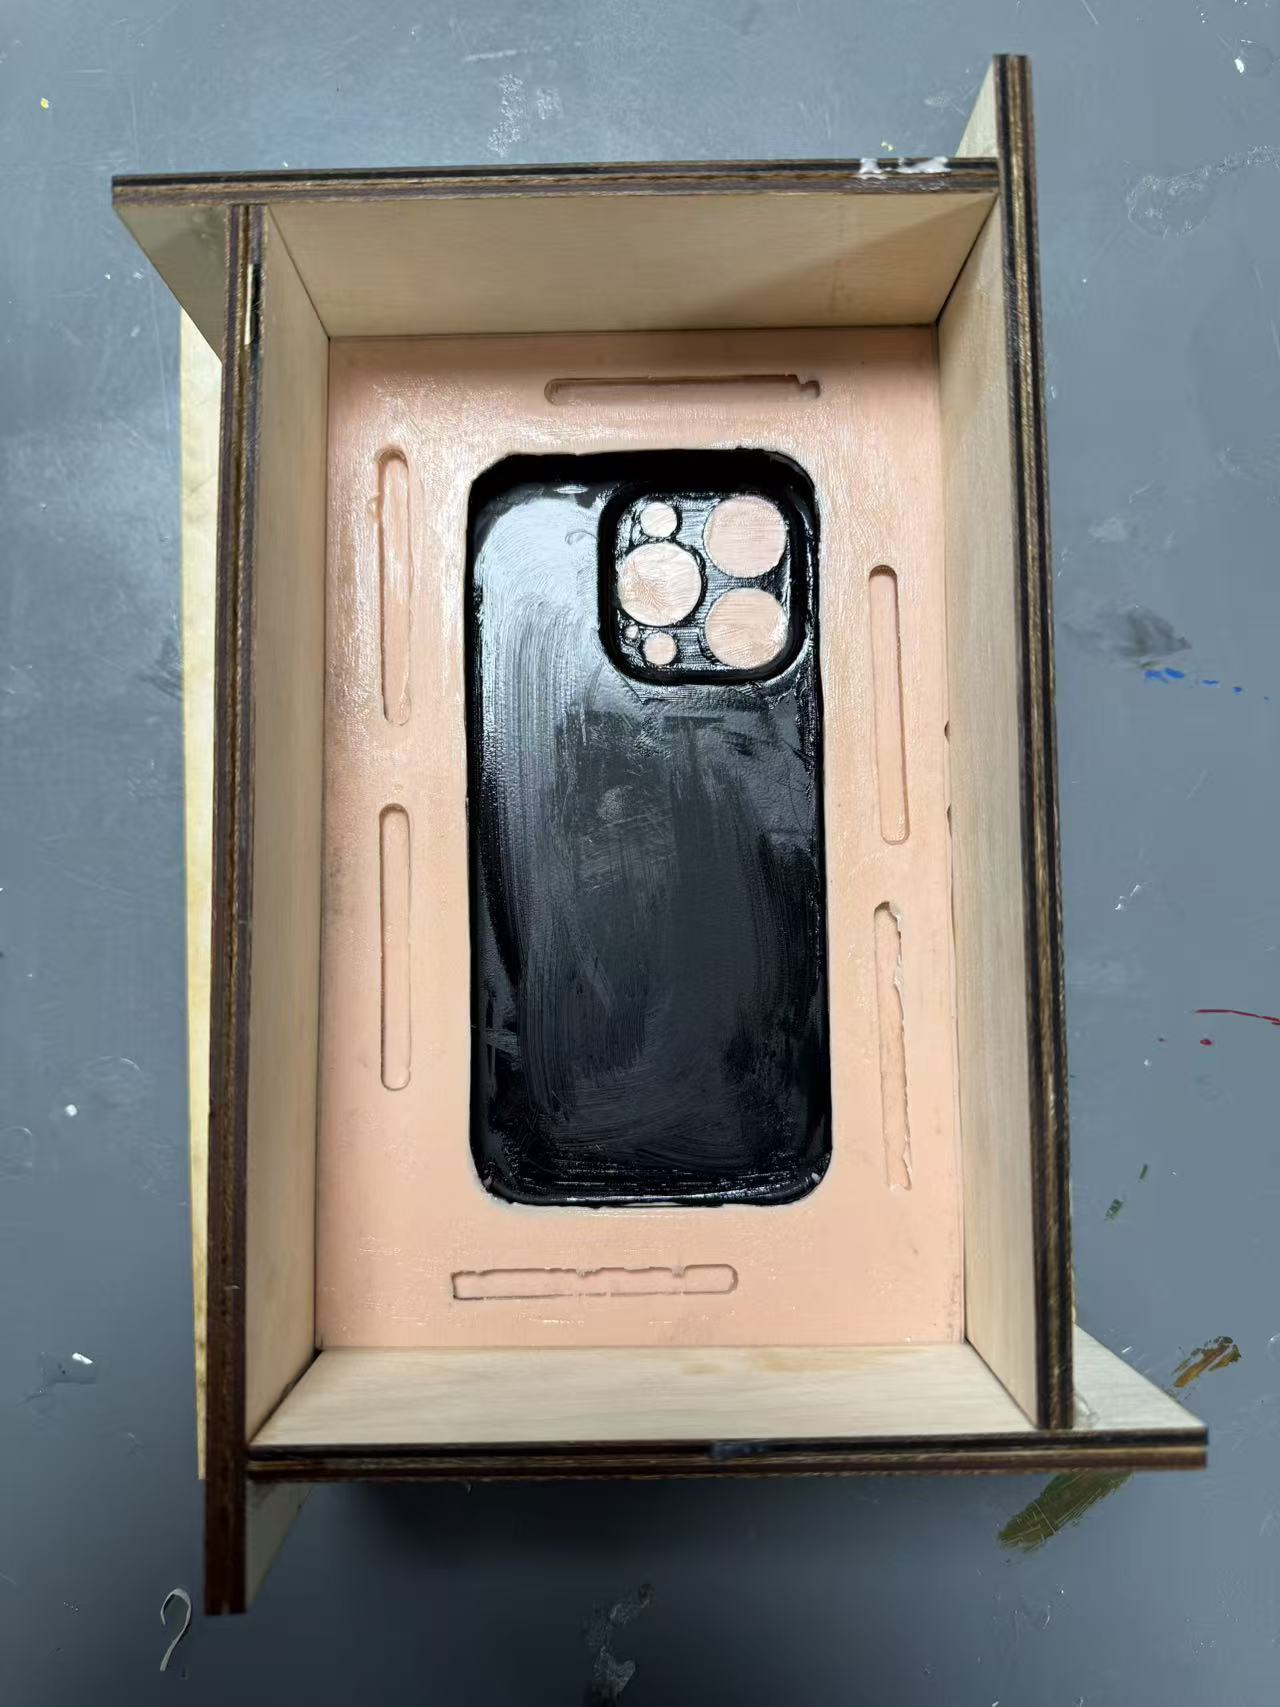
Pour the top half & split the mold浇注顶部并分离模具
Second pour, same technique. Another ~8 hours of waiting.
第二次浇注,相同方法。再等约8小时。
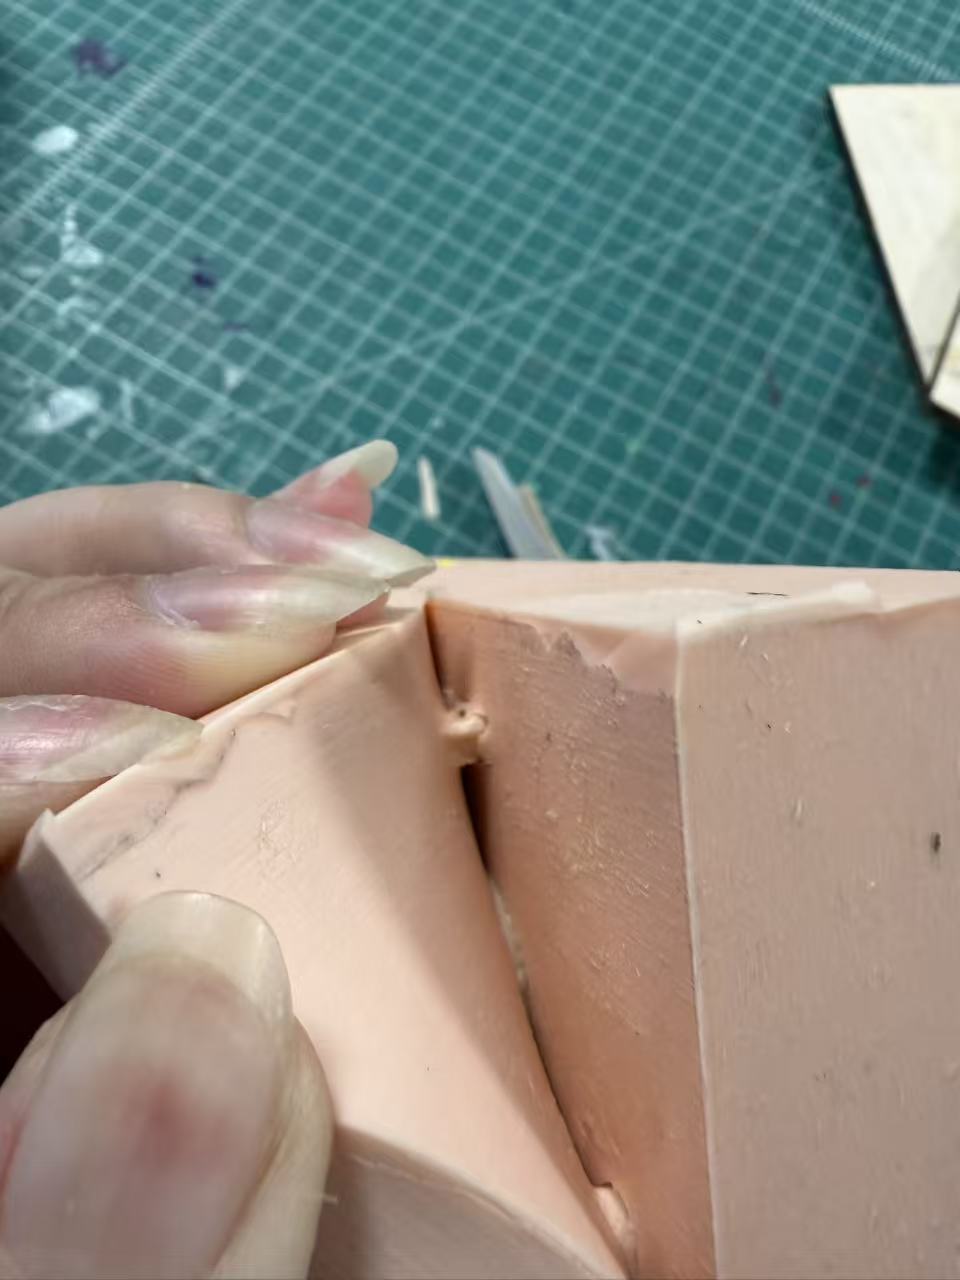
Tear down the box again, then separate the two halves. The vaseline does its job. They peel apart cleanly.
再次拆开模具盒,然后分离两个半模。凡士林发挥了作用——两半干净利落地剥离开来。
Mix resin & cast混合树脂并浇铸
AB resin, 1:1 by volume. About 2–3 oz for this mold.
AB树脂,体积比1:1,这个模具约需2–3盎司。
The fun part: glitter. I mixed white, light blue, and deep blue, with a bit of gold for depth. Kind of like mixing nail polish colors. Really enjoyed this part more than I expected.
好玩的环节来了:亮粉。我混合了白色、浅蓝和深蓝,加了一点金色增添层次感。 感觉有点像调指甲油的颜色,比想象中享受多了。
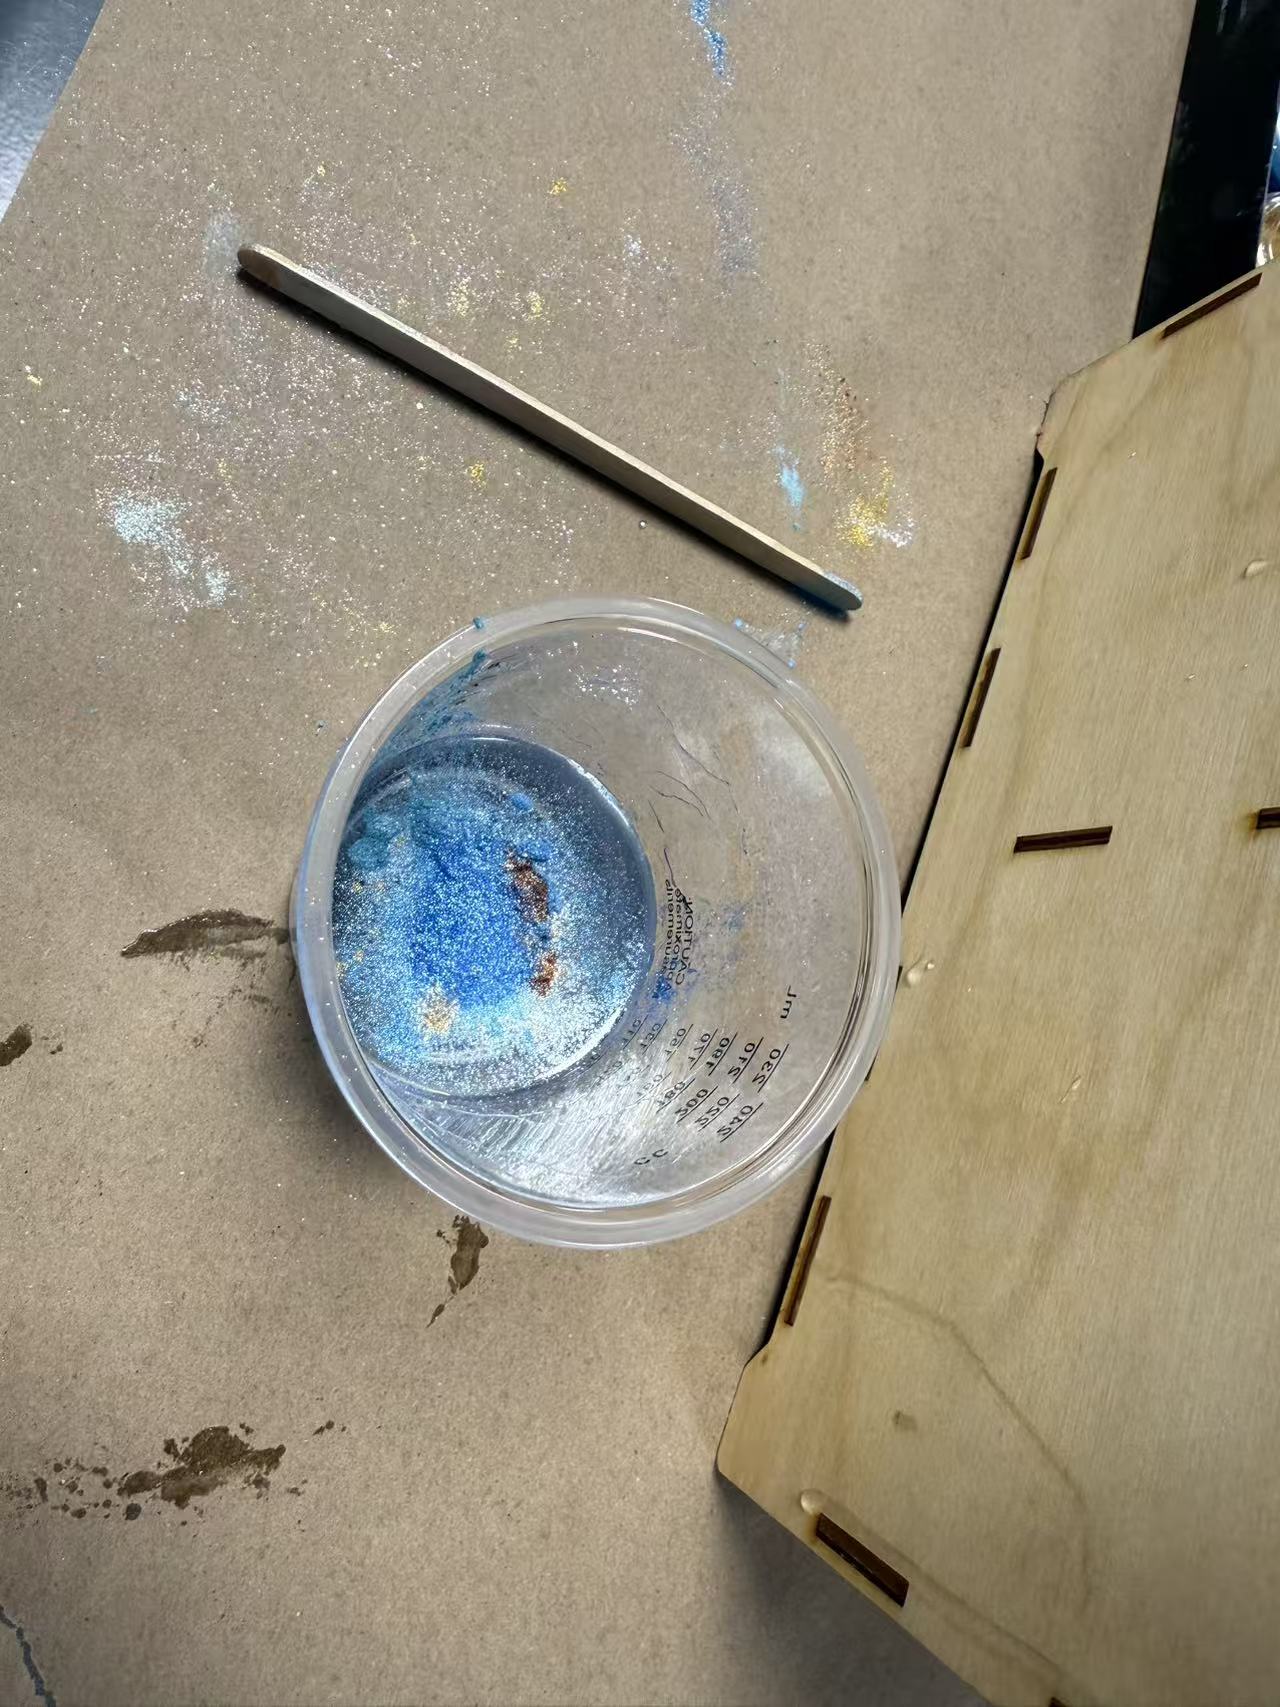
Mix vigorously for about 5 minutes. Same rule as the silicone: pay extra attention to cup edges and bottom.
用力搅拌约5分钟。规则与硅胶相同:特别注意杯子的边缘和底部。
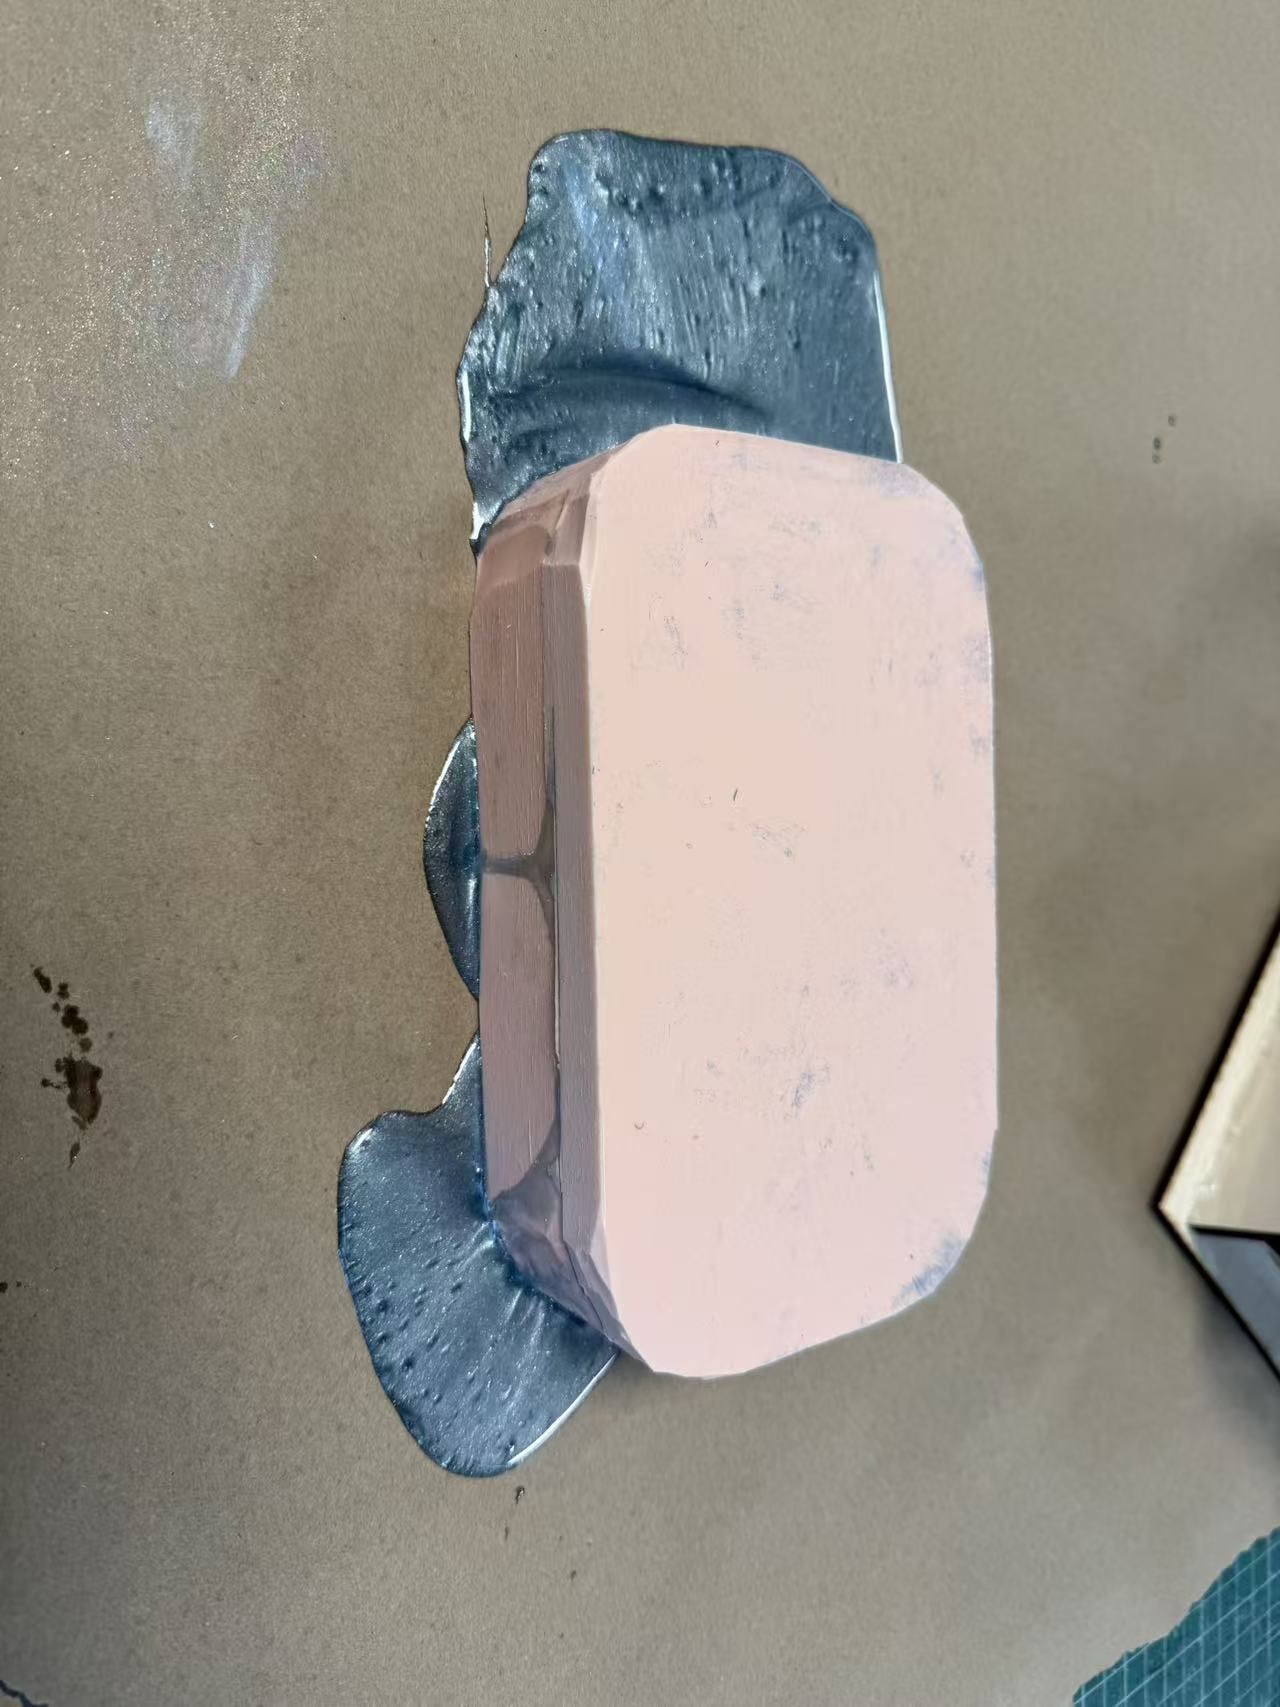
Pour resin into the bottom mold half and deliberately overfill it. Press the top half down so the excess squeezes out from the edges. Transfer the closed mold to a fresh sheet of craft paper so the overflow resin doesn't glue to the table. Wait ~24 hours.
将树脂倒入底半模,故意稍微过量。将顶半模压下,让多余的树脂从边缘溢出。把合拢的模具移到 新的打底纸上,避免溢出的树脂粘到台面。等待约24小时。

04 Knowledge Points知识点
Things to remember值得记住的事
Weigh the silicone — every gram matters精确称重硅胶——每克都很重要
For tin-cure silicone, the A:B ratio is 1:10 by weight. Part A is the catalyst. Too much and the pot life drops fast. Too little and it might not cure for days. Write the target weight on your craft paper before you start. A kitchen scale is essential.
锡固化硅胶的A:B重量比为1:10,A组分是催化剂。加多了,适用期会急剧缩短;加少了,可能几天都固化不了。 动手前先把目标重量写在打底纸上,厨房秤是必备工具。
Pour from a corner, raise the container high从角落倒入,容器尽量举高
A thin silicone stream from height naturally pops bubbles as it falls. Pouring directly onto the object traps air underneath. Start from a corner, let it flow on its own. Tilting the mold box slightly while pouring helps it reach tight spots.
从高处倒下的细流在下落时会自然打散气泡。直接倒在物体上会在其下方困住空气。从角落开始, 让硅胶自然流淌。倒入时略微倾斜模具盒,有助于硅胶流入细小的角落。
Degassing helps — but it's not a guarantee脱气有帮助——但不能保证完全消除
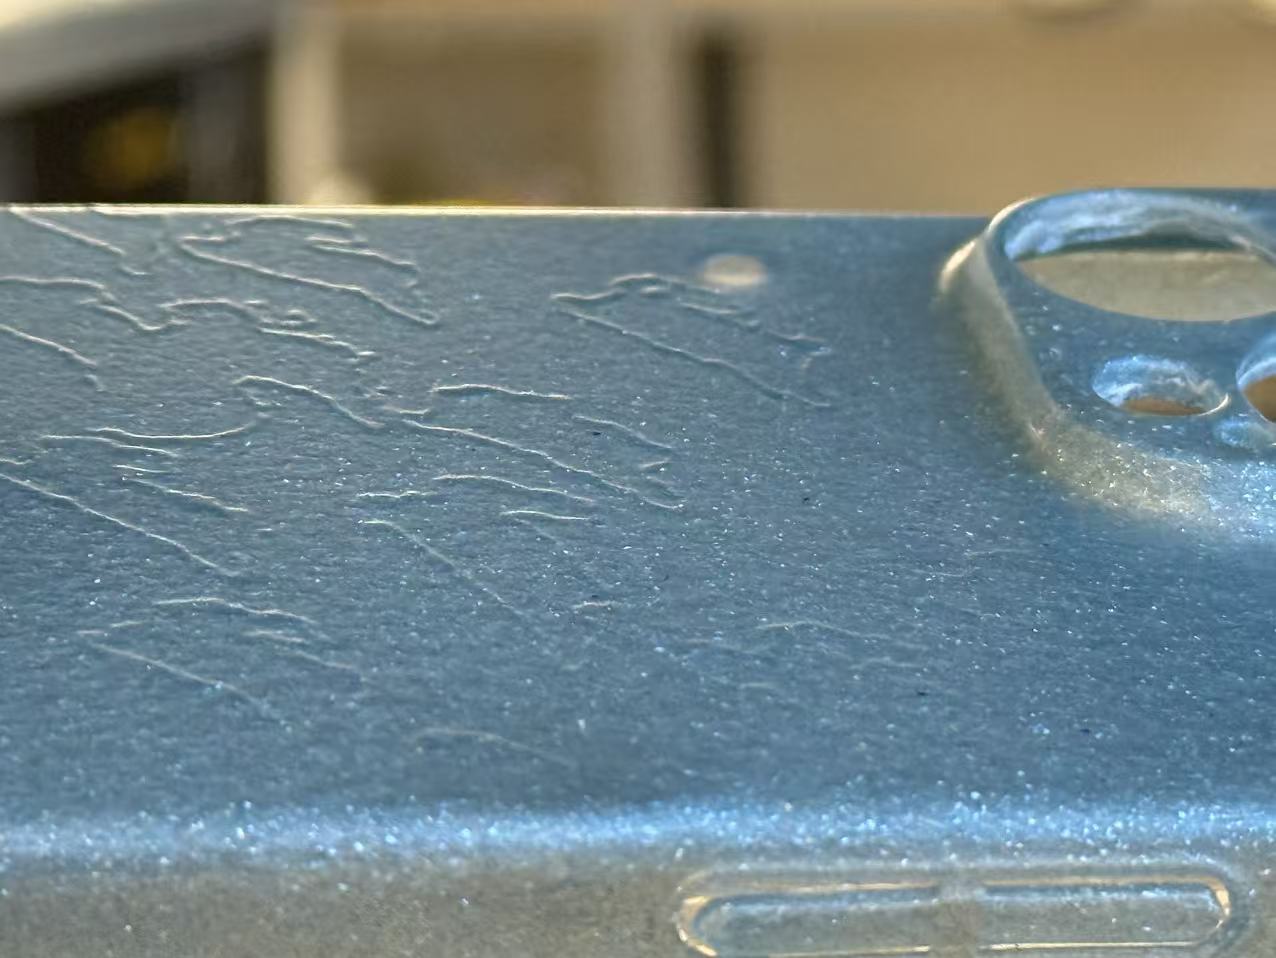
A vacuum chamber is optional: pouring from height already removes some bubbles. But degassing significantly improves quality. Even with it, bubbles can still appear — as mine did. It reduces the risk, it doesn't eliminate it.
真空箱并非必须:从高处倒入已经能去除一部分气泡。但脱气可以显著提升质量。即便如此, 气泡仍可能出现——我的作品就是这样。脱气降低风险,但无法完全杜绝。
Vaseline keeps the two mold halves from bonding — don't miss a spot凡士林防止两半模具粘合——一处都不能漏
Any silicone-to-silicone contact during the second pour will fuse permanently. Coat the entire parting face, every recess, every registration impression. One missed patch means a mold you can't open.
第二次浇注时,任何硅胶与硅胶直接接触的地方都会永久粘合。整个分型面、每个凹槽、 每个定位销印记都要涂上凡士林。漏涂任何一处,模具就无法打开。
05 Notes & Reflection笔记与反思
What I took away我的收获
Week 1 – 3 · Spring 2026第 1 – 3 周 · 2026年春季学期
Kevin was right that the phone case would be a tricky first object. The thin walls and all the cutouts definitely made it harder. But that turned out to be a good thing. It forced me to think through each step properly instead of just going through the motions.
Kevin说得对,手机壳对第一个练习对象来说确实有难度。薄壁加上各种开孔,无疑增加了复杂性。 但事后来看,这反而是好事——迫使我认真思考每一个步骤,而不是走过场。
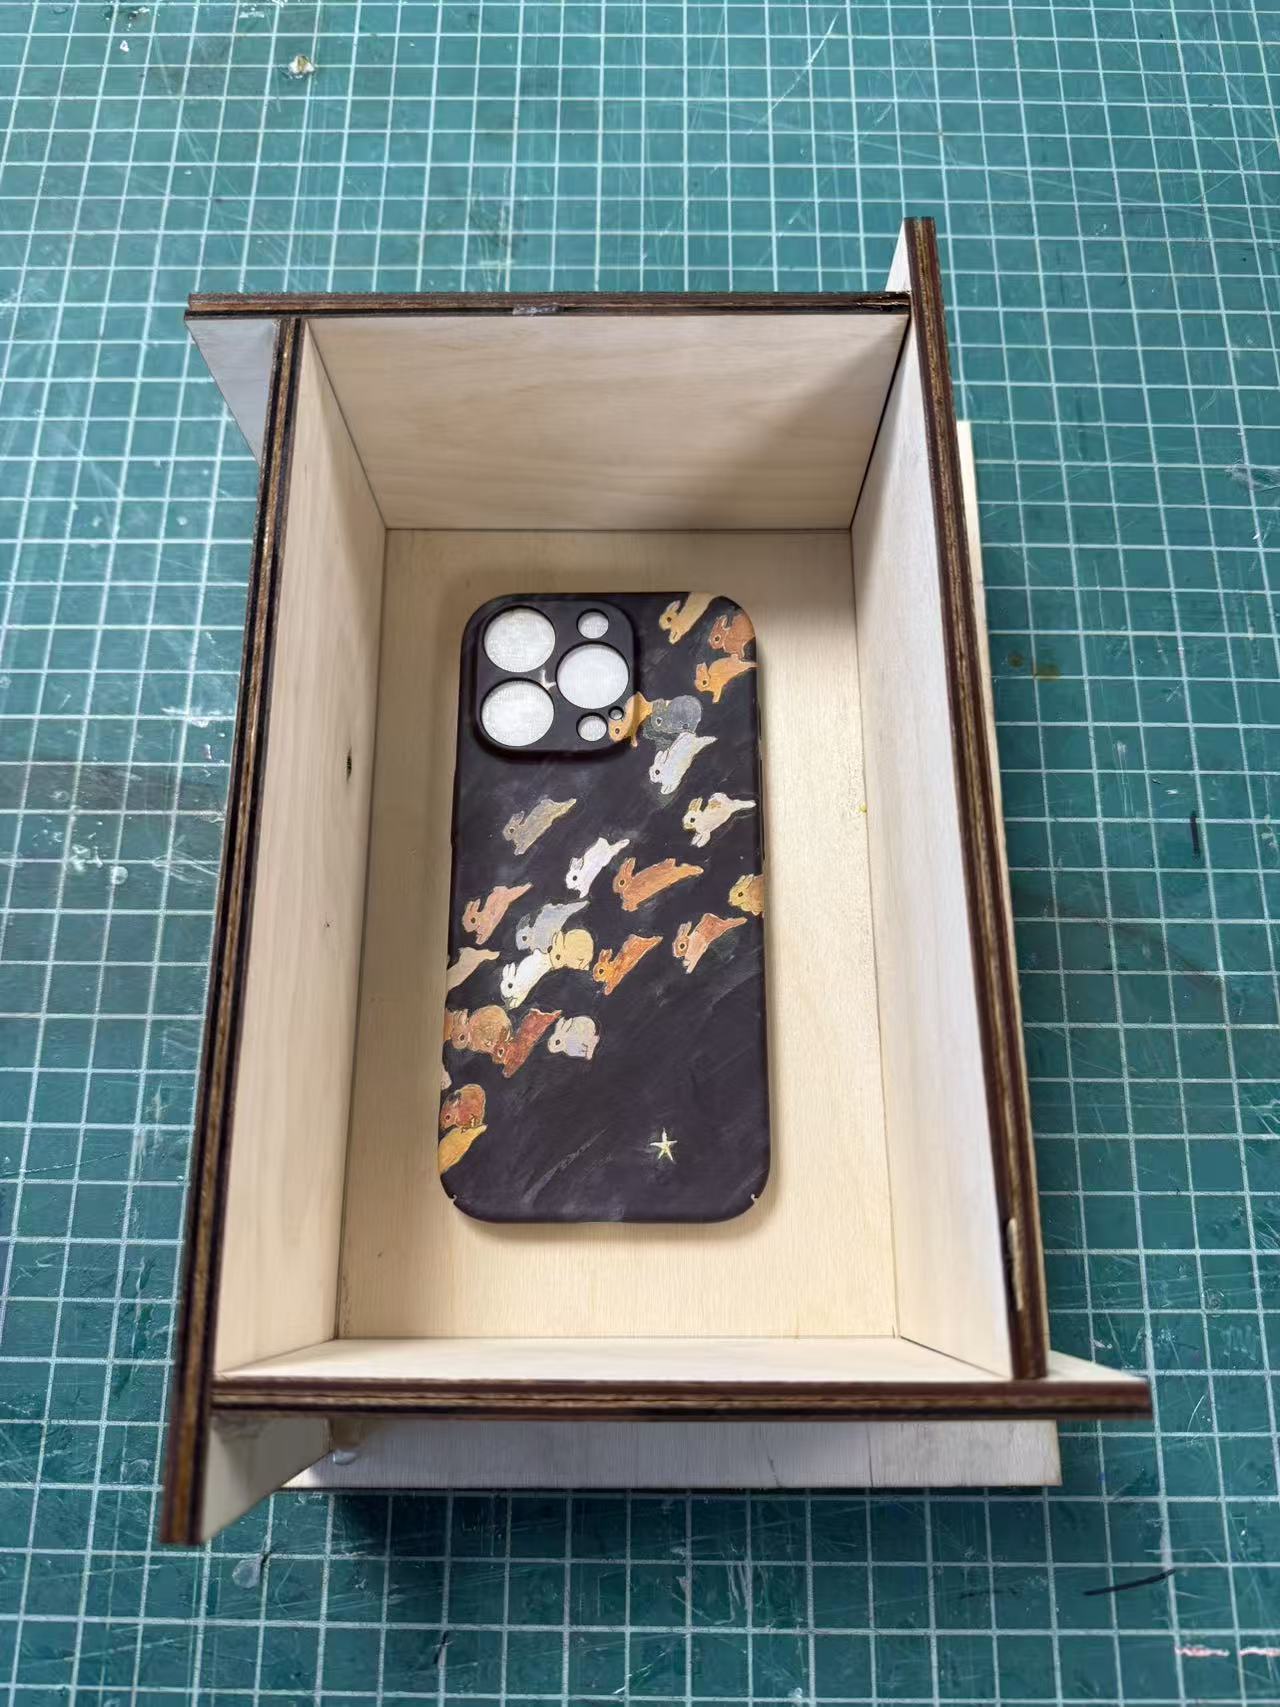
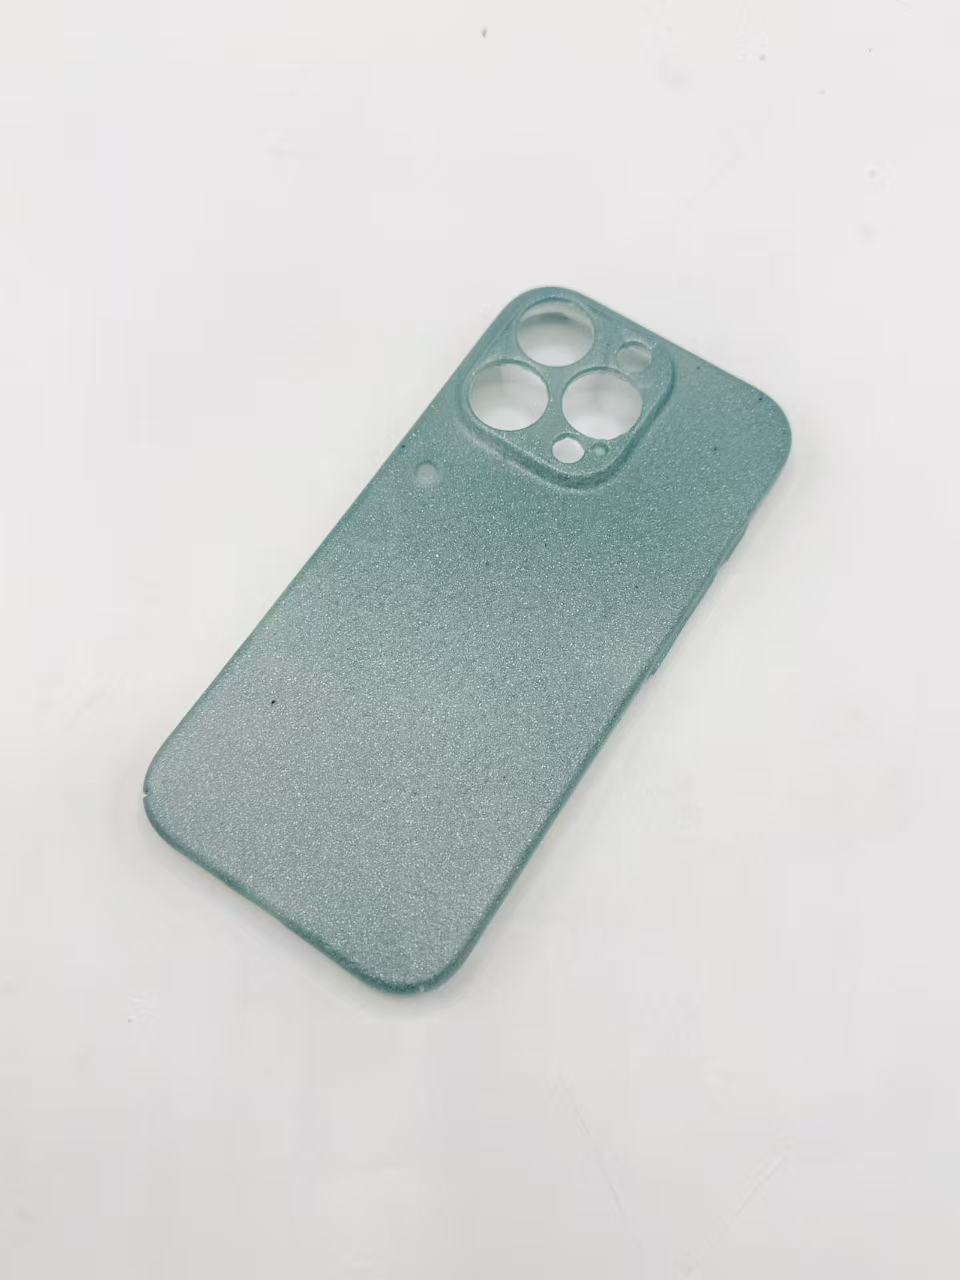
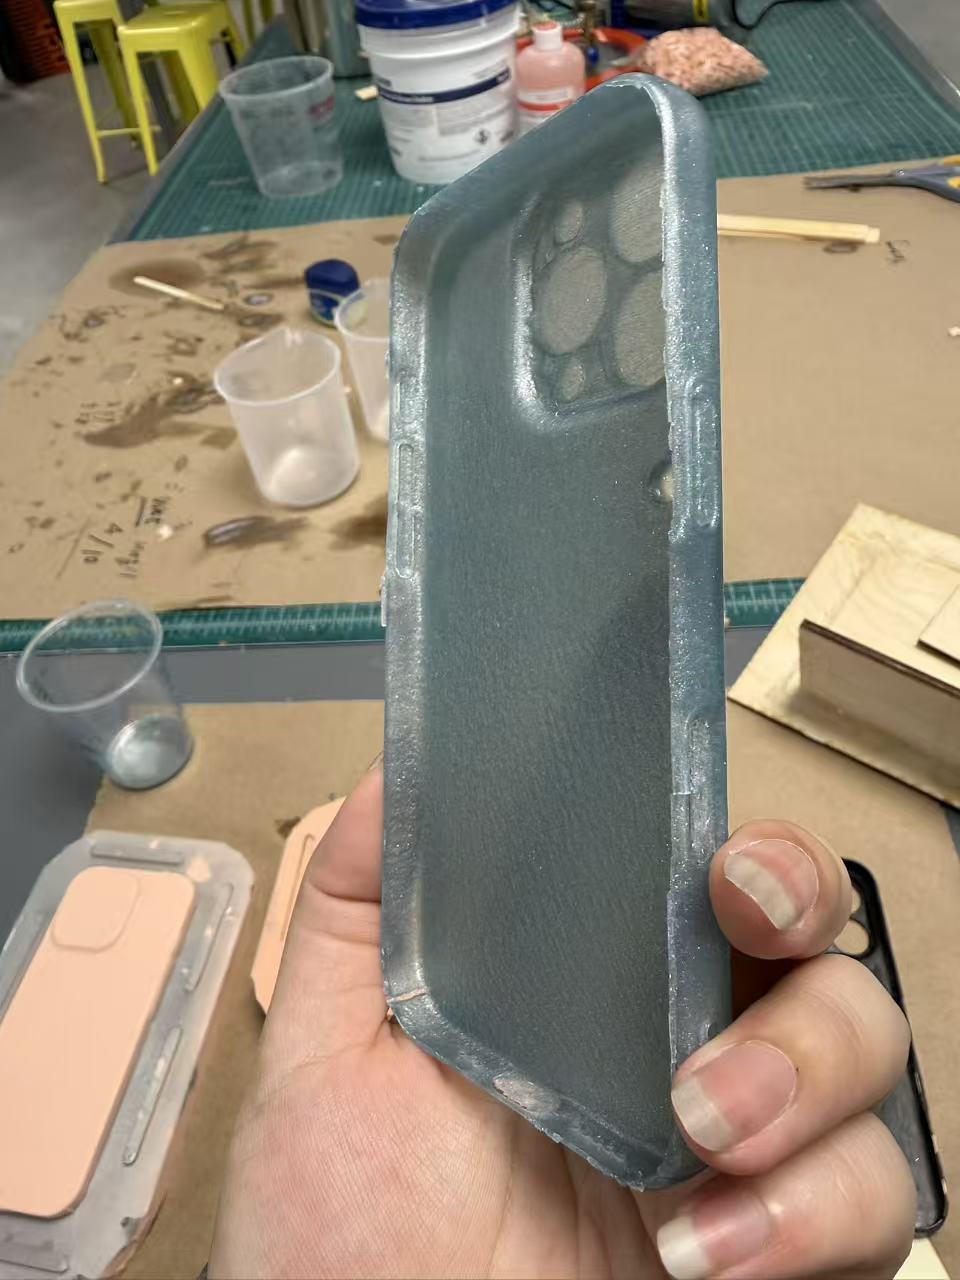
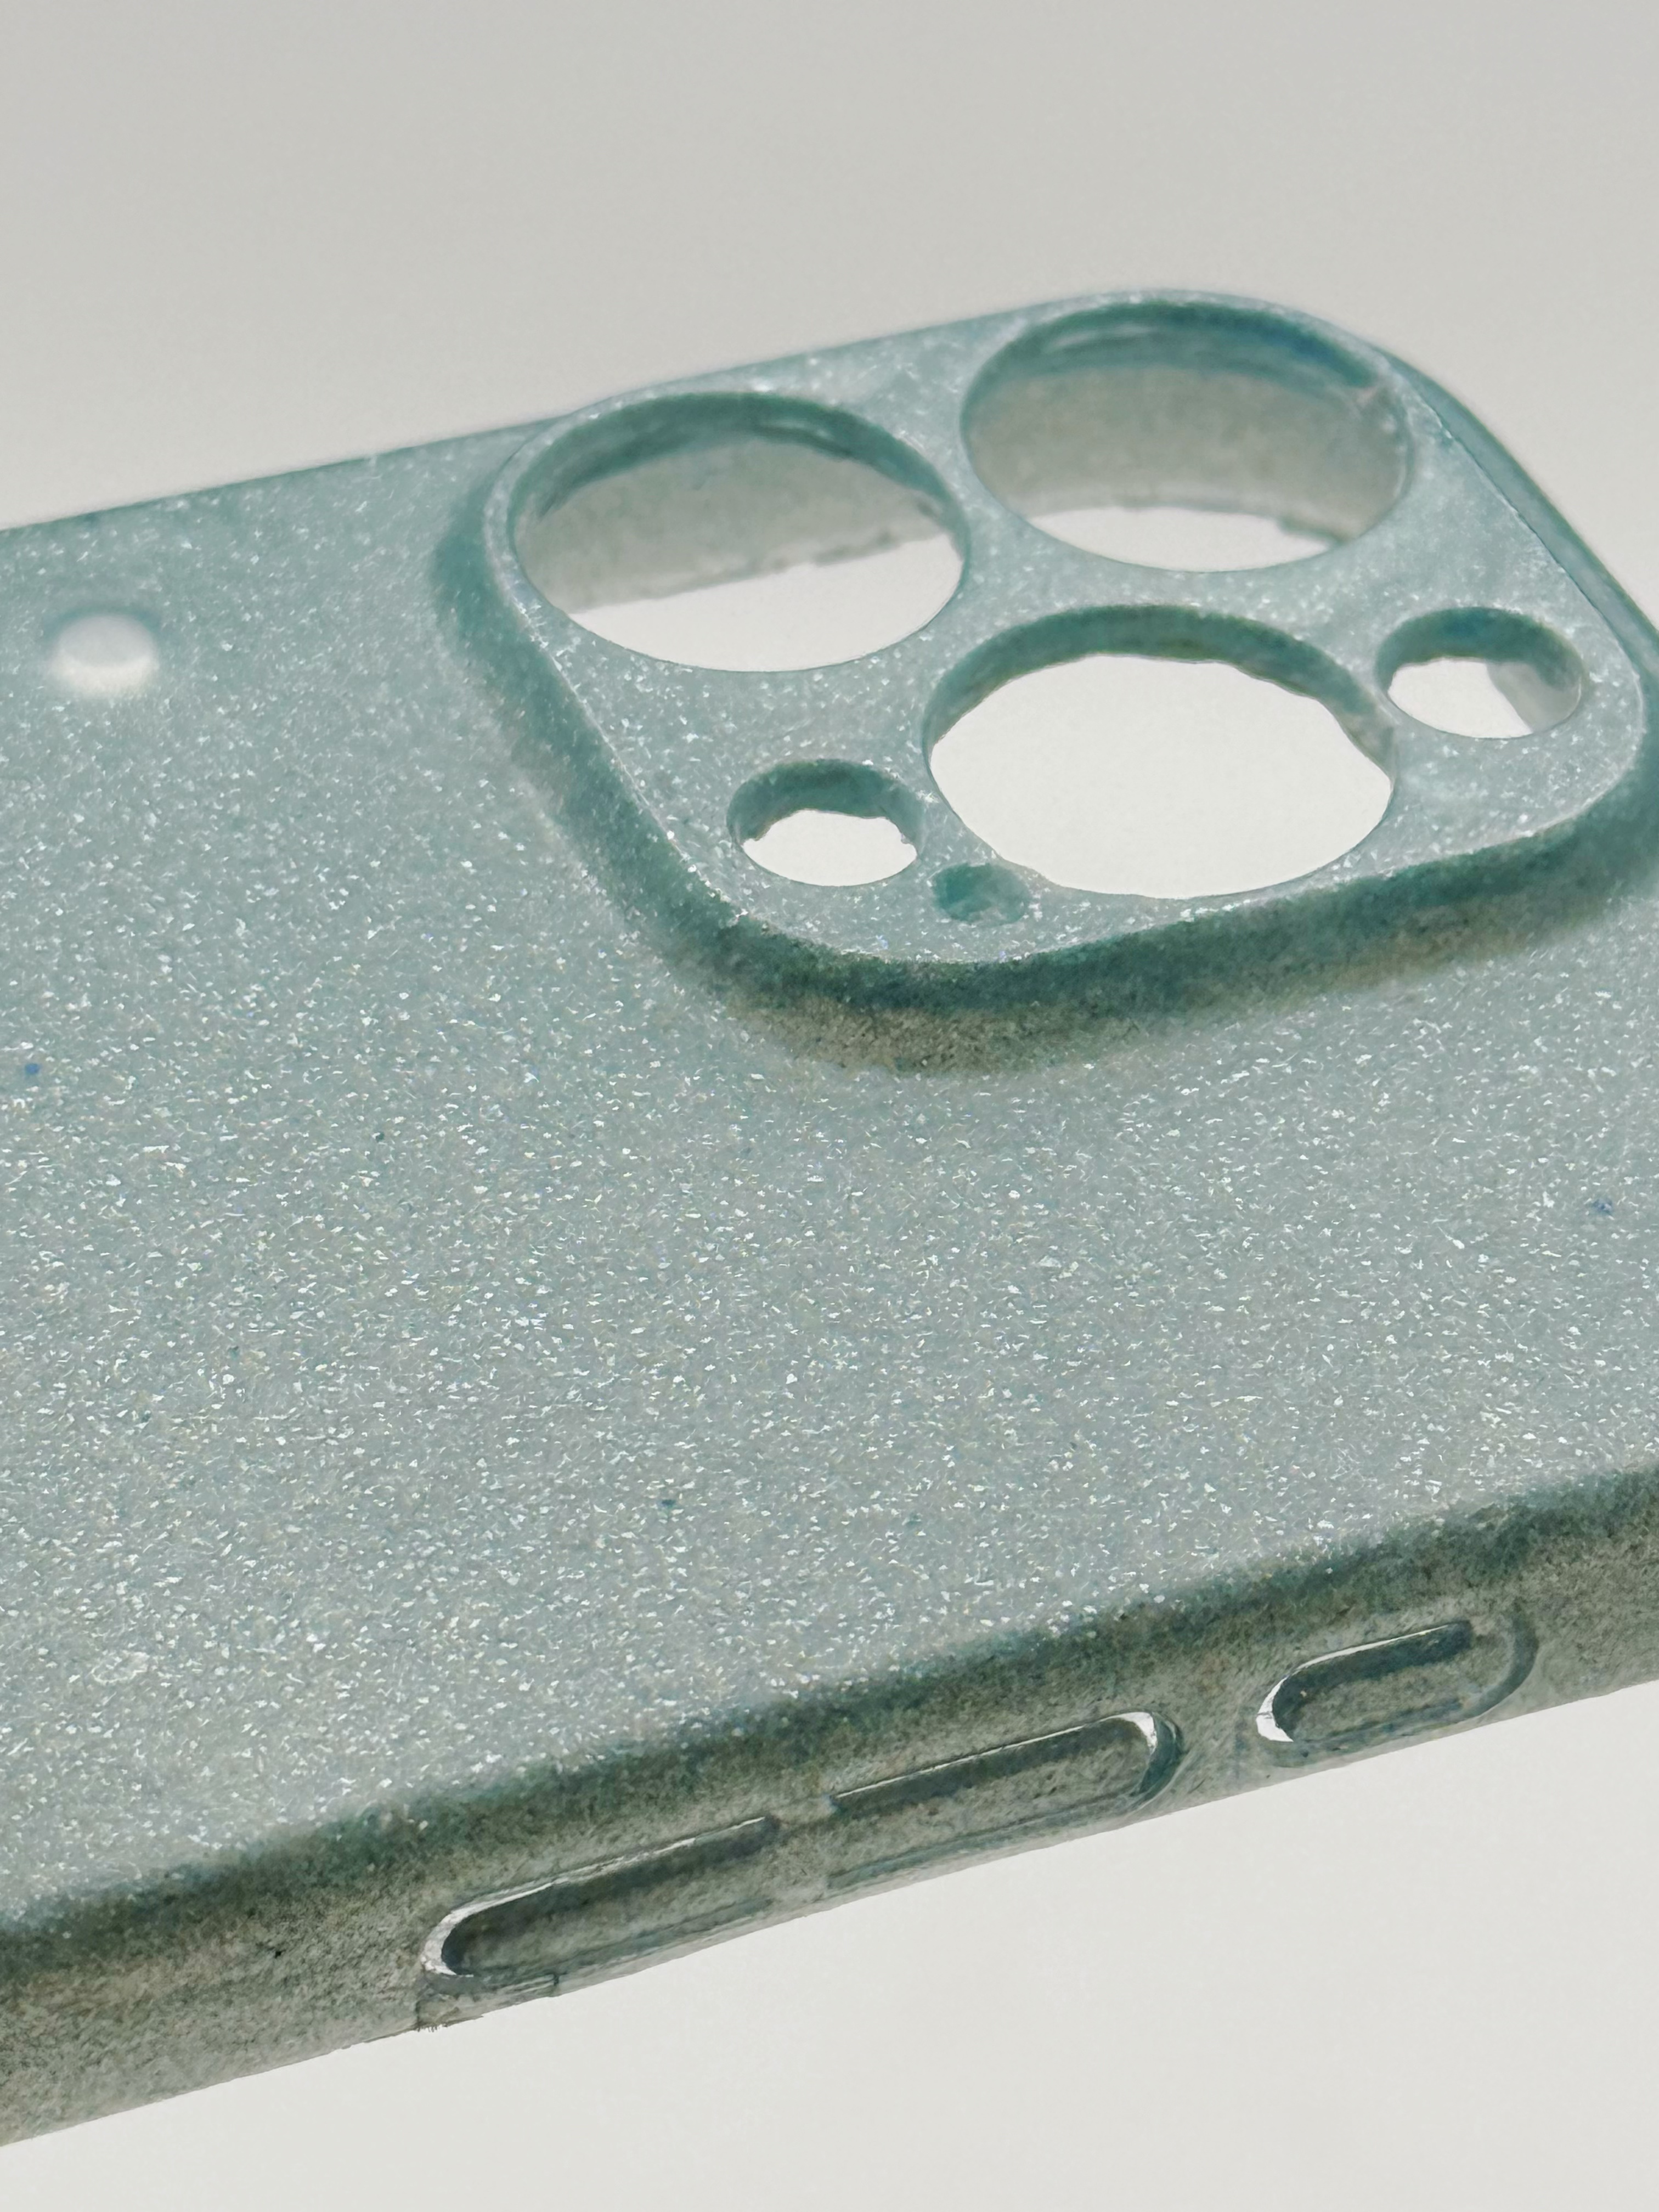
The final result genuinely surprised me. It actually fits and works as a phone case. Way beyond what I expected for a first attempt.
最终结果真的让我惊喜。它实际上能装在手机上,功能完好。远超我对第一次尝试的预期。
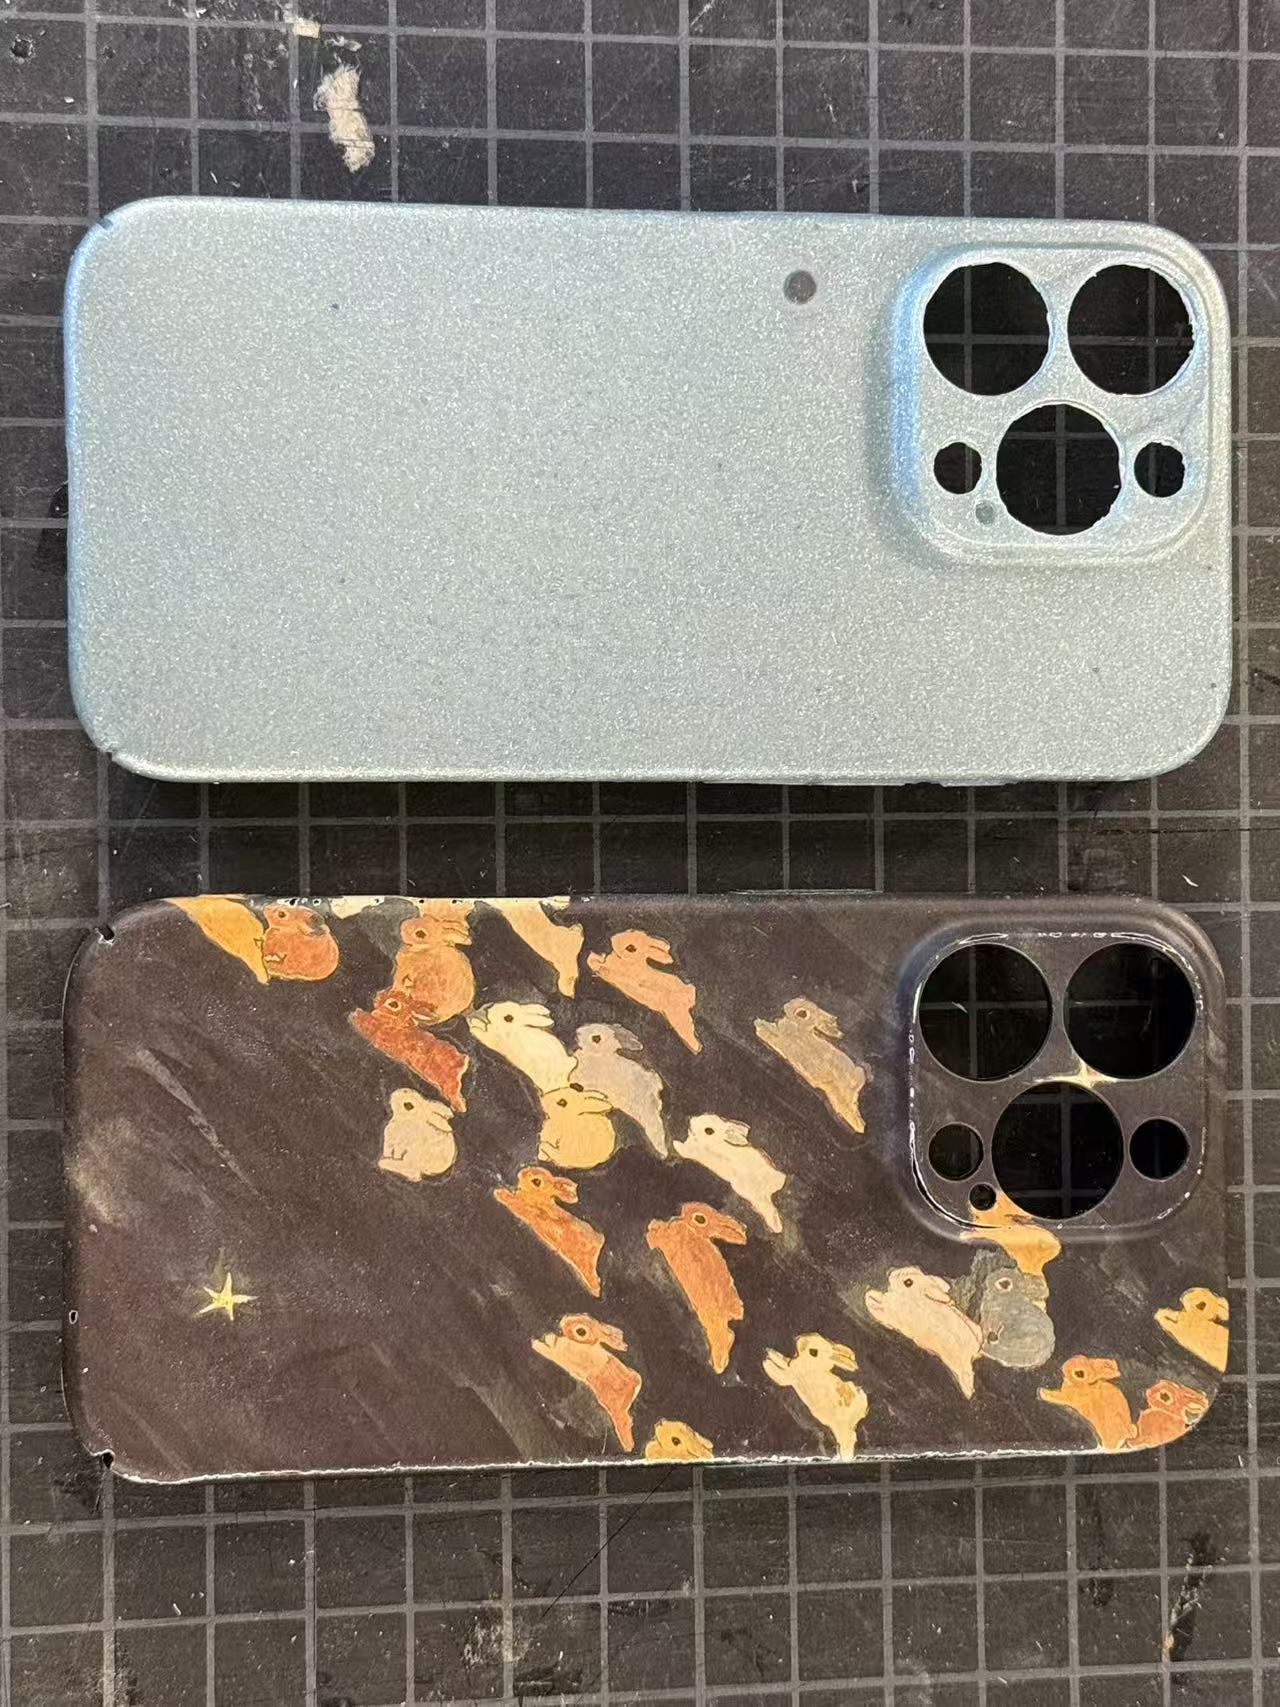
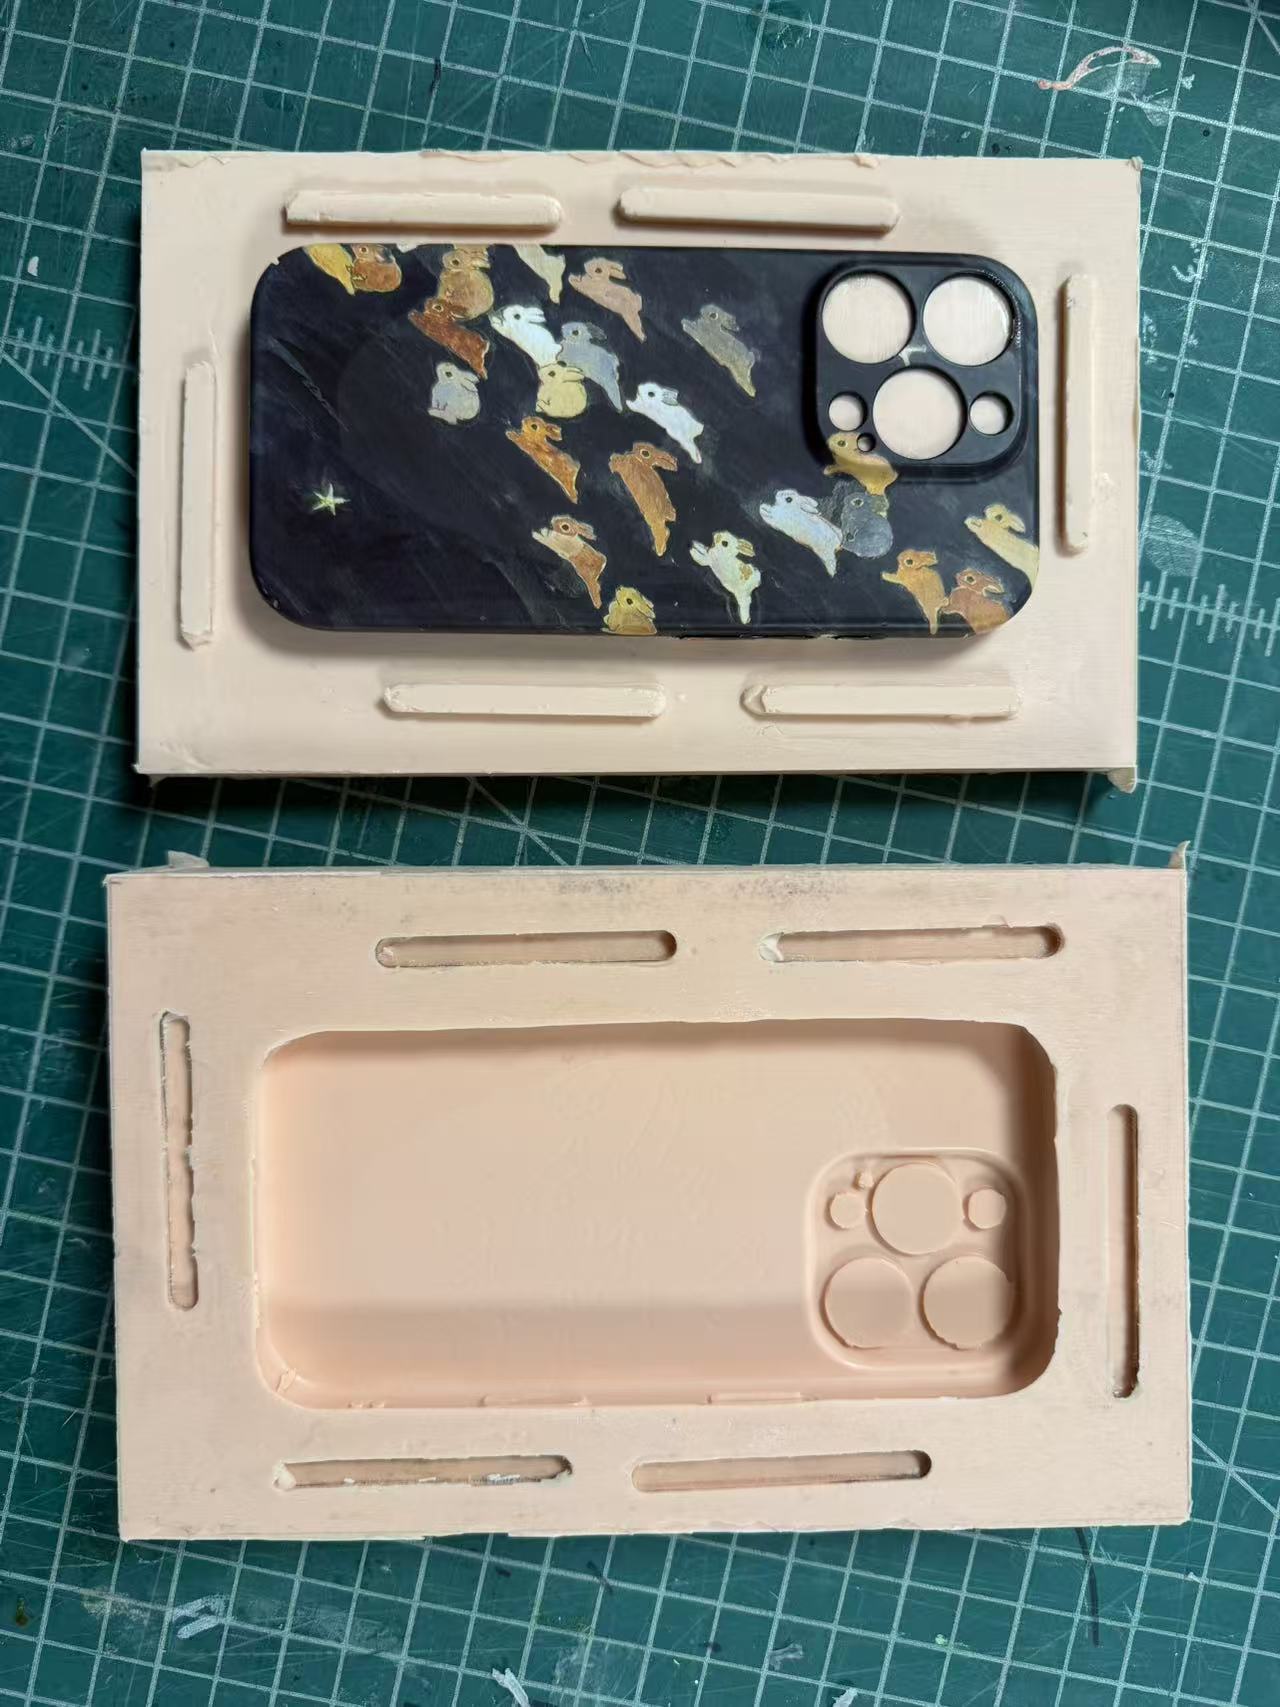
Silicone captures fine surface detail better than I thought. The tiny rabbit emboss on the original was replicated completely.
硅胶捕捉表面细节的能力比我想象的要好得多。原件上的小兔子浮雕被完整复制了出来。
- What worked: The two mold halves separated cleanly. Glitter distribution looks even and intentional. The rabbit emboss was fully replicated in the cast. 做得好的: 两半模具干净分离。亮粉分布均匀,效果自然。手机壳上的小兔子浮雕被完整复制。
- What I'd do differently: Apply more consistent pressure when closing the mold halves. The slightly thick bottom and air pocket were probably from uneven force. Also degas the resin, not just the silicone. 下次会改变的: 合模时施加更均匀的压力。底部稍厚和气泡很可能源于用力不均。另外,不只是硅胶,树脂也应该脱气。
- What this taught me for the main project: Surface detail transfers really well through silicone. Registration features need to be more precise. Always plan for post-processing time. 对主项目的启示: 硅胶对表面细节的传递效果非常好。定位特征需要更精确。务必提前预留后处理时间。